Category: Music Production

  • Do I Need a MIDI Keyboard for Music Production? Start Here

    Do I Need a MIDI Keyboard for Music Production? Start Here

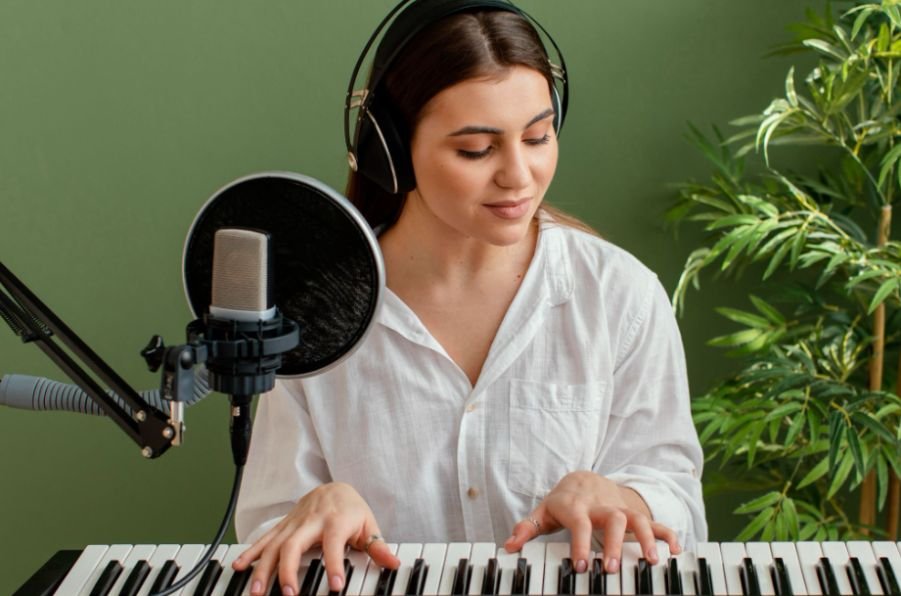
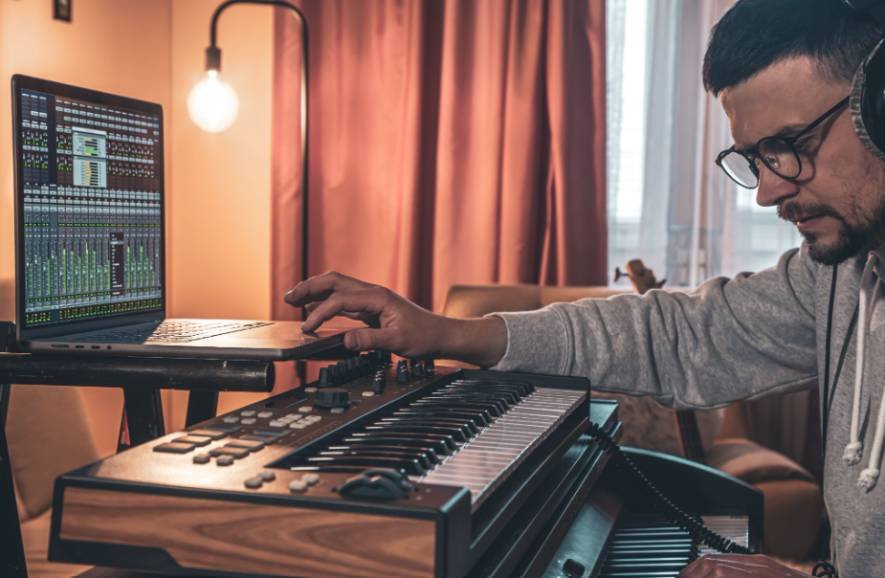
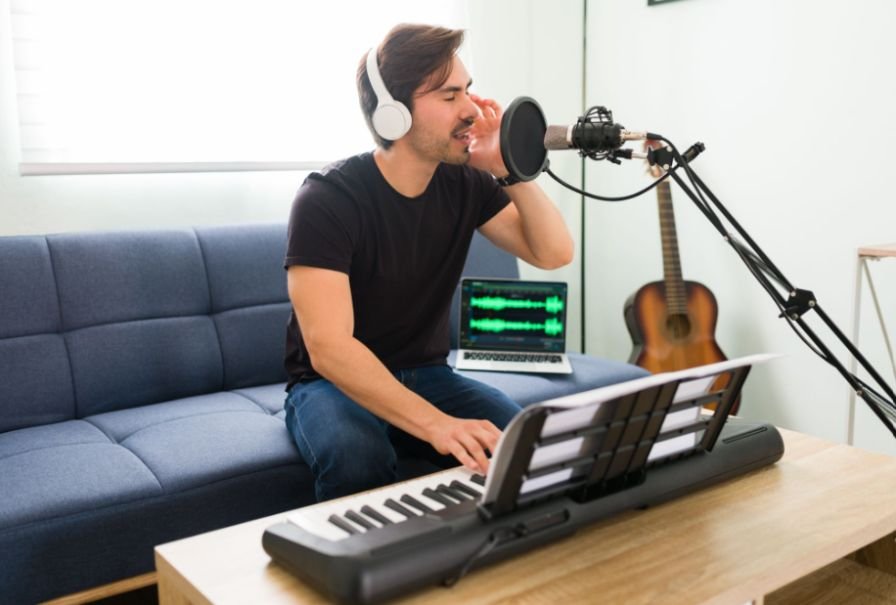
    Buying music gear can make beginners feel like they need a full studio before they can create anything worthwhile. I see MIDI keyboards on countless home-studio desks, but that does not mean they are essential. If you are asking Do I need a MIDI keyboard for music production, the real answer depends on how you prefer to write, arrange, and perform your ideas.

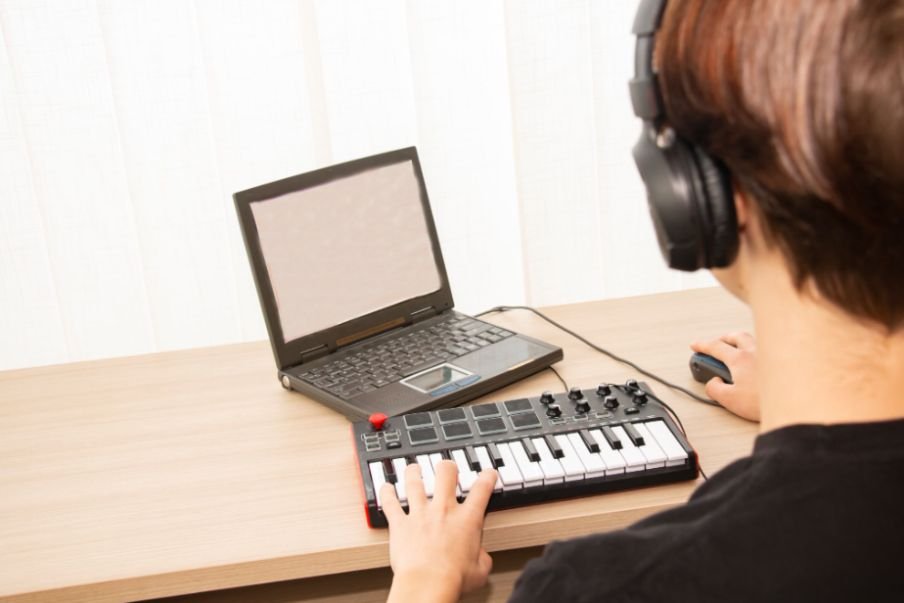
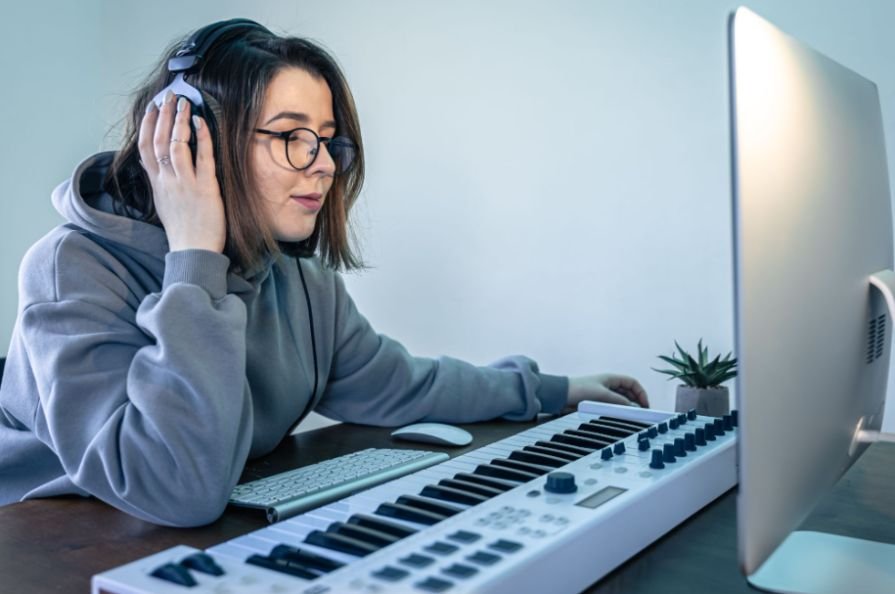
    You can build complete tracks with a laptop, DAW, mouse, computer keyboard, piano roll, samples, and step sequencer. A MIDI controller simply gives you a more hands-on way to play melodies, test chords, control virtual instruments, and capture expressive performances. For me, the right time to buy one is when clicking notes starts slowing down the creative process.

    Can You Produce Music Without a MIDI Keyboard?

    Yes. Every major digital audio workstation gives you several ways to write music without physical keys.

    The most common method is the piano roll. I can draw MIDI notes directly onto a grid with a mouse, adjust their length, move them to different pitches, change velocity, and copy entire chord progressions. This approach gives me extremely precise control and can actually be easier than live playing when I am creating complex patterns.

    Most DAWs also offer musical typing, which lets a regular QWERTY computer keyboard trigger notes. It is not as expressive as a velocity-sensitive MIDI controller, but it is perfectly usable for testing melodies and entering simple musical ideas.

    Step sequencers provide another option. Producers making hip-hop, electronic music, trap, or other beat-driven styles can program drums, basslines, and melodic patterns directly on a grid. Sample-heavy production can go even further. I can arrange loops, manipulate recorded audio, trigger drum kits, and build full tracks without playing a traditional keyboard at all.

    This is why a MIDI controller should never be considered a requirement for getting started. The same laptop-first approach is useful for beginners wondering how to start music production with just a laptop, since a DAW, piano roll, virtual instruments, samples, and a computer keyboard can provide enough tools to begin creating complete tracks.

    What Does a MIDI Keyboard Actually Do?

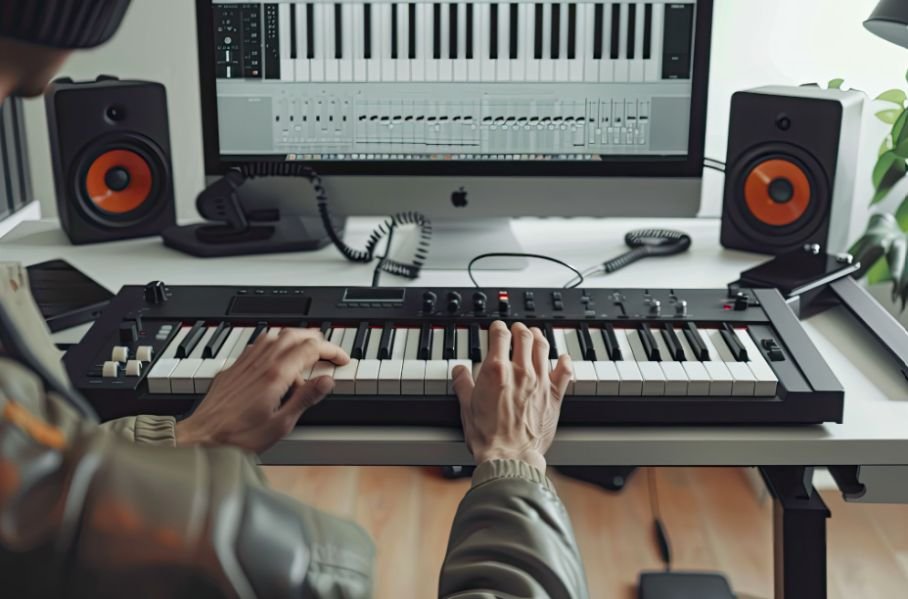
    A MIDI keyboard usually does not produce sound on its own. Instead, it sends MIDI information to a computer, DAW, virtual instrument, or compatible piece of hardware.

    When I press a key, the controller can tell my software which note I played, when I played it, how long I held it, and how hard I pressed it. The virtual instrument then turns that information into sound.

    That means the same MIDI keyboard can control a piano plugin one minute and a synthesizer, bass, string library, or drum instrument the next.

    In practical terms, it works more like an input device for music than a standalone instrument.

    Why Do So Many Producers Eventually Use a MIDI Controller?

    Why Do So Many Producers Eventually Use a MIDI Controller

    Even though it is optional, a MIDI keyboard can make music production much faster.

    Does a MIDI Keyboard Make Writing Melodies Faster?

    For me, one of the biggest advantages is speed.

    Finding a melody by clicking notes one at a time can interrupt the creative process. When I have physical keys in front of me, I can immediately experiment with melodies, basslines, and chord progressions.

    I do not need advanced piano skills. Even knowing where a few notes and basic chords are located can make idea generation more fluid.

    This becomes especially valuable when working with virtual instruments because I can audition different sounds while actually playing them.

    Can a MIDI Keyboard Make Music Sound More Human?

    Yes, particularly when the controller has velocity-sensitive keys.

    Velocity records how hard I press a key. A softer press can create a quieter or gentler sound, while a harder press can trigger a stronger response depending on the virtual instrument.

    That variation adds human expression to a performance.

    If every programmed note has identical velocity and perfectly aligned timing, the result can sound mechanical. I can manually adjust those details in the piano roll, but a live MIDI performance captures many of those variations naturally.

    This is especially useful for virtual piano, strings, electric piano, synthesizers, and orchestral instruments.

    What Do Pads, Knobs, and Faders on MIDI Keyboards Do?

    Modern MIDI controllers often do much more than send keyboard notes.

    Many include drum pads that let me tap out rhythms instead of clicking drum hits into a sequencer. Pads can also trigger samples, loops, or clips depending on the DAW.

    Assignable knobs allow me to control synth parameters, effects, filters, automation, and other software settings in real time. Faders can control volume, while transport buttons can handle play, stop, and record functions.

    Pitch bend and modulation controls provide another layer of expression.

    This type of DAW integration can reduce the amount of time I spend reaching for a mouse and make the production process feel more hands-on.

    Do Beginners Need a MIDI Keyboard?
    Do Beginners Need a MIDI Keyboard

    Beginners do not need one immediately.

    I would first learn how to navigate a DAW, create MIDI notes, edit audio, arrange tracks, use virtual instruments, program drums, and build basic mixes.

    I would first learn how to navigate a DAW, create MIDI notes, edit audio, arrange tracks, use virtual instruments, program drums, and build basic mixes. This foundation is also important when learning how to learn music production from scratch at home, because understanding the DAW and core production workflow should come before deciding which hardware is necessary.

    Once I understand how I naturally like to create music, hardware decisions become much easier.

    If I constantly find myself wishing I could play melodies instead of drawing them, test chords more quickly, or perform software instruments naturally, then a controller solves a real workflow problem.

    If I mostly work with samples, loops, vocals, guitar recordings, or step sequencing, I may not need one at all.

    Do You Need to Know Piano to Use a MIDI Keyboard?

    No. A MIDI keyboard does not require formal piano training.

    I can start by learning basic note positions and simple chord shapes. That alone can make writing music easier.

    Over time, using keys can also help me understand scales, intervals, chord construction, and basic music theory because the notes are laid out visually.

    Complex two-handed performances are optional. Producers can record one part at a time, fix mistakes afterward, or edit notes inside the piano roll.

    Is a 25-Key or 49-Key MIDI Keyboard Better?

    A 25-key controller works well for small US home studios, dorm rooms, apartments, and portable laptop setups. It provides enough range for basslines, melodies, simple chords, synth parts, and beat-making.

    A 49-key controller gives me more room to play chords and melodies without constantly changing octaves. It is usually more comfortable for someone who uses virtual instruments often or wants to play with both hands.

    Larger 61-key and 88-key models make more sense for keyboard-focused musicians, composers, or producers using detailed piano and orchestral arrangements.

    The right size depends more on workflow and available space than on experience level.

    Should You Buy a MIDI Keyboard Right Away?
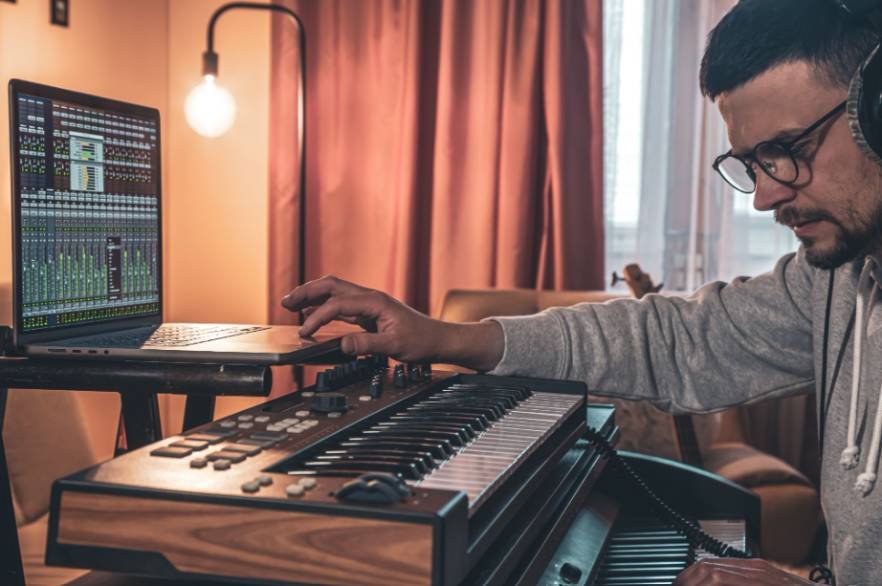
    Should You Buy a MIDI Keyboard Right Away

    Before spending money, I would try producing several tracks without one.

    Use the piano roll. Try musical typing. Build beats with a step sequencer. Arrange samples. See which part of the process feels slow.

    See which part of the process feels slow. The same workflow mindset applies when evaluating playback quality, since understanding why does my mix sound different in the car can help producers identify whether their monitoring setup, mix balance, or listening environment is affecting how a track translates outside the studio.

    If manually entering notes starts holding back your ideas, a MIDI keyboard may be a worthwhile upgrade.

    The purpose of music-production gear should be to remove friction, not simply to make a studio look more professional.

    Frequently Asked Questions 

    1. Can I Make Professional Music Without a MIDI Keyboard?

    Yes. Producers can create complete professional tracks using a DAW, mouse, samples, computer keyboard, piano roll, and step sequencer. A MIDI keyboard improves workflow but does not determine production quality.

    2. Do I Need a MIDI Keyboard for Music Production as a Beginner?

    If you are asking Do I need a MIDI keyboard for music production, I would start without one unless playing melodies and chords is central to your workflow. Learn your software first, then buy hardware when you understand what would genuinely improve your process.

    3. Can I Use My Laptop Keyboard Instead of a MIDI Keyboard?

    Yes. Many DAWs let you use a laptop keyboard as a basic musical keyboard. It works for entering notes and testing ideas, although it does not provide velocity sensitivity, pads, modulation controls, or the range of a dedicated controller.

    4. Is a MIDI Keyboard Useful for Beat Making?

    Yes, especially if it includes drum pads. You can use it to play drum patterns, basslines, melodies, chords, and samples. However, beat makers can also work entirely with a mouse and step sequencer.

    5. Does a MIDI Keyboard Make Sound by Itself?

    Most MIDI controllers do not have built-in sounds. They send MIDI data to software instruments or external hardware that creates the audio.

    Final Thoughts

    When someone asks me whether I need a MIDI keyboard for music production, I think the most useful answer is to start making music with what you already own.

    A computer, DAW, mouse, piano roll, musical typing, step sequencer, and samples can take you surprisingly far. There is no need to delay learning music production because your home studio does not include a keyboard controller.

    However, once clicking notes starts slowing you down, a MIDI keyboard can become one of the most useful tools in your setup. It can speed up songwriting, make virtual instruments more expressive, improve DAW control, and help musical ideas feel more immediate.

    Buy one because your workflow needs it, not because you think every producer is supposed to have one.

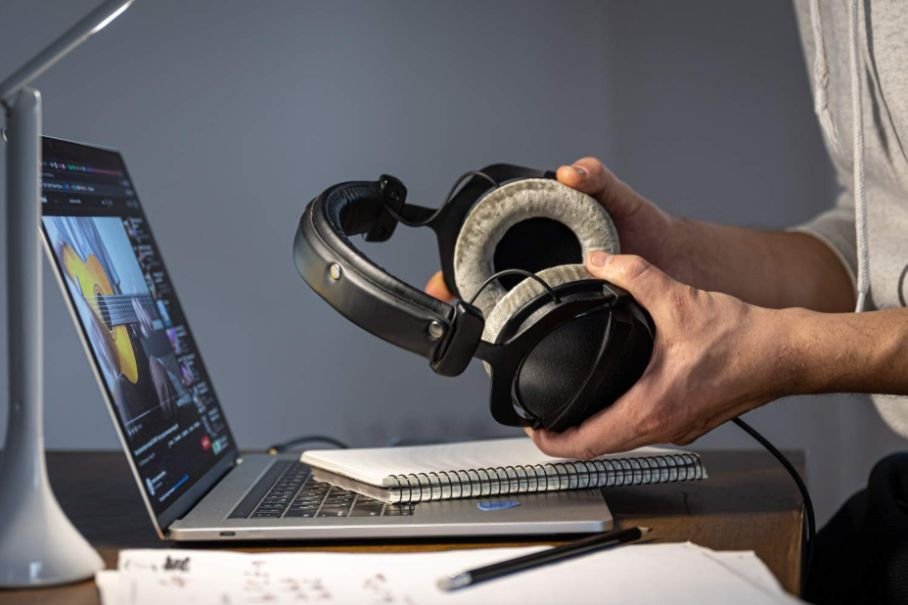
  • Can I Mix Music With Regular Headphones? What Actually Works

    Can I Mix Music With Regular Headphones? What Actually Works

    You do not need a perfect studio setup to make smart mixing decisions. I have found that one of the biggest mistakes beginners make is waiting for expensive gear before learning how to balance a track properly. If you are asking Can I mix music with regular headphones, the answer is yes, provided you understand what those headphones may exaggerate, hide, or change.

    Regular consumer headphones can still help you shape vocals, balance instruments, adjust EQ, control dynamics, and build a convincing stereo image. The challenge is that many models are tuned for enjoyable listening rather than neutral monitoring. That means bass may sound bigger, highs may feel brighter, and stereo width may seem more dramatic than it really is.

    Instead of treating that as a reason to stop mixing, I treat it as something to work around. By learning the sound of your headphones, comparing your mix with professional reference tracks, checking mono compatibility, and testing the finished track on cars, phones, earbuds, and speakers, you can make much more reliable decisions even without dedicated studio headphones.

    Why Do Regular Headphones Affect Mixing Decisions?

    Consumer headphones and studio headphones are usually designed with different goals.

    Studio headphones aim to provide a more revealing listening experience so producers can identify frequency imbalances, distortion, harshness, unwanted noise, and other problems. Consumer models often prioritize an enjoyable sound.

    That does not mean every pair boosts bass or treble in the same way. However, many commercial headphones emphasize particular frequency ranges.

    This creates what I call the bass-boost trap.

    Imagine your headphones exaggerate the low end. Your kick and bass may sound powerful even when they are actually too quiet. You reduce them until they sound balanced in your headphones. When you later play the track through neutral speakers or your car audio system, the mix suddenly sounds thin.

    The same thing can happen with treble. Bright headphones may convince you to remove too much high-frequency energy, leaving the finished song dull elsewhere.

    Why Can Stereo Width Sound Misleading on Headphones?

    Headphone mixing also changes how you perceive stereo space.

    With speakers, sound from the left speaker reaches both ears, and sound from the right speaker does the same. This natural interaction is sometimes discussed in terms of crossfeed.

    Headphones isolate those channels much more strongly. Your left ear primarily hears the left channel, while your right ear hears the right channel.

    That can create an unusually wide stereo image.

    As a result, you might pan instruments too aggressively, underestimate stereo effects, or make questionable decisions about reverb and delay.

    I recommend checking important mixes in mono occasionally. If vocals, guitars, synths, or other key elements suddenly disappear or become weak, your arrangement may depend too heavily on stereo separation or phase relationships.

    How Can I Mix Music With Regular Headphones More Accurately?

    How Can I Mix Music With Regular Headphones More Accurately

    If you are wondering if you can mix music with regular headphones without ruining your mix translation, the most important thing is learning exactly how your headphones sound.

    Start by listening to several professionally produced songs you know extremely well. Choose music in a similar genre to what you are producing.

    Pay attention to the vocal level, kick, bass, snare brightness, stereo width, and overall tonal balance. Over time, you begin recognizing how a properly mixed song should sound through your particular headphones.

    That familiarity can sometimes matter more than immediately buying expensive equipment.

    Why Are Reference Tracks So Important?

    Reference tracks are one of the most effective tools available to a home producer.

    Import a professionally mixed song into your DAW and compare it with your own track. Make sure both tracks play at reasonably similar loudness levels because louder audio often seems more impressive even when it is not better balanced.

    Compare the relationship between the bass and kick. Listen to how loud the vocals feel compared with the instruments. Check the brightness of the cymbals and the amount of stereo width.

    If the commercial reference sounds extremely bass-heavy through your headphones, that tells you something important about how your headphones reproduce low frequencies.

    Instead of trusting the headphones blindly, you are comparing your mix against a known standard through the same listening system.

    How Should I Check Mix Translation?

    Mix translation describes how well your music holds together when people hear it on different playback systems.

    This matters enormously for US listeners because your track may be played through AirPods during a commute, a car stereo on the highway, a Bluetooth speaker at home, laptop speakers, inexpensive earbuds, or a smartphone.

    After exporting a mix, I like to listen to it through several everyday devices.

    The goal is not to make the song sound identical everywhere. That is impossible because every playback system has its own frequency response.

    Instead, listen for major differences.

    If the bass disappears completely in your car, the vocal becomes painfully loud through your phone, or the cymbals become harsh through earbuds, those patterns tell you where your mix may need adjustment.

    Can Headphone Calibration Software Improve Accuracy?

    Can Headphone Calibration Software Improve Accuracy

    Headphone calibration can help if you want greater consistency without immediately replacing your equipment.

    Tools such as Sonarworks SoundID Reference use corrective EQ profiles designed for supported headphone models. The software attempts to reduce frequency-response irregularities so the headphones behave more neutrally.

    Systems such as Steven Slate Audio VSX take a different approach by combining specialized headphones with software designed to simulate different monitoring environments.

    These tools can be useful, but they are not magic. Calibration does not replace listening skills, reference tracks, or real-world playback checks.

    It simply gives you another way to improve monitoring consistency.

    Can I Mix With Bluetooth Headphones?

    Bluetooth headphones can work for basic mixing and playback checking, but I would avoid relying on them for timing-sensitive production.

    Wireless audio can introduce latency. That delay becomes especially noticeable when recording vocals, playing MIDI instruments, or making precise timing edits.

    Some wireless headphones can also apply internal processing.

    If your headphones support both Bluetooth and a wired connection, I would use the wired option for serious production sessions whenever possible.

    Can I Mix With Earbuds or Gaming Headphones?

    You can mix with earbuds if they are the only monitoring option available.

    Earbuds are especially useful for checking vocals, midrange balance, and how the track might sound to everyday listeners. The main limitation is low-end accuracy and stereo perception.

    Gaming headphones can also work, but I recommend disabling virtual surround sound, bass enhancement, and similar effects before mixing.

    The fewer additional processing layers between your DAW and your ears, the easier it becomes to make consistent decisions.

    Do I Need Studio Monitors to Make a Good Mix?

    No.

    In fact, poorly positioned studio monitors in an untreated bedroom can sometimes create more problems than a familiar pair of headphones.

    For beginners who are still building their setup, how to start music production with just a laptop explains how a DAW, headphones, and software-based tools can be enough to begin producing before investing in additional studio equipment.

    Walls, windows, corners, furniture, and desk reflections can exaggerate or cancel certain frequencies.

    Headphones eliminate many room-acoustic problems because they deliver sound directly to your ears.

    Headphones eliminate many room-acoustic problems because they deliver sound directly to your ears. They can also be useful for producers who are still developing their musical skills, especially when learning how to make melodies without music theory by experimenting with notes, patterns, and sounds directly inside a DAW.

    Studio monitors remain extremely useful because they provide a more natural stereo perspective, but you can still develop strong mixing skills without owning them.

    How Do I Avoid Ear Fatigue While Mixing?

    How Do I Avoid Ear Fatigue While Mixing

    Long headphone sessions can make it harder to judge your mix accurately, particularly if you listen loudly.

    I prefer mixing at a moderate level where I can hear details clearly without feeling pressure in my ears.

    Take regular breaks and return to the track with fresh ears. When you come back, you may immediately notice problems that seemed invisible after a long session.

    Turning the volume down very low can also help reveal whether the vocal, kick, snare, and main instruments maintain a sensible balance.

    When Should I Upgrade to Studio Headphones?

    You do not need to upgrade simply because you are beginning music production.

    Consider buying studio headphones when you repeatedly struggle with bass translation, want a more predictable frequency response, or begin doing more serious mixing work.

    A better monitoring setup can make your job easier, but it cannot replace experience. The same principle applies when deciding do I need a MIDI keyboard for music production, since additional hardware can improve workflow and control but is not a requirement for learning production or creating complete tracks.

    Learning one pair of headphones extremely well often produces better results than constantly switching between unfamiliar equipment.

    Frequently Asked Questions 

    1. Can I make professional mixes using consumer headphones?

    Yes. Strong mixes are possible when you understand the limitations of your headphones, use reference tracks, compare multiple playback systems, and develop your listening skills.

    2. Why does my mix sound good on headphones but bad in my car?

    Your headphones and car speakers reproduce frequencies differently. Bass, vocals, stereo width, and high frequencies may therefore change dramatically between the two systems.

    3. Are studio headphones necessary for beginners?

    No. Beginners can learn EQ, compression, panning, automation, arrangement, editing, and effects using ordinary headphones before investing in professional monitoring equipment.

    4. Should I mix on headphones or speakers?

    Both provide useful information. Headphones reveal fine details and remove room acoustics, while speakers give you a more natural stereo perspective.

    5. Can I mix music with regular headphones and release the song?

    Yes. The most reliable approach is to check your finished mix through several listening systems before releasing it. If you understand your headphones, use professional references, control your volume, and test translation, ordinary headphones can become a surprisingly capable mixing tool.

    Final Thoughts

    I would never tell a new producer to stop creating music until they can afford expensive studio gear. Regular headphones are enough to practice, learn, complete songs, and even build solid mixes.

    The real skill is understanding what your listening system exaggerates and what it hides. Learn your headphones, use reference tracks, watch the low end, check stereo compatibility, take listening breaks, and test your work in cars, phones, earbuds, laptops, and speakers.

    Once you begin making decisions based on comparison rather than assumption, your equipment becomes much less limiting.

  • Why Does My Mix Sound Different in the Car? The Real Reason

    Why Does My Mix Sound Different in the Car? The Real Reason

    I can spend hours balancing a track until the vocal sits perfectly, the bass feels controlled, and the stereo image sounds wide and polished. Then I play the same song in my car, and suddenly everything shifts. The low end feels too heavy, the vocals lose clarity, or the highs become much sharper than they were in the studio.

    If you are wondering why your mix sounds different in the car, the issue is usually not that your car is “wrong.” It is revealing how well your mix translates outside the environment where you created it. Car cabins, speaker placement, road noise, factory audio processing, room acoustics, and stereo behavior can all expose problems that headphones or studio monitors may hide.

    That is exactly why the car test remains useful. Instead of treating it as a final judgment on your mix, I use it as another listening perspective that helps me identify low-end imbalance, masking, phase problems, harsh frequencies, and other translation issues before I finish the track.

    Why Does the Car Test Reveal Problems I Missed in My Studio?

    A studio and a vehicle handle sound very differently.

    In a properly positioned monitoring setup, speakers typically create a controlled stereo image around the listening position. Headphones isolate the left and right channels even more dramatically.

    Inside a car, speakers sit in doors, dashboards, pillars, or rear panels. They are rarely the same distance from your ears. Glass, plastic, upholstery, seats, and the compact cabin all affect reflections and frequency response.

    Many modern US vehicles also use factory DSP, EQ curves, bass enhancement, crossovers, loudness compensation, or other processing. As a result, the car is not a perfectly neutral reference system. Even if I am focused on creative tasks like making melodies without music theory, I still need to check whether those musical ideas translate clearly outside the studio.

    Add engine noise, tire noise, air conditioning, and road vibration, and your mix suddenly has to survive an entirely different noise floor.

    Why Does My Bass Sound Boomy or Weak in the Car?

    Why Does My Bass Sound Boomy or Weak in the Car?

    Low-end translation causes some of the biggest car-test surprises.

    The 60 Hz to 200 Hz region can quickly become muddy or boomy when kicks, bass guitars, synths, guitars, and reverbs overlap. A small vehicle cabin can also reinforce certain low frequencies, making excessive bass much easier to hear.

    Your studio can create the opposite problem. An untreated room may produce room modes, bass buildup, or frequency cancellations. If my listening position happens to cancel an important bass frequency, I may mistakenly boost it in the DAW. That extra energy becomes obvious elsewhere.

    Sub-bass can also create problems below roughly 60 Hz. Excessive energy at the very bottom may contribute little musically while consuming headroom or causing panels and speakers to struggle.

    I sometimes use a high-pass filter on tracks that do not need deep bass and carefully control unnecessary energy below roughly 20 to 30 Hz. However, I avoid blindly filtering the kick or bass. Every decision should serve the actual recording.

    Why Do My Vocals Disappear Through Car Speakers?

    A vocal that sounds clear through headphones can suddenly become buried in a car.

    The most common culprit is frequency masking. Guitars, synths, keyboards, snare drums, reverbs, and other instruments may compete with the vocal through the mids.

    The car’s road noise and speaker response can expose that competition more clearly.

    I do not automatically solve this by turning the vocal up. Sometimes reducing competing frequencies, shortening an overly dense reverb, or using subtle automation provides better separation.

    Compression can also help stabilize an inconsistent vocal performance. The aim is to keep the vocal intelligible without making it unnaturally loud.

    Why Does My Mix Sound Harsh and Piercing in the Car?

    Upper-midrange problems often become obvious around approximately 2 kHz to 5 kHz.

    Vocals, guitars, snare attack, synths, and cymbals are all important elements of music that can contribute significant energy in this range. Something that sounds exciting or crisp on studio monitors may become tiring when reproduced through a bright car system and reflected around glass surfaces.

    Road noise can make this worse indirectly. Drivers often increase playback volume to hear music over traffic and tire noise, making aggressive frequencies more noticeable.

    If commercial reference tracks remain comfortable while my own mix becomes painful, I inspect the upper mids, vocal sibilance, cymbals, distortion, and overall tonal balance rather than simply lowering the master volume.

    How Do Headphones Affect Stereo Width and Phase?

    How Do Headphones Affect Stereo Width and Phase?

    Headphones can create an unusually wide listening experience because each ear receives its own channel directly.

    A huge stereo guitar, delay, synth pad, or reverb may sound impressive on headphones but behave differently through speakers.

    Car speakers are also off-axis and positioned asymmetrically. Wide elements can lose impact, and phase-dependent effects may partially cancel.

    This is why I check my mix in mono regularly.

    If an important guitar, vocal layer, kick, or bass element becomes dramatically quieter when summed to mono, I investigate phase relationships and stereo processing.

    Mono compatibility does not mean your mix has to sound narrow. It simply helps make important elements survive less-than-perfect playback conditions.

    How Does Listening Too Loud Hurt Mix Translation?

    Monitoring volume can change the way I perceive frequency balance.

    Human hearing does not respond equally to every frequency at every volume, a concept commonly discussed through equal-loudness contours and historically associated with Fletcher-Munson curves.

    When I mix extremely loudly, the lows and highs can appear more impressive than they do at quieter levels. That can encourage decisions that do not translate well.

    Moderate monitoring around the commonly discussed 75 to 85 dB SPL range may be useful in appropriate studio situations, but I do not treat that as a rigid target for every room or every session. I also spend time listening quietly.

    Low-volume checks are especially useful for judging whether the vocal, kick, snare, and primary melodic elements remain clear.

    How Should I Use Reference Tracks for the Car Test?

    Professional reference tracks give me context.

    I import a commercially released song from a similar genre into my DAW and compare its tonal balance, bass level, vocal placement, brightness, stereo image, and overall dynamics with my mix.

    I also play the same reference song in the car.

    Level matching matters. A louder track can easily seem fuller and more exciting even when the tonal balance is not actually better.

    If a professionally released reference sounds controlled through the same vehicle while my bass becomes overwhelming, I have stronger evidence that my mix needs attention.

    How Can I Fix a Mix That Does Not Translate?

    How Can I Fix a Mix That Does Not Translate?

    When why does my mix sound different in the car becomes a recurring question during a project, I avoid making huge corrections based on one listening session.

    I first identify the specific problem. Is the bass too loud? Is the vocal disappearing? Are the cymbals harsh? Does the stereo image collapse?

    Then I compare the mix against a reference track and check the same problem through headphones, monitors, smaller speakers, and mono.

    Once I confirm the issue across more than one playback system, I make a small correction.

    Dynamic EQ can control frequencies that become excessive only at particular moments. Compression can tighten inconsistent dynamics. Careful high-pass filtering can remove unnecessary sub-frequency energy, while EQ can create space between competing instruments.

    For kick and bass conflicts, I pay attention to both frequency and timing rather than simply boosting one and cutting the other.

    Should I Trust My Car More Than My Studio Monitors?

    No single playback system should become the absolute authority.

    If a mix sounds balanced through monitors, headphones, earbuds, and multiple speakers but strange in one particular vehicle, the vehicle may simply have unusual factory processing or speaker tuning.

    The warning sign appears when the same issue follows the mix everywhere.

    If the bass feels excessive through the car, headphones, and home speakers, I probably have a real low-end problem. If the vocal repeatedly disappears outside my studio, my monitoring environment may have been misleading me.

    The pattern matters more than one test.

    Frequently Asked Questions (FAQs)

    1. Why does my mix sound good on headphones but bad in my car?

    Headphones remove room acoustics and deliver each channel directly to your ears. A car introduces cabin reflections, unusual speaker positioning, road noise, frequency-response differences, and potentially factory audio processing, which can expose translation problems.

    2. Why is the bass louder when I play my mix in the car?

    The enclosed cabin can reinforce certain low frequencies. Poor studio acoustics, excessive sub-bass, or an unbalanced kick-and-bass relationship may also contribute.

    3. Should I cut everything below 30 Hz?

    Not automatically. Removing unnecessary ultra-low energy can improve headroom, but aggressive filtering can also weaken instruments that rely on deep frequencies. Listen and make decisions based on the track.

    4. Should I always check my mix in mono?

    Mono checking is useful because it can reveal phase cancellation and excessive reliance on stereo effects. It should complement stereo monitoring rather than replace it.

    5. Is the car test reliable for mixing music?

    Yes, as a secondary reference. A familiar car can reveal problems because you already know how professionally mixed songs sound through its system. However, you should combine the car test with several other playback systems.

    Final Thoughts

    Whenever I hear a dramatic difference between my studio and the car, I resist the temptation to immediately redesign the mix.

    Solving why my mix sounds different in the car is really about improving translation. I compare reference tracks, check mono compatibility, monitor at sensible levels, evaluate bass carefully, control masking, inspect phase relationships, and confirm problems on more than one playback system.

    A great mix does not sound identical through every speaker. It preserves its essential balance everywhere. When the bass remains controlled, the vocal stays clear, the highs stay comfortable, and the song retains its impact from headphones to a US commuter’s car stereo, I know the mix is translating successfully.

  • Turn Your Laptop Into a Studio: How to Start Music Production With Just a Laptop

    Turn Your Laptop Into a Studio: How to Start Music Production With Just a Laptop

    A blank DAW project can feel overwhelming at first, especially when every music production setup online seems packed with expensive gear. The reality is much simpler. You can make your first beat, build melodies, arrange a full track, and start learning the fundamentals without owning a studio full of equipment.

    If you are trying to learn how to start music production with just a laptop, the most important thing is knowing how to use the tools already available to you. A DAW, stock virtual instruments, built-in effects, samples, and headphones can give you everything you need to begin creating music from home.

    I find this approach especially useful for beginners because it removes the pressure to buy gear before developing actual production skills. Instead of worrying about what equipment comes next, you can focus on making music, finishing songs, and improving one project at a time.

    What Do You Actually Need to Produce Music on a Laptop?

    Your beginner music production setup can stay extremely simple. You need a laptop capable of running your chosen DAW, music production software, and a way to hear your project.

    You do not initially need studio monitors, an audio interface, a MIDI controller, or a microphone if you plan to work entirely “in the box.” This means your drums, synthesizers, bass, samples, effects, MIDI, and arrangement all exist inside the computer.

    Even regular wired headphones can work while you learn. Upgrade only when your current equipment creates a genuine limitation.

    Which DAW Should a Beginner Choose?

    A DAW, or digital audio workstation, is essentially your virtual recording studio. Most major DAWs can record, arrange, edit MIDI, run virtual instruments, process effects, mix tracks, and export finished music. The better choice is usually the software that fits your computer and feels intuitive to you.

    GarageBand for Mac Beginners

    GarageBand is one of the easiest places to start if you already own a Mac. It offers virtual instruments, loops, effects, drums, and recording tools without requiring an additional software purchase.

    FL Studio for Beat Making

    FL Studio is widely used for electronic music, trap, hip-hop, and beat production. Its pattern-based workflow makes creating drums, melodies, and loops approachable for beginners.

    Ableton Live for Electronic Production

    Ableton Live works well for electronic music, sampling, looping, arrangement, and live performance. Ableton currently offers a free Live Suite trial before you decide whether a paid edition makes sense for you.

    Cakewalk Sonar for Windows

    Cakewalk Sonar for Windows

    Older tutorials often recommend Cakewalk by BandLab. That version has been replaced by Cakewalk Sonar. A free Sonar tier now provides the core DAW functionality, while additional features are available through BandLab Membership.

    REAPER for a Flexible Setup

    REAPER supports Windows, macOS, and Linux and includes MIDI recording, editing, mixing, mastering, and multitrack audio tools. It currently offers a fully functional 60-day evaluation, with a discounted license available for qualifying individual users.

    I would choose one DAW and stay with it long enough to learn its workflow rather than constantly switching between programs.

    How Can You Make Music Without a MIDI Keyboard?

    One of the biggest misconceptions about laptop music production is that you need a physical keyboard to compose.

    You do not.

    If you want to explore creating music without traditional instruments altogether, you can also learn how to make music without any instruments using software-based tools, MIDI, samples, and virtual instruments.

    Use the Piano Roll

    The piano roll is a grid inside your DAW where you can draw MIDI notes with your mouse or trackpad. You control the pitch, timing, duration, and velocity of individual notes.

    That means you can program bass lines, melodies, chords, and drum patterns without physically playing an instrument.

    Turn Your Laptop Keyboard Into an Instrument

    Many DAWs also allow your computer’s QWERTY keyboard to trigger musical notes. It will not feel exactly like a piano, but it is enough for experimenting with melodies and rhythms.

    A MIDI controller becomes useful later if physically playing notes improves your workflow. It is not a requirement for starting.

    Should Beginners Buy Plugins and Virtual Instruments?

    I recommend using your DAW’s stock tools first.

    Most modern music production software includes synthesizers, drum samplers, EQ, compression, reverb, delay, distortion, and other essential effects. These tools can teach you the fundamentals without sending you into an endless cycle of downloading plugins.

    If you cannot yet explain why you need another compressor, synthesizer, or EQ, you probably do not need to buy one.

    Mastering a small collection of stock plugins usually develops better production habits than owning hundreds of tools you barely understand.

    Where Can Beginners Find Samples for Music Production?

    Where Can Beginners Find Samples for Music Production

    Samples can make laptop-only production much easier because you do not have to record every sound yourself.

    Royalty-free sample libraries can provide kicks, snares, percussion, bass sounds, effects, and instrument loops. Platforms such as Ghosthack offer free sample packs, while producer communities can help you discover additional sounds.

    Always check the licensing terms before commercially releasing music made with downloaded samples. “Free download” does not automatically mean unrestricted commercial use.

    How Do You Build Your First Beat?

    Once your DAW is installed, open a blank project instead of spending another week watching setup videos.

    Choose a tempo in BPM and create a simple four-bar drum pattern. Start with a kick, snare, and hi-hat. Add a basic bass rhythm underneath it, then create a small melody or chord progression with a stock virtual instrument.

    Do not worry about making the loop complex. Your first objective is understanding how rhythm, bass, and melody work together.

    Once the loop sounds reasonable, resist the temptation to add fifteen more sounds.

    How Do You Turn a Short Loop Into a Complete Song?

    Many new producers can create eight good bars but struggle to make a full track.

    The solution is arrangement.

    Duplicate your core musical idea along the DAW timeline and create variation. Start with fewer instruments, introduce additional elements gradually, build toward a fuller section, remove parts during a breakdown, and bring the central idea back before ending the track.

    Your first finished song does not need a sophisticated structure. A short intro, main section, variation, and ending can teach you more than dozens of unfinished loops.

    Do You Need an Audio Interface?

    Not if you are producing entirely with MIDI, samples, virtual instruments, and headphones.

    An audio interface becomes important when you want to connect an XLR microphone, guitar, studio monitors, or other external audio equipment.

    If you are still deciding whether you need one, you can learn more about whether you can produce music without an audio interface before investing in additional hardware.

    Until then, your laptop’s built-in audio hardware can be enough to learn production.

    Can You Mix Music on Laptop Speakers?

    You can begin on laptop speakers, but they have limitations. Small built-in speakers often struggle to reproduce deep bass and may not reveal subtle balance problems.

    For that reason, headphones are one of the more useful early upgrades when your current listening setup becomes limiting. Popular monitoring-oriented options include models such as the Audio-Technica ATH-M50x and Sennheiser HD 280 Pro, although you do not need either specific model to begin.

    I also recommend checking an exported mix on several systems. Listen through earbuds, headphones, laptop speakers, a phone, and your car stereo if available. If the balance survives several playback environments, you are learning an important mixing skill.

    How Should a Beginner Learn Music Production Faster?

    How Should a Beginner Learn Music Production Faster

    Tutorials work best when they solve a problem you currently have.

    If you are starting from the beginning, learning music production from scratch at home can give you a structured way to build your DAW, composition, arrangement, and mixing skills step by step.

    Instead of watching random hours-long production videos, search for specific lessons such as “how to make a beat in FL Studio” or “how to arrange a song in Ableton Live.” Beginner-focused channels such as In The Mix can also help you understand DAW workflows, EQ, compression, mixing, and related production concepts.

    Most importantly, apply what you learn immediately.

    Watching someone create twenty songs will not teach you as much as struggling through your own first five.

    Frequently Asked Questions 

    1. Can I learn how to start music production with just a laptop without knowing music theory?

    Yes. You can create beats and songs using MIDI, piano rolls, samples, loops, and virtual instruments before learning advanced music theory. Learning scales, chords, rhythm, and song structure gradually will make composing easier.

    2. Can I make professional-quality music on a laptop?

    Yes. Modern laptops can run professional DAWs, plugins, synthesizers, samples, and mixing tools. Your production decisions, arrangement, sound selection, and mixing skills matter more than owning a large studio.

    3. Do beginners need studio monitors?

    No. Headphones can be enough while you learn production and basic mixing. Studio monitors become more useful when you have an appropriate listening space and need a more dedicated mixing environment.

    4. What music production skills should I learn first?

    I would focus first on rhythm, MIDI editing, sound selection, basic chords and melodies, arrangement, volume balancing, EQ, compression, reverb, and automation. Advanced mixing and mastering can come later.

    Start Making Music Before Building a Studio

    When I look at beginner music production, the biggest obstacle is rarely equipment. It is waiting for the ideal setup.

    Your laptop already gives you access to a DAW, piano roll, virtual instruments, synthesizers, effects, samples, automation, and mixing tools. That is enough to create your first complete track.

    Start with a simple beat. Add bass and melody. Turn the loop into an arrangement. Balance the tracks, apply a few basic effects, and export the result.

    Your early songs may not sound like commercial releases, and that is completely normal. Each finished project teaches you what to improve next.

    Build your skills first. Your studio can grow when your music actually gives you a reason to 

  • From Bedroom Beginner to Producer: How to Learn Music Production From Scratch at Home

    From Bedroom Beginner to Producer: How to Learn Music Production From Scratch at Home

    The first time I opened a DAW, the screen looked more like a control panel than a place to make music. Tracks, plugins, MIDI, waveforms, effects, and dozens of unfamiliar buttons made the whole process feel more technical than creative. But music production becomes much easier once I stop trying to understand everything at once and start learning one practical skill at a time.

    For anyone figuring out how to learn music production from scratch at home, the best starting point is not buying expensive studio gear or downloading hundreds of plugins. It is building a simple setup, choosing one DAW, learning how rhythm and song structure work, and completing small projects consistently.

    A laptop, headphones, basic software, and regular practice can take a beginner surprisingly far. The goal is to turn that simple setup into a working creative space where each finished track teaches the next skill.

    What Do I Need to Start Producing Music at Home?

    The minimum setup is surprisingly simple. I need a capable computer or laptop, a digital audio workstation, and dependable headphones.

    If you are starting with minimal equipment, learning how to start music production with just a laptop can help you understand what you actually need before investing in additional studio gear.

    For modern music production, a computer with around 8GB to 16GB of RAM can provide a practical starting point, although demanding virtual instruments and large projects may benefit from more processing power and memory.

    The DAW becomes the center of the home studio. It is where I record audio, program drums, create MIDI parts, arrange songs, add effects, mix tracks, and export finished music.

    GarageBand offers an accessible starting point for Mac users, while Reaper provides a flexible recording and production environment. FL Studio is popular for beat making and electronic production, while Ableton Live is widely used for electronic music, songwriting, sampling, and live performance.

    The most important decision is not finding the supposedly perfect DAW. It is choosing one and staying with it long enough to understand the workflow.

    Good studio headphones are also valuable, especially when I cannot use speakers loudly in an apartment or untreated room. Closed-back headphones can also help when recording vocals because they reduce sound leaking into the microphone.
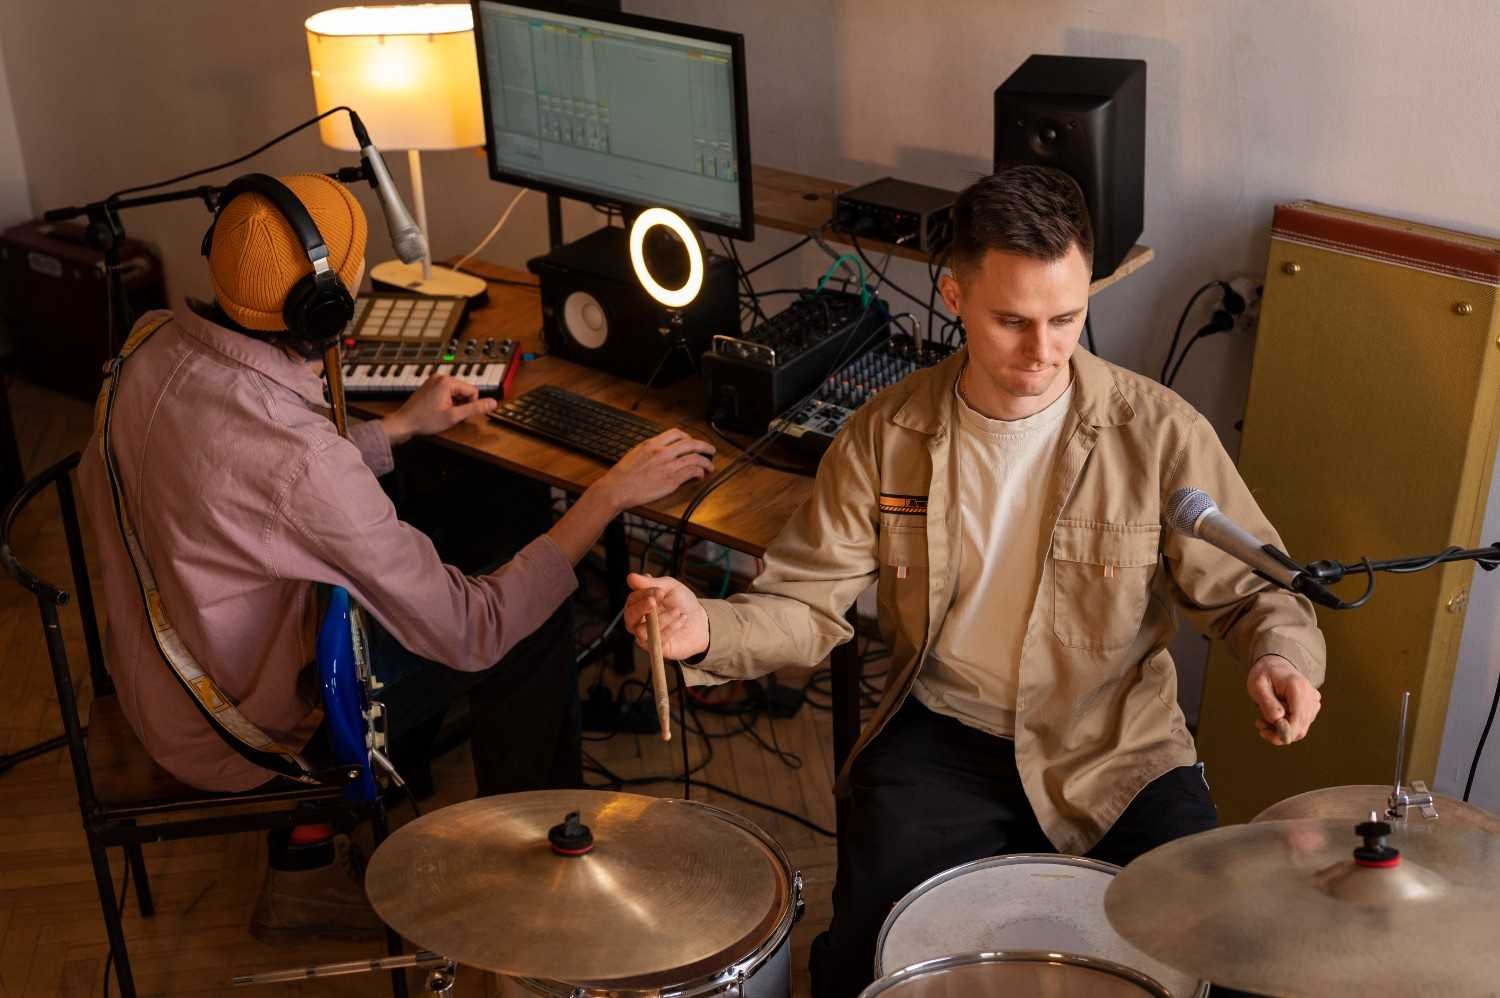
    A MIDI keyboard can make playing chords, bass lines, and melodies easier, but it is optional. If I want to record vocals, guitar, or other instruments, I can later add an audio interface and microphone.

    What Is the Best Order to Learn Music Production?

    What Is the Best Order to Learn Music Production

    I would learn production in a clear sequence rather than jumping between random tutorials.

    First, I would learn my DAW. Next, I would understand rhythm, basic music theory, MIDI, audio, and samples. After that, I would practice recreating existing songs, arranging complete tracks, and using basic mixing tools. Finally, I would develop my ears, improve sound selection, explore sound design, and learn more advanced mixing and mastering.

    As you explore different artists and styles, understanding what indie means in music can also give you useful context for how independent artists approach production and release their work.

    Following this order prevents me from spending weeks learning advanced compression techniques before I can even arrange a complete song.

    How Should I Learn My DAW as a Complete Beginner?

    My first goal should be navigating the DAW (A digital audio workstation) without constantly searching for basic controls.

    I would learn how to create tracks, use the timeline, load virtual instruments, import audio samples, record MIDI, edit notes in the piano roll, adjust track volume, add stock plugins, automate parameters, and export an audio file.

    Stock plugins are more than enough at this stage. Buying large plugin collections before understanding EQ, compression, reverb, and delay often creates more confusion rather than better music.

    I would also learn keyboard shortcuts gradually. Faster navigation gives me more time to stay creative instead of fighting the software.

    How Much Music Theory Should a Beginner Producer Learn?

    I do not need to become a trained pianist or study advanced harmony before making music.

    Basic music theory is enough to remove much of the guesswork. I would start with tempo, rhythm, musical keys, major and minor scales, chords, chord progressions, melodies, and basic song structure.

    Once I understand which notes belong to a key, writing melodies becomes easier. Once I understand simple chords, creating harmonic progressions becomes less random.

    The fastest way to make theory useful is to apply it immediately inside the DAW rather than studying it only from a textbook.

    Should I Reverse Engineer Songs to Learn Music Production Faster?

    Yes. Recreating parts of existing songs is one of the most practical learning exercises available.

    I can import a song I like into my DAW as a reference track and listen carefully to its tempo, drum pattern, bass line, chords, transitions, and arrangement.

    If the song is being developed for an independent release, understanding curated user playlists vs editorial pitching can also help you think about how the finished track may be promoted after production.

    Then I can attempt to recreate those elements with basic virtual instruments and samples.

    The purpose is not to copy or release somebody else’s music. I am studying how professional songs are constructed.

    Reverse engineering also teaches me how intros develop, when choruses arrive, how instruments enter and leave, and how energy changes throughout a track. These lessons can be harder to understand through theory alone.

    How Do I Build a Complete Song Instead of an Eight-Bar Loop?

    How Do I Build a Complete Song Instead of an Eight-Bar Loop

    Many beginners become good at creating loops but struggle to finish songs.

    Learning how to make music without any instruments can also help beginners build complete songs using MIDI, samples, loops, virtual instruments, and other digital production tools.

    I would begin with rhythm by building the drums and bass. Then I would introduce harmonic elements such as chords, pads, or keys. After establishing that foundation, I could add melodies, leads, vocals, samples, and additional textures.

    Next, I would turn the loop into an arrangement.

    Depending on the genre, the structure might include an intro, verse, pre-chorus, chorus, bridge, breakdown, buildup, drop, or outro. Not every track needs every section.

    The goal is movement. Different parts of the song should create changes in energy, density, and emotion.

    Finishing imperfect music is far more educational than repeatedly polishing the same eight bars.

    When Should I Start Learning Mixing?

    I would start learning basic mixing after I can create a reasonably complete arrangement.

    The first mixing tool I would use is volume. Many problems can be solved simply by making one element quieter or louder.

    Next comes panning, which helps position sounds across the stereo field. From there, I can begin learning EQ to manage frequencies, compression to control dynamics, reverb to create space, delay to add repeats and depth, and automation to make parameters change throughout the song.

    I would avoid assuming that professional mixing requires dozens of plugins. Good arrangement, sound selection, recording, and volume balance often matter more.

    How Do Reference Tracks Improve My Mixing and Ear Training?

    Reference tracks help me understand what professional production sounds like within the genre I am creating.

    I can compare my track with professionally released music and listen for differences in bass level, kick impact, vocal placement, brightness, stereo width, dynamics, and overall energy.

    This develops critical listening skills.

    Over time, ear training helps me recognize muddy low frequencies, harsh highs, weak drums, buried vocals, excessive reverb, and other production problems much faster.

    How Can I Learn Without Watching Tutorials All Day?

    Tutorials become useful when they solve a real problem.

    Instead of watching hours of unrelated music production videos, I would open my DAW and start creating. When I encounter something I cannot solve, I can search specifically for that problem.

    For example, if my kick and bass sound muddy together, I can research frequency balance, EQ, sidechain compression, and arrangement techniques that address that issue.

    This problem-based learning approach immediately connects information with practical experience.

    What Should My First 30 Days of Music Production Look Like?

    What Should My First 30 Days of Music Production Look Like

    During the first week, I would focus almost entirely on learning the DAW. I would create tracks, load instruments, program basic drums, experiment with MIDI, use samples, and export small projects.

    During week two, I would practice beats, bass lines, chord progressions, melodies, and basic music theory. I would also begin recreating simple parts of songs I enjoy.

    Week three would focus on turning short ideas into complete arrangements while introducing basic EQ, compression, panning, reverb, and volume balancing.

    During week four, I would finish and export at least one complete track.

    It does not need to sound professional. Completing the project teaches me arrangement, decision-making, mixing, workflow, and problem-solving in a way unfinished loops cannot.

    What Beginner Music Production Mistakes Should I Avoid?

    One common mistake is constantly switching DAWs because another producer uses different software. Another is buying expensive plugins before understanding stock tools.

    I would also avoid comparing my first few tracks with commercially mastered releases created by experienced producers, engineers, and musicians.

    Finally, I would not expect mastering to repair weak production. Mastering is the final preparation of an already strong mix. It cannot completely fix poor sound selection, weak arrangement, badly recorded vocals, or major balance problems.

    Frequently Asked Questions 

    1. Can I Produce Music Without Playing an Instrument?

    Yes. MIDI programming, piano rolls, samples, loops, virtual instruments, and step sequencers allow me to produce music without traditional instrumental skills.

    2. Do I Need an Audio Interface to Start Producing Music?

    Not necessarily. I mainly need an audio interface when I want to connect microphones, guitars, studio monitors, or other external audio equipment.

    3. Can I Make Professional Music Using Only Headphones?

    Headphones can take a beginner surprisingly far. I should learn how my headphones sound and regularly compare my mixes with professional reference tracks. Studio monitors and acoustic treatment can become useful upgrades later.

    4. How Many Hours Should a Beginner Practice Music Production?

    Consistency matters more than occasional marathon sessions. Even 30 to 60 focused minutes several times per week can produce noticeable improvement when I spend most of that time actively creating.

    5. What Is the Fastest Way to Understand How to Learn Music Production From Scratch at Home?

    The fastest approach is to choose one DAW, learn its essential tools, practice rhythm and basic theory, understand MIDI and audio, recreate simple songs, arrange complete tracks, learn basic mixing, and finish projects consistently.

    Turning Beginner Practice Into Real Production Skills

    When I think about learning music production from scratch at home, I would not measure progress by the number of tutorials I have watched, plugins I own, or pieces of studio equipment on my desk.

    I would measure progress by finished music.

    Every completed track reveals something new about arrangement, rhythm, sound selection, mixing, recording, or songwriting. My next track allows me to correct those weaknesses.

    A computer, DAW, headphones, consistent practice, and the willingness to finish imperfect projects are enough to begin. The studio can improve later. The most important step is opening the DAW and making music regularly.

  • Why Do My Vocals Sound Thin After Recording? The Real Reasons

    Why Do My Vocals Sound Thin After Recording? The Real Reasons

    A vocal can sound powerful while I am performing it and still feel surprisingly weak the moment I listen back. That contrast is usually what makes me ask, why do my vocals sound thin after recording? The answer is rarely just “bad EQ.” Thinness can start with microphone distance, room reflections, the way the voice was captured, or the way instruments compete with it later in the mix.

    What makes this problem confusing is that a vocal can lose body at several different stages. It may be recorded without enough low-mid warmth, weakened by comb filtering in an untreated room, thinned out by aggressive high-pass filtering, or buried by guitars, synths, and keys occupying the same frequency range. 

    I find the fastest way to fix it is to identify exactly where the vocal starts sounding small, then correct that stage instead of stacking more processing on top.

    What Makes a Recorded Vocal Sound Thin?

    A thin vocal usually lacks the low-mid warmth and density that make a voice feel full and present. It may sound overly bright, nasal, distant, brittle, or disconnected from the rest of the track.

    However, a dry raw vocal should not necessarily sound like a finished commercial recording. Professional releases build vocal size through strong tracking, arrangement space, compression, saturation, automation, EQ, delay, and reverb.

    Your first goal should therefore be identifying whether the raw vocal is genuinely weak or simply unfinished.

    Is Your Microphone Too Far From Your Voice?

    Microphone distance can dramatically change your recorded tone.

    Many directional microphones create a proximity effect, which increases low-frequency response as you move closer to the capsule. Moving too far away can reduce this natural warmth and capture more room reflections.

    For many large-diaphragm condenser microphones, around 6 to 10 inches with a pop filter can provide a useful starting position. Some voices and microphones may work better slightly closer or farther away.

    Rather than following one fixed measurement, I recommend recording several short takes at different distances and comparing them at the same playback volume.

    Can an Untreated Room Make Vocals Sound Thin?

    Can an Untreated Room Make Vocals Sound Thin?

    Yes. Reflections from hard walls, ceilings, windows, desks, and floors can return to the microphone milliseconds after your direct voice.

    For a more complete approach to controlling those reflections, how to reduce echo in a bedroom studio covers practical ways to improve room acoustics with absorption, positioning, and other treatment methods.

    When those signals interact, they can create comb filtering. Certain frequencies reinforce each other while others partially cancel, leaving the vocal sounding hollow, phasey, or weak.

    This is why a better microphone does not automatically solve a thin vocal recording.

    For US home producers working in untreated rooms, adding broadband acoustic panels, thick absorption, or other appropriate treatment around reflection areas can help.

    Understanding why do my recorded vocals sound muffled can also help producers identify whether room reflections are contributing to a dull, unclear, or less defined vocal recording.

    Recording closer to the microphone can also reduce how much room sound reaches the mic compared with your direct voice.

    Is Frequency Masking Making Your Vocal Disappear?

    Sometimes the vocal sounds perfectly acceptable when soloed but suddenly loses its body when the instrumental starts.

    That usually points to frequency masking.

    Guitars, synths, keyboards, samples, and other instruments may occupy important vocal frequencies. The broad 400 Hz to 1.5 kHz area can become particularly crowded in dense arrangements, although the exact conflict varies from song to song.

    I would avoid automatically boosting the vocal by several decibels.

    Instead, listen to the competing instrument and create small EQ reductions where it masks the voice. Dynamic EQ or frequency-conscious sidechaining can be even more effective because the competing frequency range moves out of the way primarily when the singer is active.

    Are You High-Passing Too Much Vocal Body?

    High-pass filters are useful for removing HVAC rumble, floor vibration, handling noise, and unwanted sub-bass information. However, aggressive filtering can remove part of the vocal itself.

    Many voices carry useful warmth somewhere around 100 to 250 Hz.

    If you push the high-pass filter too far upward simply because a tutorial recommends a particular number, you may remove exactly what gives the singer weight.

    When using thin vocal EQ, I prefer moving the cutoff while listening to the whole song rather than looking at the frequency number alone.

    Are Your EQ Boosts Making the Vocal Brighter but Smaller?

    Another common mistake is repeatedly boosting presence and air.

    Boosting frequencies around 2 to 5 kHz can improve articulation and help the voice cut through a mix. High-frequency boosts above roughly 10 kHz can create additional air. However, a careful analysis of load frequency across the vocal and instrumental can also help reveal whether too much energy is building up in these higher ranges while the vocal lacks sufficient low-mid support.

    But if the vocal already lacks low-mid body, those boosts can exaggerate the imbalance.

    Before adding more highs, I check whether I have removed too much around 150 to 300 Hz. A subtle low-shelf adjustment or carefully chosen bell boost may restore weight, but the exact frequency should depend on the singer and recording.

    Can Too Much Compression Make Vocals Sound Thin?

    Can Too Much Compression Make Vocals Sound Thin

    Compression can make vocals denser, more consistent, and easier to hear, but aggressive settings can make them feel smaller.

    Very fast attack settings may reduce the natural impact of words and phrases. Heavy gain reduction can also make a performance feel choked.

    If a vocal sounded healthy before compression, I bypass the compressor and compare.

    I often get better results from gentler compression than forcing one processor to control every peak. The goal is to stabilize the voice while preserving its natural character.

    Can Saturation Add Warmth to Thin Vocals?

    Subtle saturation can help a vocal feel fuller by introducing additional harmonic content.

    Tape-style or tube-style saturation can create perceived density without simply turning up the low frequencies. This can be especially useful for clean condenser microphone recordings that feel overly clinical.

    I still treat saturation as an enhancement rather than a repair tool. If the recording suffers from severe room reflections, bad mic placement, clipping, or strong phase problems, saturation will not solve the underlying issue.

    Why Do Double-Tracked Vocals Sometimes Sound Hollow?

    Vocal layering can create impressive width and size, but similar recordings can interact in unpredictable ways.

    If two tracks line up closely, phase relationships can cause some frequencies to partially cancel. The combined vocal may actually sound thinner than one track alone.

    Mute the doubles and listen to the lead. If the vocal suddenly regains its weight, check the timing and phase relationship between the layers.

    Small timing differences often sound natural, but problematic cancellation may require editing or a different approach to the doubles.

    How Can I Tell Whether the Recording or Mix Is the Problem?

    This is the test I recommend before changing anything else.

    Bypass every plugin and listen to the raw vocal.

    If the unprocessed recording already sounds thin, focus on mic distance, microphone choice, gain staging, room acoustics, performance, and recording position.

    If the raw vocal sounds full but loses weight after processing, reactivate the plugins one at a time. You may quickly discover that a high-pass filter, EQ cut, compressor, noise reduction processor, or effect is causing the problem.

    If the vocal only becomes weak when the instrumental plays, investigate frequency masking instead.

    How Do I Make Thin Vocals Sound Fuller?

    How Do I Make Thin Vocals Sound Fuller

    I start with the recording rather than immediately boosting bass.

    A good vocal sound comes from capturing enough natural body at the source, minimizing destructive room reflections, and leaving enough space for the voice in the arrangement.

    That arrangement principle also matters when deciding how long should a beat intro be, because the opening section can establish the track’s space and energy before the vocal enters.

    After that, I use corrective EQ carefully, maintain useful low-mid energy, apply controlled compression, and add subtle saturation when appropriate. I also shape competing instruments instead of continuously making the vocal louder.

    This approach usually creates more natural vocal warmth than stacking corrective plugins.

    Frequently Asked Questions 

    1. Why does my recorded voice sound thinner than my voice in real life?

    You hear your own voice partly through vibrations conducted through your head as well as through the air. A microphone mainly captures airborne sound, so your recorded voice may initially seem lighter than what you hear while speaking or singing.

    2. What frequency adds body to vocals?

    Vocal body often exists somewhere around 100 to 300 Hz, but the ideal frequency varies with the singer, microphone, and recording. Avoid blindly boosting one frequency on every vocal.

    3. Why does my vocal sound good alone but thin in the mix?

    Frequency masking is usually responsible. Guitars, keyboards, synths, and other instruments may compete with the vocal’s important midrange frequencies. EQ or dynamic processing on the competing instruments can create more room.

    4. Can room reflections really make my vocals sound hollow?

    Yes. Early reflections can interact with the direct signal and create comb filtering, causing some frequencies to become stronger while others partially cancel.

    5. Can compression make my vocals fuller?

    Moderate compression can increase perceived density and consistency. Too much compression, however, may make the vocal feel flat, choked, or smaller.

    6. Why do my vocals sound thin after recording even before I start mixing?

    If why do my vocals sound thin after recording is the problem you hear in the completely raw take, I would check microphone distance, gain level, room reflections, microphone choice, and performance before applying EQ or compression.

    Final Thoughts

    When I hear a thin vocal, I no longer assume that EQ is automatically the answer. I first listen to the raw take, check microphone placement and room acoustics, and then determine whether processing or arrangement masking is changing the sound.

    Getting enough vocal body at the recording stage makes everything afterward easier. From there, careful EQ, restrained compression, subtle saturation, and intelligent arrangement choices can help a vocal sound warm, clear, and confident without making it artificially bass-heavy.

  • Can You Produce Music Without an Audio Interface? Start With What You Have

    Can You Produce Music Without an Audio Interface? Start With What You Have

    You open your DAW, load a drum kit, add a virtual synth, plug in your headphones, and start building a track. At that point, you may wonder whether an audio interface is actually necessary—or whether it is just another piece of gear people assume every producer should own.

    If you are asking if you can produce music without an audio interface, the answer is yes. You can create beats, arrange songs, work with MIDI, use VSTs, layer samples and loops, mix with headphones, and export finished music using your computer’s built-in audio system.

    For beginners in the US building a home or bedroom studio, this means you can start making music without buying extra hardware immediately. The real question is not whether you can produce without an interface, but how far your current setup can take you before recording, monitoring, and connectivity limitations start to matter.

    Do You Need an Audio Interface for Music Production?

    You do not need an interface if you produce mainly “inside the box.” This means your music stays inside your computer and digital audio workstation rather than coming from microphones, guitars, or external synthesizers.

    You can program drums, write melodies, use VST instruments, manipulate samples, arrange songs, apply effects, mix tracks, and export completed music without separate audio hardware. DAWs such as FL Studio, Ableton Live, Logic Pro, and GarageBand can work with your computer’s existing sound system.

    For electronic music, hip-hop, trap, pop demos, lo-fi, and other sample-based production, that setup can be enough to start making complete tracks.

    What Can You Produce Without an Audio Interface?

    Can You Make Beats and Electronic Music Without One?

    Yes. Beat making and electronic music rely heavily on MIDI, samples, virtual synthesizers, drum machines, loops, and effects plugins. None of these automatically requires an audio interface.

    A USB MIDI keyboard can normally connect straight to your computer. MIDI carries performance information rather than recorded audio, so your DAW uses that information to trigger virtual instruments. You can even create melodies directly in your DAW’s piano roll without owning a MIDI controller.

    Can You Mix Music Using Only Headphones?

    Can You Mix Music Using Only Headphones

    Yes. You can connect wired headphones directly to your computer’s headphone output and monitor your DAW.

    USB headphones can also work, but I would avoid relying heavily on Bluetooth headphones for production. Wireless connections can introduce noticeable audio latency, which can make recording or playing virtual instruments uncomfortable.

    A dependable pair of wired studio headphones gives beginners a relatively affordable way to monitor and mix before investing in studio monitors.

    Can You Record Vocals Without an Audio Interface?

    You can record vocals without a traditional interface if you use a USB microphone.

    A USB microphone converts the signal internally and sends digital audio directly to your computer. This setup can work well for demos, songwriting, vocals, voiceovers, and other basic recording tasks.

    Your laptop’s built-in microphone can technically record too, although background noise, room acoustics, and microphone quality may limit the result.

    An XLR studio microphone changes the situation. Most XLR microphones need a microphone preamp and analog-to-digital conversion, while many condenser microphones also require 48-volt phantom power. An audio interface conveniently provides these features.

    Can You Record Guitar Without an Audio Interface?

    Direct guitar recording is one area where an interface becomes considerably more useful.

    Electric guitars normally use a quarter-inch instrument connection, while most computers do not provide the proper high-impedance input needed for direct guitar recording.

    You can sometimes work around this limitation with a USB-equipped amplifier, USB guitar adapter, or another compatible digital recording device. However, if guitar or bass becomes a regular part of your music production workflow, an interface with an instrument input generally provides a cleaner and more flexible setup.

    How Can You Reduce Audio Latency Without an Interface?

    How Can You Reduce Audio Latency Without an Interface

    Latency is the delay between performing an action and hearing the result. You may notice it when playing a MIDI keyboard, recording vocals, or monitoring audio through your DAW.

    On a Windows PC, an ASIO-based audio driver can help reduce latency compared with some standard Windows audio configurations. FL Studio includes FL Studio ASIO, while ASIO4ALL can work with many built-in audio devices.

    Mac users generally work through Apple’s Core Audio system, which is integrated into macOS and designed for high-performance, low-latency audio.

    Your audio buffer size also matters. A smaller buffer can make your virtual instruments feel more responsive, but going too low can increase CPU usage and produce clicks, pops, or audio dropouts. I prefer lowering the buffer gradually until I find a setting that feels responsive without making the system unstable.

    What Are the Disadvantages of Producing Without an Audio Interface?

    The biggest limitations usually appear as your home studio grows.

    Built-in computer audio provides fewer options for XLR microphones, electric guitars, external synthesizers, multiple simultaneous inputs, and professional studio monitor connections.

    Dedicated interfaces can provide microphone preamps, instrument inputs, balanced outputs, headphone amplification, low-latency drivers, and better analog-to-digital and digital-to-analog conversion.

    However, an interface does not magically improve everything inside your DAW. If your song consists completely of MIDI, VSTs, samples, loops, and plugins, simply connecting an interface will not automatically make the exported track professional.

    Its biggest advantages come from improved recording, monitoring, connectivity, and workflow.

    As your production skills evolve, learning how to discover new indie artists can broaden your exposure to diverse sounds, styles, and production techniques that you can draw upon for creative inspiration.

    As you continue refining your production skills, understanding where to find new independent music can broaden your exposure to diverse artists, distinctive sounds, and innovative production approaches worth exploring.

    Can You Use Studio Monitors Without an Audio Interface?

    Sometimes, but using an interface generally makes the setup easier.

    Many powered studio monitors use balanced TRS or XLR connections. Balanced connections can help reduce unwanted noise while giving you a convenient way to control monitor levels.

    If you currently produce entirely through headphones, you may not need to worry about this. Once your US home studio expands to include monitors, microphones, guitars, or external instruments, an interface becomes much more valuable.

    When Should You Buy an Audio Interface?

    When Should You Buy an Audio Interface

    I would buy an interface when my existing setup starts preventing me from making the music I want.

    If you want to use an XLR microphone, plug an electric guitar directly into your DAW, connect studio monitors properly, record hardware synthesizers, or monitor live recordings with lower latency, an interface starts making practical sense.

    If you currently produce with MIDI, software instruments, samples, loops, and headphones, focus first on developing your skills in arrangement, sound selection, EQ, compression, automation, and mixing.

    Gear should solve an actual production problem rather than simply make your desk look more like a professional studio.

    For producers working independently, supporting independent musicians can also mean discovering their releases, purchasing their music, attending their shows, and engaging with their work.

    Frequently Asked Questions 

    1. Can I Make Professional Music Without an Audio Interface?

    Yes. A software-based producer can compose, arrange, mix, and export high-quality tracks using a computer, DAW, virtual instruments, samples, plugins, and headphones. External recording and professional monitoring are usually what make an interface more important.

    2. Do I Need an Audio Interface for a MIDI Keyboard?

    Usually not. Most modern USB MIDI keyboards connect directly to a computer and send MIDI information to the DAW without passing through an audio interface.

    3. Can I Use FL Studio Without an Audio Interface?

    Yes. FL Studio can use your computer’s built-in audio hardware. Windows users can also use compatible ASIO drivers to improve latency and responsiveness.

    4. Does an Audio Interface Improve Sound Quality?

    It can improve recording and monitoring through better converters, microphone preamps, headphone outputs, and connections. However, it does not automatically improve virtual instruments or a digital mix simply because the interface is connected.

    5. Do Beginners Need an Audio Interface for a Home Studio?

    No. A capable computer, DAW, and wired headphones can provide everything many beginners need to start learning music production. You can add an interface later when your recording and monitoring requirements grow.

    Final Takeaway

    When I look at what a new producer actually needs, I would rather see someone start creating music than delay learning because they think expensive hardware is mandatory. The answer to whether you can produce music without an audio interface is yes, especially when you work inside the box using MIDI, VSTs, samples, loops, plugins, and headphones.

    An interface becomes valuable when you start recording microphones and guitars, adding hardware instruments, connecting studio monitors, or needing reliable low-latency monitoring. Until that point, the computer you already own may give you everything you need to start creating and finishing music.

  • How to Make Melodies Without Music Theory Using Simple Ear Tricks

    How to Make Melodies Without Music Theory Using Simple Ear Tricks

    Some of my best melody ideas do not start with a scale chart, chord formula, or piano lesson. They start with something much simpler: a rhythm I can tap, a phrase I can hum, or a few notes that immediately feel right together.

    That is why learning how to make melodies without music theory is often less complicated than beginners expect. I do not need to understand every interval or memorize every key before I can create something catchy. Instead, I can limit my note choices, use my DAW’s scale tools, follow a simple bassline, hum ideas before programming them, and shape short patterns through repetition and variation.

    For beginner producers in the US working in FL Studio, Ableton Live, Logic Pro, GarageBand, or similar software, this approach makes melody writing feel practical instead of intimidating. The goal is not to guess randomly. It is to give my ears a simple framework so I can make faster, more confident musical decisions.

    Can I Really Make Melodies Without Knowing Music Theory?

    Yes. Music theory can eventually help me understand why certain notes work together, but I do not need to master scales, intervals, notation, and harmony before writing my first catchy melody.

    My first goal is much simpler: create a short musical idea that sounds good, repeats clearly, and is easy to remember.

    I usually start with only three to five notes. Fewer choices force me to pay attention to rhythm, note length, silence, and repetition instead of randomly filling the piano roll.

    How Can I Use the White-Key Trick to Write Melodies?

    One of the easiest beginner shortcuts involves the white keys.

    C major and A natural minor use only the white notes on a standard piano. That means I can experiment with those notes while staying within one note collection. EDM Tips also demonstrates a transposition technique that lets producers use white keys while effectively playing in another key.

    I still use my ears because staying inside a scale does not guarantee that every note will sound perfect over every chord.

    If my DAW supports scale highlighting or scale mode, I often use that instead. It visually limits or highlights the notes belonging to my selected scale, making piano roll melodies far easier to construct.

    Should I Start My Melody With a Bassline?

    Should I Start My Melody With a Bassline?

    Starting with bass notes gives me a foundation.

    I place three or four low notes across my loop and listen to their movement. Instead of immediately worrying about a complicated chord progression, I treat those bass notes as anchors for everything I add afterward.

    Production Music Live recommends a similar approach: establish bass notes first, then use them as a framework for finding notes that fit the track.

    Once that foundation sounds right, I can start experimenting higher in the piano roll.

    How Can I Build Easy Chords Without Knowing Chord Theory?

    If I want harmony underneath the melody, I can start with basic three-note shapes.

    Using notes available within my selected scale, I begin with a low note and stack additional notes above it while leaving scale-note spaces between them. This gives me a simple starting shape that I can adjust by ear.

    I can also move individual chord notes an octave higher or lower. This technique, commonly called an inversion or wider voicing, changes the chord’s character without requiring an entirely new set of notes.

    Once the chord works, I avoid making everything perfectly mechanical. Very small timing differences can make programmed parts feel less rigid. Production Music Live similarly recommends subtle timing adjustments to humanize MIDI performances.

    How Do I Use Humming to Find a Catchy Melody?

    Humming is one of the fastest ways I know to escape piano-roll overthinking.

    I loop my drums, bassline, or chords and record myself humming whatever comes naturally. I do not worry about lyrics or singing perfectly. I only want the rhythm and general rise and fall of the idea. This also helps me better understand the structure of musical preferences, because the phrases I naturally repeat often reveal the rhythms, note movements, and melodic shapes I find most appealing.

    EDM Tips demonstrates this approach by recording improvised vocal melody ideas and then converting or reproducing them as MIDI.

    After recording, I find the first note on a piano or synth and work through the phrase gradually. Even if my transcription is not perfect, it gives me a much more musical starting point than randomly clicking notes.

    Should I Create the Rhythm Before Choosing Melody Notes?

    When I cannot think of a melody, I sometimes ignore pitch completely.

    I place one repeated note across the piano roll and create a rhythm first. Once the groove sounds interesting, I move selected notes higher or lower while preserving most of the timing.

    This turns rhythm into a melodic pattern.

    It also helps prevent the common beginner mistake of using too many different pitches. A catchy melody often gets its identity from rhythm and repetition rather than complexity.

    How Do I Use Repetition Without Making a Melody Boring?

    How Do I Use Repetition Without Making a Melody Boring?

    I like using a simple four-bar rule.

    Bars one and three establish the recognizable idea. Bars two and four introduce small changes.

    I might change the final note, alter the rhythm, add a higher passing note, shorten one note, extend another, or introduce a brief pause.

    Production Music Live emphasizes repeating recognizable notes and then filling the spaces around them, which follows the same underlying principle: listeners need something familiar before variations become meaningful.

    This is one of the most useful techniques when learning how to make melodies without music theory because I do not need to invent four completely different musical phrases.

    Why Does My Melody Sound Random?

    When my melody sounds random, I usually have too many unrelated decisions happening at once.

    Maybe every note changes pitch. Maybe the rhythm never repeats. Perhaps I jump between octaves constantly or fill every space.

    I fix this by finding the strongest two- or three-note idea and repeating it somewhere else.

    Then I remove unnecessary MIDI notes.

    Silence is especially important. Empty spaces give listeners time to process one phrase before the next begins. A melody does not need constant movement to feel complete.

    How Do I Give a Melody More Movement?

    I think visually about melodic contour.

    If my notes slowly move upward, the phrase can feel as though it is building. A downward movement can create a sense of release. Repeating notes can create stability, while an occasional larger jump attracts attention.

    I normally combine small steps with occasional wider movement rather than jumping unpredictably between distant notes.

    The piano roll makes this easy to understand even if I cannot name a single musical interval.

    How Can I Make a Counter Melody Without Music Theory?

    I first look for gaps in the main melody.

    If the lead plays continuously, adding another busy melody usually creates clutter. Instead, I let the counter melody answer the main phrase during its quieter moments.

    I also place it in a different register or choose a contrasting instrument so both melodies remain distinct.

    A counter melody may only need a few notes. Its job is to support the hook, not compete with it.

    What Is the Easiest Melody Exercise for Beginners?

    What Is the Easiest Melody Exercise for Beginners?

    When I practice how to make melodies without music theory, I create a four-bar loop and limit myself to roughly five notes.

    I begin with one repeated note and create the rhythm. Then I change selected pitches, duplicate the strongest phrase, modify the second or fourth bar, and remove notes that do not improve the idea. I also pay attention to beat intro length, because the amount of time before the full melody enters can affect how naturally the idea develops and how much impact the main section has.

    Finally, I test different note lengths, octaves, rests, and sounds.

    This exercise teaches me to develop one strong musical idea instead of continuously adding new ones.

    FAQs About Writing Melodies as a Beginner

    1. Do I Need to Know Scales to Make Melodies?

    No. I can start with scale highlighting, the white-key method, and my ears. Learning scales later can make the process faster, but I do not need to master them before producing music.

    2. Should I Make Chords or Melody First?

    Both workflows work. I may start with chords or a bassline when I want a harmonic foundation, but humming the melody first often produces more spontaneous ideas.

    3. How Many Notes Should a Beginner Melody Have?

    I usually start with three to five different notes. Once the phrase works, I can introduce additional pitches when they serve a clear purpose.

    4. Why Do My Melodies Sound Boring?

    The issue may be rhythm, repetition, note length, or phrasing rather than the notes themselves. I first change the timing and introduce rests before adding more pitches.

    5. Can I Make Melodies Using Only a Mouse?

    Yes. I can create complete MIDI melodies directly in a piano roll. A MIDI keyboard can make experimentation faster, but it is not required.

    Final Thoughts

    I stopped struggling with melodies once I stopped treating every production session like a music theory exam.

    A simple bassline gives me direction. Scale highlighting limits wrong turns. Humming captures ideas before I overthink them. Rhythm gives the melody personality, while repetition and variation make it memorable.

    Music theory is still useful, and I can learn more of it over time. But I do not have to postpone creating music until I understand every technical term. My ears, DAW (A digital audio workstation), and a few reliable constraints are enough to start writing stronger melodies today.

  • How to Turn an 8 Bar Loop Into a Full Song That Feels Finished

    How to Turn an 8 Bar Loop Into a Full Song That Feels Finished

    Eight bars can capture the best part of a track, but they can also become a trap. The groove feels right, the melody is catchy, the drums hit the way I want, and every element seems to fit. Then the loop repeats, and the song stops moving.

    When I work on turning an 8-bar loop into a full song, I don’t start by forcing myself to write a completely new section. I use the loop as the strongest version of the idea and reshape it across the timeline. By changing which elements play, controlling energy, adding variation, and creating cleaner transitions, I can turn one short musical section into an arrangement that actually feels complete.

    How Do I Map an 8-Bar Loop Into a Full Song Structure?

    I start by placing markers across my DAW timeline before changing individual instruments. A reference track in a similar genre can help me identify where the intro ends, how long the verse runs, when the chorus or drop arrives, and where a breakdown or bridge might fit.

    For many pop, hip-hop, electronic, and beat-driven songs familiar to US listeners, an intro may run around 8 to 16 bars, while verses and choruses often stretch between 16 and 32 bars.

    I never treat those numbers as strict rules. Tempo, genre, vocals, and the overall feel of the track matter more. The purpose of markers is to create a visible roadmap so I am no longer staring at eight bars with no direction.

    Why Should I Paste the Full 8-Bar Loop Across the Timeline?

    Once I have my structure, I copy every element of the loop across the entire arrangement.

    That can include drums, bass, chords, leads, percussion, textures, and effects.

    At first, the song may look overly busy. That is intentional.

    Instead of asking myself what I need to add, I can now ask what I should remove. This simple change in thinking makes arrangement much easier because I already have material covering the full timeline.

    It also helps maintain a consistent musical identity rather than forcing me to write completely unrelated sections.

    How Does Subtractive Arrangement Turn a Loop Into a Song?

    How Does Subtractive Arrangement Turn a Loop Into a Song?

    Subtractive arrangement means creating contrast by deleting or muting elements from the full version of the loop.

    For the intro, I may remove the kick and heavy bass while keeping chords, ambience, or light percussion.

    During the verse, I can introduce the groove but remove the main lead to create space for vocals.

    When the chorus or drop arrives, I can restore the bass, full drum pattern, lead, and supporting elements so the section immediately feels larger.

    This creates a natural energy curve without requiring a completely new composition. The same approach also works alongside techniques for making drums sound less robotic, since subtle changes in drum layers, velocity, and pattern density can help each section feel more natural and distinct.

    When learning to turn an 8-bar loop into a full song, subtractive arrangement is especially useful because it allows the strongest version of the loop to become the high-energy section while simpler versions create contrast around it.

    How Often Should I Change an 8-Bar Loop?

    I usually introduce small changes every four to eight bars while saving larger changes for new sections.

    A second verse might use a different hi-hat pattern. I may remove one melody layer halfway through the verse, change the final bass note before the chorus, or move a synth part up an octave in the second drop.

    These changes keep the listener interested without destroying the main musical idea.

    Variation can come from rhythm, melody, instrumentation, dynamics, and processing. I also use automation frequently because it creates movement without requiring more sounds.

    Filter automation, volume changes, delay throws, reverb adjustments, and stereo-width changes can make the same loop feel noticeably different.

    How Can I Build More Intensity Without Adding More Instruments?

    I think about intensity in terms of density and frequency range.

    A section containing only chords and percussion naturally feels smaller than one containing drums, bass, lead, vocals, and effects.

    This means I do not always need new instruments to make a chorus or drop feel bigger.

    Sometimes removing bass from the breakdown and bringing it back later creates more impact than adding another synth.

    Saving certain sounds for important sections also gives those elements more meaning when they finally appear.

    How Do I Create Smooth Transitions Between Sections?

    How Do I Create Smooth Transitions Between Sections?

    Transitions prevent an arrangement from sounding like separate loops pasted next to each other.

    I often use reverse cymbals, risers, white-noise sweeps, drum fills, impacts, reverb tails, or short moments of silence before major section changes.

    Filter automation works well too. For example, I might gradually low-pass several instruments before a drop and then restore their full frequency range when the beat returns.

    I avoid using dramatic effects before every section. If every eight bars contains a huge riser and impact, the listener quickly stops noticing them.

    Small transitions work well for subtle changes, while stronger transition effects should usually support important moments.

    How Can a Reference Track Help Me Finish the Arrangement?

    Reference tracks are one of the most useful tools when I am unsure about song structure.

    I choose a professionally released song with a similar genre, tempo, or energy and study its arrangement.

    I pay attention to when the drums enter, when the bass disappears, how long the verse lasts, when transitions happen, and how the second chorus or drop differs from the first.

    I am not copying the melody or production. I am studying the arrangement workflow.

    Using a reference track also helps me understand whether my intro feels too long or whether I am waiting too long before reaching the main hook.

    What Mistakes Keep an 8-Bar Loop From Becoming a Full Track?

    What Mistakes Keep an 8-Bar Loop From Becoming a Full Track?

    One common mistake is adding another instrument every time the arrangement feels repetitive. More layers can make the mix crowded without fixing the real problem.

    Another mistake is allowing every instrument to play throughout the entire song. If everything stays at maximum intensity, the chorus has nowhere to grow.

    I also avoid changing every section too dramatically. An arrangement still needs repetition so the listener can recognize the hook, groove, and musical identity.

    Finally, I try not to spend too much time mixing before the song structure is finished. Perfecting EQ and compression on an instrument I later remove wastes time and interrupts the creative workflow.

    Frequently Asked Questions About 8-Bar Loop Arrangement

    1. How many bars should a finished song have?

    There is no universal number. Tempo, genre, vocals, and section lengths all affect the final arrangement. I focus more on pacing and energy than forcing the song into a specific bar count.

    2. Can I use the same chord progression throughout the song?

    Yes. The same progression can work across multiple sections when drums, melodies, dynamics, instrumentation, and vocals create enough contrast.

    3. Should I add a new melody for every section?

    Usually not. I prefer changing rhythm, octave, instrumentation, or processing first. A new counter melody can be effective later when I want a final chorus or drop to feel different.

    4. Should I arrange the drums or melody first?

    I prefer outlining the overall song structure first. Once the sections are clear, I decide which drum and melodic elements belong in each part.

    5. How do I know when my arrangement is finished?

    I listen from beginning to end without editing. If each section has a purpose, the transitions feel natural, and the energy continues moving, I consider the arrangement ready for detailed mixing.

    Final Thoughts

    Learning how to turn an 8-bar loop into a full song gets much easier when I treat my original loop as the fullest version of the idea rather than something I need to replace.

    I map the timeline first, duplicate the full stack, remove elements to create contrast, introduce small variations, automate movement, and use transitions to connect the major sections. These changes help me control the elements of music more intentionally, including rhythm, melody, harmony, dynamics, and texture.

    The loop gives me the musical identity. Arrangement gives that idea a beginning, progression, climax, and ending.

  • How to Make Kick and Bass Not Clash for a Cleaner Mix

    How to Make Kick and Bass Not Clash for a Cleaner Mix

    A powerful low end should feel controlled, not crowded. When the kick hits and the bass enters, I want both elements to sound bigger together, not weaker, muddier, or harder to distinguish. That is why learning how to make kick and bass not clash is less about piling on plugins and more about managing space, timing, phase, and frequency with purpose.

    In many mixes, the problem starts before EQ or compression ever enters the picture. The kick may be too long, the bass may occupy the same fundamental range, or both sounds may hit with competing energy at the same moment. I prefer to solve those issues at the source first, then use EQ, sidechain compression, dynamic EQ, and phase adjustments only where they genuinely improve the mix.

    For US producers working in hip-hop, trap, EDM, pop, and related styles, this approach can help create a low end that stays punchy on studio monitors while still translating well to headphones, cars, earbuds, and everyday consumer speakers.

    Why Do Kick and Bass Clash in the First Place?

    Kick and bass usually clash because both contain strong energy in the same low-frequency range.

    A kick may have its fundamental punch somewhere around 60 to 90 Hz, while a bass or 808 may also carry heavy energy in that area. When both sounds dominate the same frequencies at the same time, frequency masking makes the mix feel muddy, weak, or undefined.

    Timing also matters. A long kick tail can continue underneath a sustained bass note. Even if the EQ looks acceptable, excessive overlap can still create low-end buildup.

    Phase cancellation creates another problem. If the kick and bass waveforms move against each other, parts of the low end can weaken instead of becoming more powerful.

    That is why I treat low-end mixing as a combination of frequency, timing, phase, and dynamics.

    Should You High-Pass Kick and Bass Below 20 Hz?

    Should You High-Pass Kick and Bass Below 20 Hz?

    Ultra-low frequencies below roughly 20 Hz are usually more felt than heard, yet they can still consume valuable headroom.

    I often check both the kick and bass with a spectrum analyzer and remove unnecessary sub-rumble using a gentle high-pass filter when needed. Tools such as Ableton EQ Eight can handle this easily.

    However, I do not automatically cut everything below 20 Hz just because a tutorial recommends it. Some sounds contain useful energy near that region, and overly aggressive filtering can weaken the weight of the mix.

    The goal is to remove unnecessary information, not strip away the character of the low end.

    How Do You EQ Kick and Bass So They Have Separate Space?

    Complementary EQ is one of the most effective methods for reducing frequency masking.

    If the kick has its strongest punch around 70 Hz, for example, I may slightly emphasize that area on the kick while making a small reduction around the same frequency in the bass.

    The reverse can also work.

    If the bass needs to dominate the deepest sub frequencies, I may reduce some low-end weight from the kick and allow more of its character to come from the upper bass or attack frequencies. This kind of separation can also help fix beats that sound empty by making the low end feel more intentional and balanced instead of simply adding more layers.

    This does not mean every mix needs dramatic boosts and cuts. Small EQ adjustments often work better because extreme carving can make both sounds feel unnatural.

    I always identify the actual kick fundamental frequency before making changes instead of blindly copying fixed EQ settings.

    Should the Kick or Bass Own the Sub Frequencies?

    Either can control the deepest frequencies.

    What matters is creating a low-end hierarchy.

    In some trap and hip-hop mixes, the 808 carries most of the sub-bass energy while the kick provides more transient punch. In other productions, the kick sits deeper while the bass occupies a slightly higher range.

    Problems usually appear when both elements try to dominate the same area.

    I decide which sound should feel deeper based on the genre, arrangement, and character of the track.

    Can Shortening the Kick Stop It From Clashing With Bass?

    Absolutely.

    One of the simplest fixes is reducing the kick length.

    If a kick continues playing long after the initial transient, its low-frequency tail can overlap with the bass. I may trim the kick sample or shorten its decay so it ends before the bass reaches full strength.

    Some producers use an eighth-note kick length as a rough starting point, but I do not treat that as a strict rule. Tempo and arrangement matter.

    The correct kick length is simply one that provides enough weight without unnecessarily covering the bass.

    Should You Change Bass MIDI Notes Before Using Plugins?

    Should You Change Bass MIDI Notes Before Using Plugins?

    Yes, especially when the clash comes from timing.

    I often inspect the MIDI arrangement before touching another EQ or compressor.

    If the bass note begins at the same instant as every kick, I may move selected notes slightly later, shorten their duration, or let them finish before the next kick lands.

    Changing the octave of a bass note can also help if a specific note creates excessive low-frequency buildup.

    These small arrangement changes allow the kick and bass to move around each other naturally.

    In many cases, fixing note placement sounds more transparent than forcing separation with aggressive compression.

    How Do You Check Phase Between Kick and Bass?

    If the kick sounds strong in solo but suddenly loses power when the bass plays, phase should be one of the first things you inspect.

    I compare the two sounds together, flip polarity, and experiment with tiny timing adjustments.

    If the low end becomes noticeably stronger after a small timing change, phase interaction was probably contributing to the problem.

    I also listen in mono because phase problems often become easier to detect without stereo distractions.

    Visual waveform alignment can help, but I trust what I hear more than what the waveform looks like.

    How Much Sidechain Compression Should You Use?

    Sidechain compression creates temporary space for the kick by reducing the bass volume whenever the kick hits.

    I place a compressor on the bass and use the kick as the sidechain trigger.

    A relatively fast attack can move the bass out of the way when the kick transient arrives. The release should then allow the bass to return naturally with the groove.

    I avoid making the bass pump dramatically unless that sound fits the genre.

    The objective is not to make the compression obvious. It is to create enough room for the kick to remain clear.

    This is one of the most reliable techniques when learning how to make kick and bass not clash, but it should not replace good sound selection and arrangement.

    Is Dynamic EQ Better Than Regular Sidechain Compression?

    Dynamic EQ can be more transparent because it targets only the frequencies that are actually colliding.

    Traditional sidechain compression lowers the entire bass signal when the kick hits.

    A sidechained dynamic EQ can instead reduce only a narrow area, such as 60 or 70 Hz, while leaving the rest of the bass almost untouched.

    Plugins such as iZotope Neutron and frequency-selective tools like Fuser can accomplish this type of bass ducking.

    This technique works particularly well when full-band sidechain compression makes the bass feel too weak.

    How Do You Make Kick and Bass Translate to Cars and Small Speakers?

    How Do You Make Kick and Bass Translate to Cars and Small Speakers?

    I never finish low-end decisions using only one playback system.

    A mix that sounds clean on studio monitors may become overwhelming in a car because the cabin emphasizes certain bass frequencies.

    Small speakers create the opposite challenge because they cannot reproduce deep sub-bass effectively.

    I check the track on headphones, consumer earbuds, small speakers, and a car system whenever possible.

    If the bass disappears on smaller devices, adding controlled harmonic content can help listeners perceive it without increasing the sub frequencies.

    If the kick disappears at low volume, it may need more upper-frequency attack rather than more bass.

    Frequently Asked Questions (FAQs)

    1. What frequency should I cut from bass for kick?

    There is no universal frequency. Find the kick’s main fundamental area and reduce the bass slightly there only when audible frequency masking occurs.

    2. Should kick and bass hit at the same time?

    Yes. They can hit simultaneously as long as their frequency content, phase, sustain, and dynamics allow them to work together.

    3. Is EQ or sidechain better for kick and bass?

    EQ works well for constant frequency overlap, while sidechain compression works better for short timing conflicts. Many mixes benefit from subtle amounts of both.

    4. Why does my kick disappear when the bass enters?

    Frequency masking, phase cancellation, and excessive bass sustain are the most common causes. Test each one before adding more processing.

    5. Should sub-bass be mono?

    Keeping the deepest low frequencies relatively centered usually improves stability and translation, although higher bass harmonics can still contain stereo width.

    Final Takeaway

    When I work on how to make kick and bass not clash, I start with the simplest fixes first.

    I choose complementary sounds, control unnecessary sub-rumble, decide which element owns the deepest frequencies, shorten kick and bass tails, adjust MIDI timing, and check phase. Only then do I use complementary EQ, sidechain compression, or dynamic EQ.

    The goal is not to process the low end as heavily as possible. It is to create enough separation that the kick feels punchy while the bass remains full, controlled, and musical.

    When those two elements stop competing and begin supporting each other, the entire mix sounds bigger.