Category: Music Production

  • When Should You Use Reverb on Vocals? Avoid These Mistakes

    When Should You Use Reverb on Vocals? Avoid These Mistakes

    A vocal can be perfectly recorded and still feel strangely disconnected from the rest of a song. I usually notice this when the singer sounds too dry, too close, or almost pasted on top of the instrumental instead of sitting naturally inside it. That is when reverb becomes one of my most useful mixing tools.

    So, when should you use reverb on vocals? I use it when I want to create believable physical space, blend a dry vocal with the surrounding instruments, control how close or distant the singer feels, or create a specific emotional atmosphere. The goal is not simply to make a vocal sound bigger. Good vocal reverb should support the performance without making the lyrics harder to understand.

    Most studio vocals are recorded relatively dry, especially in treated recording spaces. That gives me more control later because I can decide exactly how much ambience, depth, and character the vocal needs during mixing.

    Why Does Reverb Make Vocals Sound More Natural?

    In real life, we rarely hear a voice without reflections from walls, ceilings, floors, or nearby surfaces. A completely dry recording can therefore sound unnaturally close or almost uncomfortable when placed against a full instrumental.

    Reverb recreates some of those reflections.

    I use subtle ambience when I want a vocal to feel more natural and dimensional. Even a short room reverb can make a close-miked recording feel like it exists in a believable space without making the reverb itself obvious.

    Reverb can also act like a sonic bridge. When several instruments and vocals share similar ambience, they often feel more connected instead of sounding like separate recordings stacked together.

    When Should You Keep Vocals Mostly Dry?

    When Should You Keep Vocals Mostly Dry?

    More reverb is not always better.

    Fast rap verses, intricate vocal flows, dense pop arrangements, and lyric-heavy performances often need maximum clarity. Long reverb tails can overlap syllables and make important words harder to understand.

    I also keep vocals relatively dry when I want an intimate, in-your-face sound. Modern hip-hop, indie productions, acoustic recordings, and some pop mixes benefit from vocals that feel extremely close to the listener.

    A dry vocal does not necessarily mean zero ambience. I may still use a very short room, subtle slap delay, or an almost inaudible reverb send. The effect simply remains supportive instead of becoming part of the foreground.

    If the instrumental is already crowded or muddy, I may use delay instead of a long reverb. Delay can provide width and depth while leaving more open space between repetitions.

    Which Type of Reverb Works Best on Vocals?

    Different reverbs create different perceptions of space, so I choose the type based on what the song needs.

    When Should You Use Plate Reverb on Vocals?

    Plate reverb is one of my favorite choices for lead vocals because it can add smoothness, sustain, and richness without necessarily creating the impression of a real room.

    I often use plate reverb when a vocal needs polish while remaining relatively forward. It works particularly well in pop, rock, R&B, and other modern productions where vocal presence matters.

    When Does Room Reverb Work Better?

    Room reverb is useful when I want natural ambience.

    A short room can help a dry vocal blend with acoustic instruments or make separate recordings feel as though they occupy the same environment. Because the decay is usually shorter, room reverb can also work well in faster or busier arrangements.

    When Should You Choose Hall Reverb?

    Hall reverb creates a much larger sense of distance and atmosphere.

    I tend to use it for emotional ballads, atmospheric pop, dream pop, cinematic sections, or sparse arrangements where there is enough room for a longer tail.

    A large hall can sound beautiful, but too much decay can quickly push the lead vocal backward in the mix.

    How Much Reverb Should You Add to Vocals?

    How Much Reverb Should You Add to Vocals?

    There is no universal vocal reverb setting.

    I usually increase the send until I clearly hear the effect and then pull it back slightly. This helps me retain the sense of depth without letting the ambience overpower the singer.

    I also judge reverb while the full instrumental is playing. A vocal can sound impressive when soloed but become cloudy as soon as guitars, keyboards, drums, and background vocals return.

    This is especially important when deciding when you should use reverb on vocals, because the correct amount depends heavily on arrangement density, tempo, vocal delivery, and genre.

    How Does Pre-Delay Keep Vocals Clear?

    Pre-delay determines how long the dry vocal plays before the reverb reflections begin.

    I often use roughly 20 to 50 milliseconds as an initial starting range. A little separation allows the original vocal to remain clear and upfront before the reverb blooms behind it.

    However, I never treat those numbers as strict rules. Faster songs, slower ballads, aggressive vocals, and spacious productions may all need different settings.

    The right pre-delay should help preserve consonants and vocal definition while still creating depth.

    What Reverb Decay Time Should You Use?

    Decay controls how long the reverb tail remains audible.

    Shorter decay times generally work better in busy or fast-moving tracks because the reflections disappear before they interfere with the next phrase. I also pay attention to the decay transient, since the way the reverb fades after the initial vocal can affect how clean or crowded the next phrase feels. Longer tails can create emotion, drama, and atmosphere in slower or more spacious music.

    I often listen to the gaps between vocal lines. If the previous line is still washing over the next phrase, I usually shorten the decay before reducing the entire reverb level.

    Should Vocal Reverb Be on an Aux Send?

    In most cases, I prefer using an auxiliary or bus send instead of placing the reverb directly on the vocal track.

    I set the reverb bus to 100% wet and control how much vocal enters it with the send level. This lets me process the dry vocal and wet signal separately.

    I can then EQ, compress, automate, or de-ess the reverb without affecting the original recording.

    An insert can still work for creative effects, but sends usually give me greater control in a conventional vocal mix.

    How Do You Stop Reverb From Making Vocals Muddy?

    How Do You Stop Reverb From Making Vocals Muddy?

    Reverb can easily create low-frequency and low-mid buildup.

    I often use EQ to remove unnecessary low-end information from the reverb return. Instead of automatically choosing one fixed cutoff, I adjust it by ear because different voices and arrangements require different treatment.

    I also pay attention to harsh high frequencies and sibilance. Strong S and T sounds can create bright, distracting reverb tails, so EQ or de-essing the signal entering the effect can help.

    The objective is to let the ambience surround the vocal without competing with it.

    Should You Automate Vocal Reverb?

    Yes, and this is one of the easiest ways to make a mix feel more dynamic.

    I may keep verses relatively dry and increase the reverb slightly when the chorus arrives. That makes the chorus feel larger without forcing the entire song to stay heavily reverberant.

    Reverb throws are another useful technique. I can send only the final word or phrase of a section into a long reverb, creating drama while keeping most of the vocal clear.

    Background vocals can also handle more reverb than the lead because the additional ambience helps push them farther back in the soundstage.

    Frequently Asked Questions (FAQs)

    1. Should every vocal have reverb?

    No. Some vocals sound better almost completely dry, especially when maximum lyric clarity or intimacy is important. Reverb should solve a specific mixing or creative problem rather than being added automatically.

    2. Is reverb or delay better for vocals?

    Neither is always better. Reverb creates continuous ambience, while delay produces distinct repetitions. I often use delay when I want depth without filling the mix with a long reverb tail.

    3. What is a good pre-delay for vocals?

    Around 20 to 50 milliseconds is a practical starting range, but the best setting depends on tempo, vocal phrasing, arrangement density, and the desired sense of distance.

    4. Should I put reverb before or after compression?

    I generally compress the main vocal first and then send the controlled signal to the reverb. However, different processing orders can create useful creative effects.

    5. Can too much reverb ruin vocal clarity?

    Yes. Excessive decay, poor EQ, or too much wet signal can blur words, create low-mid buildup, and push the singer too far behind the instrumental.

    How Do You Know When There Is Too Much Reverb?

    I know I have gone too far when lyrics become difficult to understand, the singer feels too distant, or several reverb tails start overlapping and making the mix cloudy.

    If commercial reference tracks remain clear while my mix sounds washed out, I check the reverb level, decay time, pre-delay, and EQ before changing the entire vocal balance. Reverb can also help when a beat sounds empty and makes the vocal feel too exposed, but I still avoid using ambience as a substitute for better arrangement or frequency balance.

    Ultimately, learning when you should use reverb on vocals is more useful than memorizing a preset. I decide what role the vocal needs to play first, then use reverb to create the right depth, emotion, and sense of space.

  • How to Reduce Echo in a Bedroom Studio Before It Ruins Your Mix

    How to Reduce Echo in a Bedroom Studio Before It Ruins Your Mix

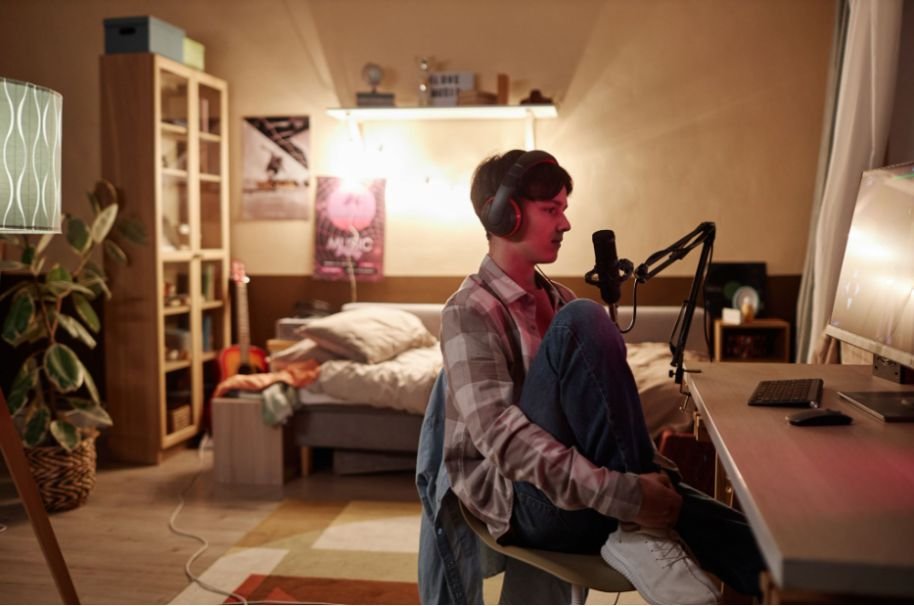
    I can usually tell when a bedroom studio has too much room reflection before I even touch the EQ. Vocals feel farther away than they should, claps leave a sharp ring behind, and mixes become harder to judge because the room keeps adding its own sound to everything I hear.

    That is why learning how to reduce echo in a bedroom studio is one of the smartest improvements I can make before spending more on microphones, monitors, or plugins. In many US bedrooms and apartment setups, the main culprits are bare drywall, hard floors, windows, low ceilings, and closely spaced parallel walls. The good news is that I do not need a full commercial studio build to fix them.

    By treating first reflection points, softening hard surfaces, improving microphone placement, and controlling low-frequency buildup, I can create a noticeably cleaner recording and mixing environment without overcomplicating the room.

    Why Does a Bedroom Studio Sound Echoey?

    Sound from studio monitors, instruments, or a voice travels outward until it reaches a surface. Hard walls, windows, floors, ceilings, desks, and doors reflect much of that energy into the room.

    Because a bedroom is small, those reflections return very quickly. They can interfere with the direct sound and create flutter echo, harshness, boxiness, or an exaggerated sense of room ambience.

    Parallel walls are particularly troublesome. I can often identify flutter echo by clapping once and listening for a fast metallic ringing or repeated reflection.

    The goal of bedroom studio acoustic treatment is not to eliminate every reflection. I want enough sound absorption and control to hear recordings and mixes clearly without making the room unnaturally dead.

    Where Should I Put Acoustic Panels in a Bedroom Studio?

    I start with the first reflection points because treating them usually delivers one of the biggest improvements.

    These are areas where sound from the monitors hits a wall before bouncing toward my listening position. I can locate them with the mirror method. While I sit in my normal mixing position, another person moves a mirror along the side wall. Wherever I can see a monitor in the mirror is a likely first reflection point.

    Dense fabric-wrapped acoustic panels work especially well in these locations. Budget acoustic foam can reduce some high-frequency reflections, but thicker broadband panels generally absorb a wider frequency range.

    I also consider the wall behind the listening position. In a compact bedroom studio, reflections from this surface can return quickly. If ceiling reflections are strong, a ceiling cloud above the desk or listening area can provide additional control.

    Do Rugs Help Reduce Echo on Hardwood Floors?

    Do Rugs Help Reduce Echo on Hardwood Floors

    Yes, especially when the bedroom has hardwood, tile, vinyl, or laminate flooring.

    Hard flooring reflects a large amount of mid- and high-frequency sound, and the way those reflections behave can vary depending on amplitude and frequency. I prefer a thick area rug that covers a significant portion of the open floor between my workspace and the opposite side of the room.

    Adding a dense rug pad underneath can improve absorption further.

    A rug will not fix wall reflections or low-frequency room problems, but it can noticeably reduce the brightness and ringing that come from a large exposed floor.

    What Curtains Work Best for Bedroom Studio Windows?

    Glass is highly reflective, so uncovered windows can contribute significantly to room echo.

    I use heavy, floor-length curtains when possible. Thermal curtains, velvet drapes, or dense blackout curtains generally provide more absorption than thin decorative curtains.

    For US bedrooms with large windows or sliding glass doors, covering as much glass as practical can help reduce harsh reflections during recording and mixing.

    Curtains work especially well when combined with wall treatment rather than used as the only acoustic solution.

    Can Bookshelves and Bedroom Furniture Improve Studio Acoustics?

    Furniture can help, particularly in a room that would otherwise contain large empty reflective surfaces.

    A filled bookshelf with books arranged at different depths can scatter some reflections instead of sending them directly back toward the listener. Fabric storage boxes, soft furnishings, upholstered chairs, and a small couch can also help reduce excessive reflections.

    The bed itself is useful. A mattress, comforter, pillows, and other bedding absorb more sound than a completely bare wall or floor.

    I do not rely on furniture as a replacement for acoustic panels, but I use it as part of an overall DIY acoustic treatment strategy.

    Do Bass Traps Help in a Small Bedroom Studio?

    Do Bass Traps Help in a Small Bedroom Studio

    Low-frequency problems deserve separate attention.

    Low-frequency pressure often becomes strongest around room boundaries and corners. This can produce boomy bass, muddy mixes, and inconsistent low-end response.

    These room-related low-end problems are also important when learning how to make kick and bass not clash, because uncontrolled bass buildup can make it harder to judge the balance and separation between low-frequency elements.

    Installing thick bass traps in vertical corners can help control this energy and shorten low-frequency decay.

    Thin acoustic foam is not a substitute for bass trapping. Foam can help with flutter echo and higher-frequency reflections, while effective bass treatment generally requires thicker absorptive material.

    How Can I Reduce Echo While Recording Vocals?

    Microphone placement can sometimes improve a vocal recording before I add any new acoustic treatment.

    I avoid recording directly in a corner or placing the microphone close to a bare reflective wall. Recording closer to the microphone can increase the amount of direct voice relative to room sound, allowing me to lower the gain while capturing a cleaner signal.

    I can also position a thick acoustic panel, moving blanket, comforter, or other dense absorptive material around the recording area.

    When figuring out how to reduce echo in a bedroom studio, I always test several microphone and vocalist positions because a change of only a few feet can produce a noticeably different recording.

    Once the room and recording setup are under control, producers can also consider workflow tools and whether do I need a MIDI keyboard for music production based on how they prefer to create melodies, chords, and other MIDI parts.

    Is Acoustic Treatment the Same as Soundproofing?

    No. They solve different problems.

    Acoustic treatment controls reflections, reverberation, frequency buildup, and other sound behavior inside the room.

    Soundproofing aims to stop sound from entering or leaving the room. Proper sound isolation usually involves construction techniques such as adding mass, sealing air gaps, decoupling structures, and improving doors or walls.

    If a vocal sounds overly roomy, acoustic treatment is usually the priority. If traffic, neighbors, HVAC systems, or outside noise appears in the recording, sound isolation is the larger issue.

    How Do I Test Whether My Echo Treatment Is Working?

    I make one change at a time and compare the results.

    A simple clap test can reveal obvious flutter echo. I clap near the mixing or recording position and listen for metallic ringing.

    For vocals, I record the same spoken passage before and after changing the room. I keep the microphone position, gain, and distance consistent so I can make a fair comparison.

    I also play familiar commercial recordings through my studio monitors. Checking those same reference tracks through headphones can provide another useful perspective, especially when learning can I mix music with regular headphones and trying to understand how different monitoring environments affect mixing decisions.

    Better treatment should make stereo imaging, vocals, bass, and overall balance easier to judge.

    What Bedroom Studio Acoustic Treatment Mistakes Should I Avoid?

    Randomly covering walls with thin foam is one of the most common mistakes.

    Another problem is treating high frequencies heavily while ignoring bass. This can create a dull-sounding room while leaving low-frequency issues untouched.

    I also check monitor positioning before buying more treatment. Symmetry, speaker distance, desk placement, and listening position all affect what I hear.

    For me, the best approach is gradual: identify a problem, treat it, listen again, and only then decide what the room needs next.

    Frequently Asked Questions 

    1. What is the cheapest way to reduce bedroom studio echo?

    I would start with monitor and microphone placement, thick curtains, a rug with a pad, existing furniture, bedding, bookshelves, and moving blankets before investing heavily in professional treatment.

    2. Should I cover every wall with acoustic foam?

    Usually not. Strategic broadband absorption at reflection points provides better results than filling every surface with thin foam.

    3. How much acoustic treatment does a bedroom studio need?

    It depends on room dimensions, construction, furniture, speaker placement, and whether the space is mainly used for recording, mixing, or both. I start with the major reflection points and add treatment according to what I hear.

    4. How to reduce echo in a bedroom studio for vocal recording?

    Focus on microphone distance, recording position, nearby reflective surfaces, thick absorption, curtains, and temporary panels or blankets. Test multiple positions until the direct vocal becomes stronger than the room sound.

    5. Can a bookshelf work as acoustic treatment?

    A bookshelf can scatter some reflections, especially when objects have different depths and shapes. However, it should complement proper sound absorption rather than replace it.

    Final Thoughts

    When I think about how to reduce echo in a bedroom studio, I focus on solving the biggest problems first instead of buying every acoustic product I can find.

    I treat first reflection points, soften hard flooring, cover reflective windows, use furniture intelligently, control low-frequency buildup with bass traps, and improve microphone placement. I also test the room after every major adjustment.

    With thoughtful bedroom studio acoustic treatment, even a typical US spare bedroom or apartment bedroom can become a cleaner, more controlled environment for recording vocals, producing music, and making more confident mixing decisions.

  • Should You EQ Before or After Compression? Build a Cleaner Mix

    Should You EQ Before or After Compression? Build a Cleaner Mix

    A compressor can behave completely differently depending on what I feed into it. That is why I never treat EQ and compression as two plugins that can simply be dropped into a chain in any order. A muddy low end, sharp resonance, or aggressive EQ boost placed before compression can change the amount of gain reduction and, ultimately, the character of the entire track.

    So, should you EQ before or after compression? I usually clean up unwanted frequencies before the compressor and save broader tonal shaping for afterward. However, that is only a starting point. Sometimes I intentionally EQ first to make the compressor react harder to a particular frequency, while other times I compress a clean performance before touching its tonal balance.

    The key is understanding what I want the compressor to respond to. Once I approach the signal chain that way, choosing between corrective EQ, compression, and final tonal EQ becomes much easier—and the result usually sounds cleaner, more controlled, and more natural in the full mix.

    What Happens When You EQ Before Compression?

    Placing EQ before compression changes the signal that reaches the compressor detector. That matters because a compressor reacts to level, and some frequency ranges can carry significantly more energy than others.

    Low-end information is a common example. A recording can contain sub-bass rumble, proximity-effect buildup, HVAC noise, mic-stand vibration, or other frequencies that are not musically useful. Even when I barely hear them, they can still push the compressor harder and create unnecessary gain reduction.

    Using a high-pass filter or gentle low-frequency cut before compression can clean up the signal and help the compressor react more naturally.

    The same idea applies to resonant frequencies. If one narrow frequency suddenly jumps several decibels above the rest of the performance, the compressor may react to that spike and reduce the entire signal. Cutting the resonance first allows the compressor to respond more evenly.

    When Should You Use Corrective EQ Before Compression?

    I usually place corrective or subtractive EQ first when I need to remove something that should not influence compressor behavior.

    That may include low-end rumble, muddy frequencies, boxiness, harsh resonances, excessive proximity effect, or other peaks that make gain reduction inconsistent.

    The goal is not to completely reshape the sound. I simply want to give the compressor a cleaner and more balanced signal.

    This is especially useful with vocals recorded in untreated home studios, which are common among independent producers across the US. Room reflections, desk vibrations, background HVAC noise, and microphone placement can all introduce frequencies that affect the signal chain.

    Can Boosting EQ Before Compression Be Useful?

    Can Boosting EQ Before Compression Be Useful?

    Yes. EQ before compression is not limited to cutting frequencies.

    Boosting a specific frequency range before compression makes that range hit the compressor harder. That can be useful when I intentionally want the compressor to react more aggressively to part of the spectrum.

    For example, emphasizing upper-mid frequencies or sibilance before compression can create a basic frequency-sensitive compression effect. In some cases, producers use this idea as a crude form of de-essing or dynamic shaping.

    I use this technique carefully because aggressive boosts can cause pumping, excessive gain reduction, or a flattened sound. Pre-compressor boosts are most effective when I have a specific reason for changing detector behavior.

    What Happens When You Compress Before EQ?

    Compression first allows me to control the dynamic range before I make broad tonal decisions.

    This works well when the recording already sounds balanced but has inconsistent peaks or volume changes. I can stabilize the performance first and then make EQ choices based on the compressed result.

    Compression can also change how I perceive tone. Once quieter details become louder, and peaks become more controlled, a vocal may feel warmer, darker, brighter, or more forward than it did before processing.

    That is why post-compression EQ is often easier for final tonal shaping.

    When Should You EQ After Compression?

    I usually EQ after compression when I want to add color rather than fix a problem.

    This may involve adding vocal air, increasing presence, restoring brightness, adding warmth, or bringing more attack to a snare drum. I also make these tonal decisions before adding effects like reverb on vocals, because a well-balanced compressed signal usually gives me a cleaner and more controlled foundation for ambience.

    Heavy compression can sometimes make a transient-heavy sound feel dull or reduce some of its perceived punch. Post-compression EQ gives me a chance to restore those qualities without changing how the compressor reacts.

    Broad musical EQ adjustments also become more predictable because the signal’s dynamic range has already been controlled.

    EQ Before or After Compression for Vocals?

    EQ Before or After Compression for Drums?

    Vocals are probably the clearest example of why processor order matters.

    If I hear low-end rumble, mud, strong resonances, or an unpleasant frequency peak, I usually address those issues before compression. Otherwise, those frequencies may trigger unnecessary gain reduction.

    Once the vocal is compressed, I listen again and decide whether it needs more presence, air, warmth, or clarity.

    This often leads to a chain like:

    Corrective EQ → Compression → Tonal EQ.

    When I decide whether you should EQ before or after compression for a vocal, I focus on the purpose of each move rather than following a fixed plugin order.

    EQ Before or After Compression for Drums?

    Drums can benefit from either approach depending on the sound I want.

    If a kick contains excessive sub energy, I may clean that up before compression so the compressor does not pump too aggressively. If a snare has a strong ringing resonance, I can cut it before compression and then shape attack or brightness afterward.

    On the other hand, I may intentionally leave more low-end or transient energy in the signal when I want the compressor to react strongly and create a more aggressive drum sound.

    That is why compressor placement becomes part of the creative process, not just a technical decision.

    EQ Before or After Compression for Bass?

    Bass frequencies contain a lot of energy, so small tonal imbalances can have a large effect on compression.

    If one note or frequency range dominates the compressor, corrective EQ before compression can make the bass more consistent.

    If the bass already has a balanced tone, I may compress first and use EQ afterward to help it sit around the kick, guitars, keyboards, or other low-mid elements.

    The decision depends on whether I am correcting the source or shaping it inside the full mix.

    Can You EQ Both Before and After Compression?

    Yes, and this is often the most flexible approach.

    Using one EQ before compression lets me clean the incoming signal. The compressor can then control dynamics more predictably. A second EQ afterward lets me make broad, musical tonal changes.

    Some engineers call this the “EQ-compression-EQ” or “sandwich” approach.

    It works especially well on vocals, acoustic instruments, drum buses, and other complex sources that need both cleanup and polish.

    The main risk is over-processing. Adding more plugins does not automatically improve a mix, so I keep each move intentional and relatively small.

    What Are the Trade-Offs of Each Signal Chain?

    EQ before compression gives me more control over what triggers gain reduction, but aggressive boosts can create pumping or cause the compressor to work too hard.

    Compression before EQ keeps tonal shaping independent from compressor behavior, but problematic frequencies still reach the compressor and may affect its response.

    Using EQ before and after compression offers the greatest flexibility, but it also creates more opportunities to over-process the signal.

    The best choice is the one that solves the actual problem with the fewest unnecessary moves.

    Common EQ and Compression Order Mistakes

    Common EQ and Compression Order Mistakes

    One mistake I avoid is automatically applying large EQ boosts before compression. Those boosts can change the compressor response far more than expected.

    Another common mistake is leaving obvious low-frequency problems untreated and then trying to fix pumping with compressor settings alone.

    I also level-match whenever possible. A louder processed signal can sound better simply because it is louder, even when the processing itself is not helping.

    Most importantly, I make decisions while listening to the full mix. A vocal or instrument can sound impressive in solo and still compete badly with everything else.

    Frequently Asked Questions (FAQs)

    1. Is EQ Better Before or After Compression?

    Neither order is always better. Corrective EQ often works well before compression, while tonal EQ often works well afterward.

    2. Should Subtractive EQ Come Before Compression?

    Often, yes. Removing problematic frequencies first can stop them from triggering unnecessary gain reduction.

    3. Should Additive EQ Come After Compression?

    Additive or broad tonal EQ often works well after compression because it lets you shape the final sound without changing compressor behavior.

    4. Can I Boost EQ Before a Compressor?

    Yes. Boosting a frequency before compression can intentionally make the compressor react more strongly to that range, but excessive boosts may cause pumping.

    5. Does Compression Change Frequency Balance?

    Compression does not work like a traditional EQ, but it can change perceived tonal balance by bringing quieter details forward and changing the relationship between peaks and sustained sounds.

    6. Can I Use Two EQ Plugins With One Compressor?

    Yes. One EQ can handle corrective cleanup before compression while another handles tonal shaping afterward.

    Final Thoughts

    There is no single plugin order that works for every recording. When I ask whether you EQ before or after compression, I first decide whether I am fixing the incoming signal or shaping the finished tone.

    If unwanted low frequencies, mud, or resonances are affecting gain reduction, I use corrective EQ first. If I want to add air, warmth, presence, or final polish after controlling dynamics, I EQ afterward.

    For many mixes, the most practical workflow is corrective EQ, compression, and tonal EQ. Once I understand how each processor affects the next one, the signal chain becomes much easier to build with purpose.

  • Why Does My Mix Sound Muddy on Headphones? Find the Real Cause

    Why Does My Mix Sound Muddy on Headphones? Find the Real Cause

    A mix can feel polished, wide, and balanced while I am working on it, then suddenly turn thick and congested the moment I switch to headphones. That shift is one of the fastest ways to expose problems hiding in the low mids. 

    When I start wondering why my mix sounds muddy on headphones, I do not immediately assume the entire mix is bad. I first check whether the problem comes from overlapping frequencies, the headphones themselves, or decisions I made while monitoring.

    Muddiness often develops when guitars, vocals, synths, keys, bass harmonics, and effects all compete for space around roughly 200 Hz to 500 Hz. Headphone tuning can make that buildup feel even stronger, especially on models that emphasize bass or low-mid frequencies.

    The fix is not to scoop out the low mids across every track. A cleaner mix comes from identifying exactly where the congestion starts, understanding which sounds are masking each other, and creating separation without stripping away the warmth and weight that make the song feel full.

    What Makes a Mix Sound Muddy on Headphones?

    A muddy mix usually lacks separation. Vocals may feel buried, guitars can sound thick but undefined, and the kick and bass may merge into one indistinct low-frequency layer.

    This often happens because of auditory masking. When several instruments generate strong energy in similar frequency ranges, one sound makes another more difficult to hear. Each track can sound perfectly acceptable solo while the entire mix sounds congested.

    This distinction matters because mud is not the same as having a powerful bass response. A mix can contain substantial low end and still sound clear when each important element has enough sonic space.
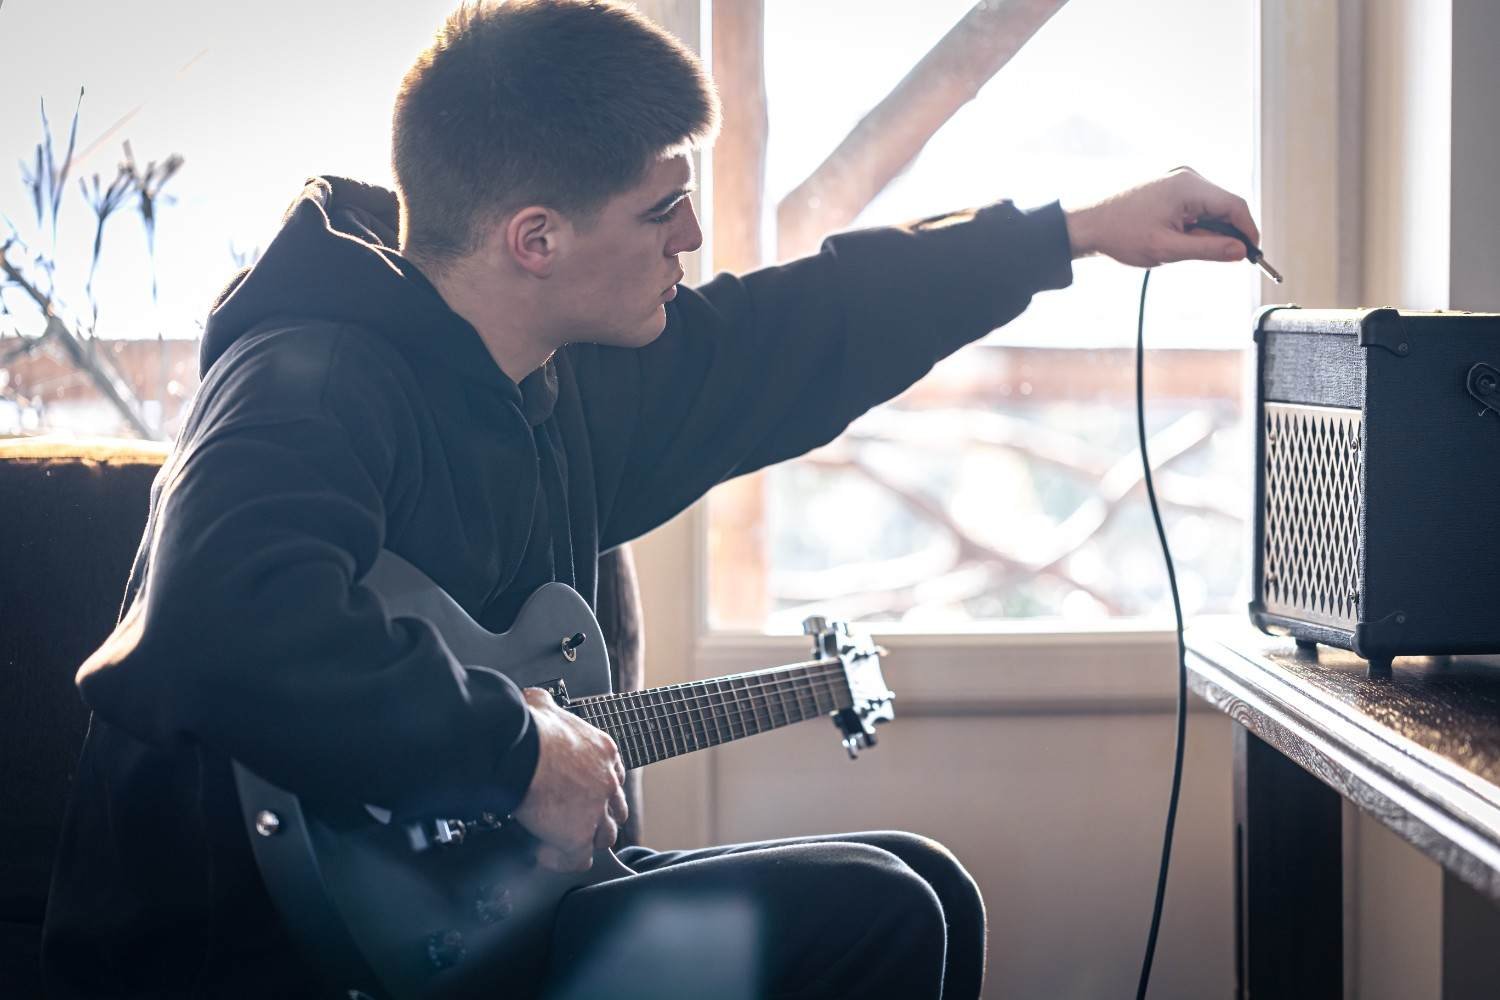
    Why Do Low-Mid Frequencies Cause So Much Mud?

    Why Do Low-Mid Frequencies Cause So Much Mud

    The 200 Hz to 500 Hz region is crowded in many popular genres heard across US streaming platforms, home studios, cars, earbuds, and consumer audio systems.

    The body of a vocal, acoustic and electric guitars, lower piano notes, synth layers, snare body, and bass harmonics may all contribute energy here.

    Instead of automatically reducing the entire region, I listen for the instruments that are competing most aggressively.

    A small subtractive EQ adjustment on one supporting element can sometimes create more clarity than a large EQ cut across the master bus.

    Can Headphones Make a Mix Sound Muddier Than It Really Is?

    Yes. Headphones have different frequency responses, and some consumer or closed-back models use bass-forward tuning. Others may emphasize certain low-mid frequencies or reduce frequencies that help you perceive clarity.

    This creates a monitoring problem.

    If your headphones exaggerate bass, you might remove too much low end because you believe the mix contains more bass than it actually does. If they underrepresent certain bass frequencies, you can make the opposite mistake and add excessive low-frequency energy.

    I therefore avoid making major decisions based on one playback system alone.

    How Do Kick and Bass Create Frequency Masking?

    Kick and bass are two of the most important elements to separate.

    When both dominate the same low-frequency range, the kick can lose punch while the bass loses definition. Simply increasing their volume usually makes the problem worse.

    The same principle applies to programmed drums, where understanding how to make drums sound less robotic can help create more natural timing, dynamics, and variation instead of relying on repetitive patterns.

    I first decide which sound should control the deepest part of the spectrum. Then I use sound selection, EQ, arrangement, envelope adjustments, or sidechain compression when necessary to help each element occupy a clearer space.

    The goal is not to remove frequencies randomly. It is to establish low-end ownership.

    Can Unfiltered Low Frequencies Make a Mix Muddy?

    Can Unfiltered Low Frequencies Make a Mix Muddy

    Low-frequency information can accumulate on tracks where you may not even notice it individually.

    Vocals, guitars, percussion, room microphones, effects, and synths can contain rumble or unnecessary low-end information. Once dozens of tracks reach the master bus, those small contributions can become significant.

    High-pass filtering can help, but I do not automatically set every non-bass track to 80 or 120 Hz. A fixed cutoff may remove useful body and warmth.

    Instead, I gradually raise the high-pass filter while listening in context and stop before the source begins losing information the arrangement needs.

    How Do I Use EQ to Fix a Muddy Mix?

    Subtractive EQ works best when I know which instrument is actually causing the congestion.

    If a guitar and keyboard are competing around 250 to 400 Hz, for example, I might make a modest cut in one rather than aggressively reducing both.

    Sometimes the problem is an arrangement issue rather than a frequency problem. This is especially important for vocals, since why do my vocals sound thin after recording can involve frequency masking, EQ decisions, and the way other instruments occupy the same frequency space.

    If several instruments play in the same register simultaneously, changing an octave, shortening a part, removing unnecessary notes, or eliminating a layer can improve separation more naturally than additional processing.

    Does Reverb Make a Mix Sound Muddy?

    Reverb and delay can quietly create a large amount of low-mid buildup.

    Long reverb tails continue occupying space after the original note has stopped. When several tracks use dense reverbs, those tails overlap and reduce clarity.

    I often EQ the reverb return separately from the original signal. Filtering unnecessary lows from the effect can prevent bass and low-mid information from spreading through the mix.

    Depending on the source, I may also shorten the decay, adjust the pre-delay, reduce the wet signal, or simplify the number of reverbs being used.

    There is no universal 300 or 400 Hz cutoff that works for every reverb. I prefer listening for the point where the effect becomes cleaner without losing its intended character.

    Why Does My Mix Sound Clear on Speakers but Muddy on Headphones?

    Why Does My Mix Sound Clear on Speakers but Muddy on Headphones

    Speakers and headphones reproduce music differently. This difference can also make vocal problems easier to notice, particularly when considering why do my recorded vocals sound muffled and whether the issue comes from frequency balance, monitoring, or the original recording.

    Speakers interact with the room, and both ears receive information from both speakers. Headphones send the left and right channels more directly to each ear and remove much of the room interaction.

    As a result, bass balance, stereo width, frequency masking, and spatial effects can feel noticeably different.

    If you repeatedly wonder why does my mix sounds muddy on headphones, check whether the congestion exists on studio monitors, quality earbuds, a phone speaker, and a car stereo as well.

    Cross-referencing helps determine whether the issue is actually inside the mix or mostly related to your monitoring system.

    Does Mixing Too Loud Affect Clarity?

    Mixing at high volumes for extended periods can lead to ear fatigue and increasingly unreliable decisions.

    After listening for too long, I may perceive the tonal balance differently and start making EQ changes that I would not make with rested ears.

    For most of my mixing session, I prefer a moderate listening level. I use occasional louder checks for impact and quieter checks to judge vocal, snare, and arrangement balance.

    Short listening breaks also help reset my perception.

    Should I Check a Muddy Mix in Mono?

    Mono checking is an excellent way to expose frequency overlap.

    A wide stereo arrangement can temporarily hide competing elements because they appear in different positions across the stereo field. When the mix collapses to mono, those instruments occupy a more concentrated space.

    If the track suddenly becomes much more congested, I investigate the arrangement, EQ relationships, and level balance.

    Mono is not where the finished track necessarily needs to sound widest or most exciting. I use it as a diagnostic tool.

    Should I Use Reference Tracks When Mixing on Headphones?

    Should I Use Reference Tracks When Mixing on Headphones

    Reference tracks provide a reality check when your ears become accustomed to your own mix.

    I compare my track with a professionally produced song from a similar genre, paying attention to bass level, low-mid density, vocal presence, brightness, and stereo width.

    The reference should be level-matched. A louder song can appear fuller and clearer simply because of volume differences.

    References are particularly useful when working primarily on headphones because they help you understand how professionally balanced music sounds through the same pair.

    Frequently Asked Questions 

    1. What Frequency Usually Makes a Mix Sound Muddy?

    Muddiness commonly appears between roughly 200 Hz and 500 Hz, although the exact problem frequencies depend on the recordings, arrangement, instruments, and monitoring system.

    2. Should I Cut 200 to 500 Hz From Every Track?

    No. Removing this range universally can make a mix thin and lifeless. Identify the tracks creating excessive buildup and make targeted adjustments instead.

    3. Can Closed-Back Headphones Cause a Muddy Mix?

    Closed-back headphones do not automatically cause mud, but some models use bass-forward tuning or emphasize portions of the low-mid spectrum. Learn the frequency response of the headphones you use.

    4. Can Too Much Reverb Cause Low-Mid Buildup?

    Yes. Multiple long or dark reverbs can accumulate low-mid energy. EQing the effects return, shortening decay times, or reducing unnecessary effects can improve clarity.

    5. How Can I Tell Whether the Problem Is My Headphones or My Mix?

    Listen through multiple playback systems and compare the track with professionally mixed references. If the same congestion appears everywhere, the mix itself likely needs attention.

    Final Thoughts

    When I hear a muddy mix, I resist the temptation to reach immediately for aggressive EQ. I first examine the arrangement, low-mid buildup, kick and bass relationship, headphone response, reverbs, listening level, and mix translation.

    Understanding why my mix sounds muddy on headphones is really about identifying what is competing for space. Once you know whether the problem comes from auditory masking, unnecessary low frequencies, effects buildup, headphone coloration, or arrangement density, you can make smaller and more intentional corrections.

    The goal is not to remove every low-mid frequency. A strong mix still needs warmth, body, and weight. The real goal is to create enough separation that every important element can perform its role without fighting the rest of the track.

  • How to Make Music Without Any Instruments and Still Sound Original

    How to Make Music Without Any Instruments and Still Sound Original

    A song can begin long before you touch a guitar, piano, or drum kit. It can start with a beat tapped on a table, a melody hummed into your phone, or a simple loop arranged on a laptop. That is why learning how to make music without any instruments has become much more practical for beginners who want to create without investing in traditional gear.

    Today, I can build drums digitally, draw melodies with a mouse, layer my own voice, reshape everyday sounds, and arrange loops or samples into a complete track. The tools are easier to access than ever, but the real skill comes from learning how to turn simple ideas into music that feels structured, intentional, and original.

    What Do You Need to Start Making Music?

    I would keep the setup simple. A laptop gives you more screen space, but a smartphone or tablet can also handle recording, beat-making, MIDI editing, and basic mixing.

    If you want a more detailed starting point, learning how to start music production with just a laptop can help you build your first setup without investing in unnecessary equipment.

    GarageBand offers touch instruments, loops, samples, and Live Loops, while BandLab provides web and mobile production tools, virtual instruments, loops, audio recording, and MIDI editing.

    Headphones are useful, but you do not need an audio interface, MIDI keyboard, studio monitors, or professional microphone to begin.

    Which No-Instrument Production Method Should You Choose?

    Can You Make a Full Song in a DAW?

    Yes. A digital audio workstation, or DAW, works like a virtual studio. You can arrange drum loops, bass parts, synth sounds, vocals, and effects on a timeline.

    GarageBand suits Apple users, while BandLab works across web and mobile. BandLab also supports looping audio and MIDI regions, making it easy to repeat ideas while building an arrangement.

    Start with one drum pattern and one melodic idea instead of filling your project with unnecessary tracks.

    Can You Draw Melodies With a Mouse?

    Can You Draw Melodies With a Mouse

    A MIDI piano roll lets you create music visually. Instead of playing a keyboard, you click or tap notes onto a grid, then change their length, timing, and pitch.

    GarageBand, for example, includes a Piano Roll Editor for adding, editing, transposing, and quantizing MIDI notes.

    Some software also offers scale-related assistance and quantization, which can make experimentation easier even if you do not know much music theory yet.

    Can Your Voice Replace Traditional Instruments?

    Your voice can become melody, rhythm, bass, or texture. Record a rough hum into a phone, then layer harmonies, beatbox percussion, clap, snap, or add body percussion.

    Pitch shifting and effects can transform those recordings. A lowered vocal hum can become a bass-like layer, while chopped vocal recordings can become rhythmic samples.

    This method works particularly well when you have melodies in your head but cannot reproduce them on a keyboard or guitar.

    Can Household Sounds Become Music?

    Almost any clean recording can become a sample.

    A desk tap can work as percussion, keys can create metallic accents, and a cardboard box can produce a kick-like sound. Record the sound with your phone, import it into your DAW, trim it, adjust the pitch, and add effects.

    Using everyday sounds can also help your tracks develop an identity instead of relying entirely on stock sounds.

    How Do Loops and Samples Help Beginners?

    Loops are prerecorded musical sections designed to repeat, while samples can be individual sounds or longer clips. They let you arrange music quickly instead of composing everything from scratch.

    Start with a drum loop, then add a compatible bass or melodic part. After that, edit the material rather than leaving everything untouched. Change the timing, shift the pitch, shorten sections, remove elements, and apply effects.

    BandLab, for example, allows creators to drag, drop, slice, and arrange audio and MIDI loops.

    Check the license attached to external loops or samples before releasing music commercially.

    Can You Make Music in a Browser?

    Can You Make Music in a Browser

    Yes. Browser-based music makers provide one of the easiest ways to experiment without installing full production software.

    Chrome Music Lab’s Song Maker lets users create songs through an interactive browser-based interface, and Chrome Music Lab works across phones, tablets, and laptops.

    These tools are useful for understanding melody, rhythm, repetition, and basic song construction before moving into a professional DAW.

    Can AI Create Music Without Instruments?

    AI music generators provide another option for beginners who want to experiment with musical ideas.

    Platforms such as Suno and Udio can generate music from written descriptions. You can describe the genre, mood, theme, instrumentation, or lyrical concept you want. Suno supports prompt-based song generation, while Udio allows prompts describing elements such as genre, mood, tempo, instruments, and subject matter.

    You can also explore whether you can produce music without an audio interface before deciding whether additional recording hardware is necessary.

    I would treat AI as a creative tool rather than a replacement for production skills. It can help you test ideas quickly, while arrangement, editing, songwriting, and creative judgment still matter.

    How Do You Turn a Short Loop Into a Full Song?

    Many beginners successfully create an eight-bar loop but struggle to turn it into a complete track.

    I solve this by thinking in sections.

    Duplicate your main loop across the timeline. Let the introduction use only a melody or atmospheric sound. Bring drums and bass into the verse. Add more layers to create a stronger chorus. Then remove elements again before rebuilding the energy.

    This simple arrangement technique can make one musical idea feel like a complete song without requiring dozens of new melodies.

    How Can You Make Your First Song Step by Step?

    Start by choosing a tempo and creating or selecting a basic drum pattern.

    Next, add one melody by humming it, drawing MIDI notes, using a virtual instrument, or adapting a loop.

    This step-by-step approach is also useful when you are learning music production from scratch at home, especially when building your first complete track.

    Add a simple bass part underneath it.

    Once your main idea works, duplicate it across the timeline and create an intro, verse, chorus, and ending. Add vocals, household samples, or additional textures only when they improve the track.

    Finally, balance your track volumes, make basic effect adjustments, and export the finished audio.

    For anyone learning how to make music without any instruments, finishing one simple song is usually more valuable than endlessly polishing an unfinished eight-bar loop.

    Do You Need Music Theory to Produce Music?

    Do You Need Music Theory to Produce Music

    No. Music theory is useful, but you do not need to master scales, chords, or notation before creating your first track.

    I prefer learning theory alongside production. Start with tempo, rhythm, scales, chords, and basic song structure. When you encounter a problem in your own music, learn the theory that helps you solve it.

    That approach keeps music theory practical instead of making it another barrier to getting started.

    Frequently Asked Questions 

    1. What is the easiest way to learn how to make music without any instruments?

    Start with a beginner-friendly DAW, create a basic drum pattern, and add one melody through a loop, MIDI piano roll, virtual instrument, or your voice. Finish a short song before worrying about advanced mixing or expensive equipment.

    2. Can I make professional music using only a laptop?

    Yes. A laptop can handle virtual instruments, MIDI, loops, vocal recording, arrangement, mixing, and exporting. Additional equipment can improve your workflow later, but it is not necessary when you are learning.

    3. Can I make a song using only my phone?

    Yes. Mobile music production apps can record vocals, trigger loops, edit MIDI, program beats, arrange song sections, and mix tracks. A smartphone can provide enough tools to learn the fundamentals of digital music production.

    4. Do I Need to Know Piano to Use Virtual Instruments?

    No. You can draw notes directly into a piano roll using a mouse or touchscreen. Learning basic keyboard layout later may make production faster, but it is not required when you are starting.

    Final Takeaway

    I would not wait until I owned the “right” instrument or studio setup before creating music. Modern production gives you many ways to turn an idea into sound.

    You can hum melodies, program drums, draw MIDI notes, arrange loops, manipulate samples, record household objects, create music in a browser, or experiment with AI-assisted production.

    I would start small and focus on completing one track. Once you understand rhythm, melody, arrangement, and basic mixing, equipment becomes an upgrade rather than a requirement.

  • How Many Layers Should a Synth Have Before It Sounds Too Big?

    How Many Layers Should a Synth Have Before It Sounds Too Big?

    A synth can sound thin with one layer, but it can also lose clarity fast when too many sounds compete for the same space. I have found that the biggest mistake in synth layering is treating extra layers as an automatic upgrade. More tracks can increase volume and width, but they can also create frequency masking, phase problems, and a crowded mix.

    So, how many layers should a synth have before the sound becomes excessive? In most productions, I treat two to four well-defined layers as a practical range. One layer may be enough for a detailed patch, while more complex EDM, cinematic, or festival-style sounds may need additional support. The key is to make every layer contribute something different, whether that is low-end weight, midrange character, transient attack, stereo width, or high-frequency detail.

    For me, the smartest approach is to build outward from one strong core sound rather than stacking presets from the start. That makes it much easier to hear what the synth actually needs and prevents unnecessary layers from weakening the mix.

    How Many Synth Layers Do You Actually Need?

    There is no fixed number because modern synthesizers can already create extremely complex sounds inside a single patch. One wavetable or subtractive synth preset may contain multiple oscillators, unison voices, noise, modulation, filters, distortion, stereo processing, and effects.

    That means one synth can sometimes provide everything a part needs.

    I normally begin with one patch and listen for what is missing. Does it need more low-end weight? More midrange character? More attack? More brightness? More stereo width?

    Only then do I add another layer.

    Two to four layers work well in many situations because they allow enough separation between different sonic functions without making frequency management unnecessarily complicated.

    Why Does the Classic Three-Layer Synth Method Work?

    One of the most useful synth layering approaches divides the sound into three functional areas: foundation, body, and air or bite.

    Foundation Layer: Low-End Weight and Power

    The foundation handles the lower or low-mid frequencies. Its purpose is to give the synth weight and stop the overall sound from feeling thin.

    For a bass, this might be a clean sub or controlled mid-bass. For a large chord stack, I might choose a warm lower-register patch that supports the main sound without dominating it.

    I usually keep this layer more centered because excessive stereo width in the lowest frequencies can create translation and mono compatibility problems.

    Body Layer: The Main Musical Character

    Body Layer: The Main Musical Character

    The body carries most of the recognizable musical information.

    This might be a warm detuned saw, an electric-piano-style patch, a wavetable sound, or another synth that clearly communicates the notes and chords.

    If I mute everything else, this layer should usually still make musical sense on its own.

    Air or Bite Layer: Clarity and Definition

    The upper layer gives the sound presence, sparkle, texture, or attack.

    I might use high-passed noise, a sharp pluck, a square-style tone an octave higher, or another brighter patch.

    This layer often sits lower in volume than producers expect. Its purpose is not to overpower the body. It simply helps the synth cut through a busy arrangement.

    How Should You Choose Synth Layers That Do Not Clash?

    Frequency is only one part of good synth layering. I also think about transient energy, stereo width, and texture.

    Two synths can occupy different octaves yet still feel unnecessarily similar. Instead, I prefer contrasting characteristics.

    For example, I may combine a sustained pad with a short pluck. The pluck supplies the initial transient while the pad carries the sustain.

    Stereo width can provide another point of separation. A strong central layer can give the sound focus while a wider detuned layer creates size around it.

    Texture matters too. Combining a clean digital tone with something gritty, noisy, or analog-inspired can create more perceived depth than stacking several versions of the same preset.

    This is why simply duplicating one sound rarely creates genuinely larger sound design. It usually increases volume before it increases character.

    When Is One Synth Layer Enough?

    One layer is enough when the patch already provides the required frequency range, movement, width, and character.

    A detailed wavetable patch, rich analog-style bass, lo-fi keyboard, or carefully programmed lead may not need support.

    I always make this decision while listening to the full mix.

    A synth that sounds slightly thin in isolation can be exactly what an arrangement needs once vocals, bass, drums, guitars, and effects occupy the remaining frequencies.

    Adding layers simply because the soloed sound feels small can quickly create frequency masking.

    When Should You Use Five or More Synth Layers?

    When Should You Use Five or More Synth Layers?

    Five or more layers can make sense in dense styles such as Future Bass, Progressive House, cinematic electronic music, or festival-oriented EDM.

    However, these larger stacks need more disciplined sound selection.

    Each layer should differ by frequency, envelope, octave, stereo position, texture, or tonal function. Otherwise, several large synth patches compete for the same space.

    I also become more aggressive about removing unnecessary frequencies as the stack grows. High-pass and low-pass filtering can help, but I avoid treating EQ as a substitute for good sound selection.

    The bigger the stack becomes, the more attention I give to phase relationships, gain buildup, stereo width, and mono compatibility.

    How Can You Tell When You Have Too Many Synth Layers?

    My favorite test is simple: mute one layer while the whole arrangement is playing.

    If the synth noticeably loses body, definition, width, texture, attack, or another important quality, the layer probably has a reason to stay.

    If I barely notice its removal, I usually delete it.

    Level matching is also important. Adding another synth automatically increases loudness, and louder often sounds better during quick comparisons. I reduce the combined level before deciding whether the new layer actually improves the sound.

    Another warning sign is a synth that sounds huge in solo but becomes undefined when the full production plays. That usually means several layers are fighting for similar frequencies.

    How Do You Prevent Phase Problems When Layering Synths?

    Phase becomes particularly important when I stack similar waveforms or multiple bass sounds. Two layers can interfere with each other and actually reduce low-end power instead of adding it.

    I check the sound in mono, especially for basses and wide lead stacks. If the synth suddenly becomes noticeably weaker, I investigate oscillator phase, stereo effects, timing, and the relationship between the different patches. 

    This becomes even more useful when I am making melodies without music theory, because I can focus on whether the layers support the musical idea clearly instead of relying only on technical complexity.

    Small timing changes or simply choosing a more complementary sound can sometimes solve the problem faster than heavy processing.

    Should Every Synth Layer Play the Same MIDI Notes?

    Not necessarily.

    For a unified lead, I may begin by sending identical MIDI information to several synths. However, octave changes can help separate layers.

    A bright layer one octave higher can add presence without competing directly with the main midrange sound. I may also simplify one supporting layer so it plays fewer notes or only selected harmonies.

    The goal is to make several sounds behave like one instrument rather than several independent instruments competing with each other.

    How Many Layers Should a Lead or Bass Synth Have?

    How Many Layers Should a Lead or Bass Synth Have?

    Lead synths often work well with two to four functional layers. I may use a central body sound, a wider supporting layer, and a brighter attack or texture layer.

    Bass synths frequently require fewer layers. A clean sub, a mid-bass layer, and possibly a higher attack or distortion layer can provide weight while remaining audible on smaller playback systems.

    For both, I focus more on role separation than raw layer count.

    What Is the Best Rule for Synth Layering?

    If someone asks me how many layers a synth should have, my answer is simple: use the fewest layers necessary to create the result you want.

    The two-to-four-layer range is useful because it encourages structure without becoming a restriction.

    A professionally mixed sound does not become impressive because its DAW contains seven synth tracks. It becomes impressive because each component adds something identifiable.

    If I cannot explain what a layer contributes, I probably do not need it.

    Frequently Asked Questions (FAQs)

    1. Are two synth layers enough?

    Yes. Two complementary synths can create a large sound when one provides the main body and the second contributes something different, such as width, attack, brightness, or texture.

    2. Are three layers better than two?

    Not automatically. Three layers work especially well when you can divide the sound into foundation, body, and air or bite, but an unnecessary third layer can make a clean two-layer sound worse.

    3. Can too many synth layers make a mix muddy?

    Yes. Too many overlapping sounds can cause frequency masking, gain buildup, phase cancellation, stereo conflicts, and reduced clarity.

    4. Should I EQ every synth layer?

    I only EQ when necessary. Choosing complementary sounds first usually creates cleaner results than stacking similar patches and trying to separate everything afterward with aggressive EQ.

    5. How many layers do professional producers use?

    There is no universal number. Some professional productions use a single sophisticated synth patch, while elaborate EDM or cinematic sounds may contain several layers.

    Final Thoughts

    For me, the answer to how many layers a synth should have comes down to function rather than quantity. Two to four layers are a useful working range, but one excellent patch can be enough, and complicated sound design can sometimes justify five or more.

    I start with the strongest possible core sound, identify what is missing, and add only the layer that solves that specific problem. By separating frequency roles, transient energy, stereo width, and texture, I can build a larger synth without sacrificing punch or clarity.

    The best synth stacks are not the ones with the most tracks. They are the ones where every layer earns its place.

  • Why Do My Recorded Vocals Sound Muffled? Fix the Real Cause

    Why Do My Recorded Vocals Sound Muffled? Fix the Real Cause

    There is a specific kind of frustration that hits when a vocal sounds strong while you are singing, then suddenly feels dull, buried, or lifeless during playback. I have found that this usually happens because something in the recording chain is removing clarity before the mix even has a chance to help.

    If you are asking why my recorded vocals sound muffled, the real cause may be microphone distance, low-mid buildup, poor room acoustics, off-axis recording, aggressive noise suppression, or frequency masking from other instruments. 

    Instead of blindly adding treble, I prefer to trace where the problem begins and fix that stage first. That approach produces a cleaner, more natural vocal and avoids the harsh, overprocessed sound that often comes from trying to brighten a bad recording with EQ alone.

    What Makes Recorded Vocals Sound Muffled?

    A muffled vocal usually has too much low-mid energy and not enough definition in the frequencies that help words sound clear.

    You may hear people describe the same problem as muddy vocals, boxy vocals, dark vocals, or vocals that lack presence. Although those terms are slightly different, they often overlap.

    The 200 Hz to 500 Hz region commonly contributes to vocal muddiness. However, I would never automatically cut that entire range. Every singer, microphone, and recording space sounds different, so the goal is to locate the actual problem rather than follow a preset blindly.

    Can Standing Too Close to the Microphone Make Vocals Muddy?

    Yes. Microphone distance is one of the first things I check.

    Directional microphones, particularly cardioid models, can produce a stronger bass response when the singer moves very close to the capsule. This is known as the proximity effect.

    A little proximity effect can make a voice sound warm and intimate. Too much can create a boomy, thick, or muddy recording.

    For many home-recording situations, starting around 6 to 12 inches from the microphone can provide a useful reference point. I would still test different distances because the ideal position changes with the microphone, singer, performance style, and room.

    Am I Singing Into the Wrong Part of the Microphone?

    Am I Singing Into the Wrong Part of the Microphone

    Incorrect microphone alignment can remove a surprising amount of clarity.

    With a side-address condenser microphone, recording into the wrong side can make the vocal sound quieter, darker, or distant. With directional microphones, singing too far off-axis can also reduce high-frequency detail.

    I always check the manufacturer’s instructions to confirm where the microphone’s active diaphragm is located.

    Handheld microphones need attention too. Covering or gripping the grille can change the microphone’s intended acoustic behavior and affect tonal balance.

    The best starting position is usually to aim the microphone’s active side toward the mouth, then make small angle adjustments if plosives or harsh consonants become a problem.

    Can an Untreated Room Cause Muffled Vocals?

    Room acoustics can dramatically affect vocal clarity.

    In a small untreated bedroom or home studio, sound reflects from bare walls, ceilings, windows, desks, and other hard surfaces. The microphone captures both the direct voice and those reflections.

    When reflections overlap, some frequencies become stronger while others cancel. The result may sound boxy, hollow, muddy, or distant.

    Soft furnishings, curtains, rugs, acoustic panels, and strategic absorption can help reduce unwanted reflections. However, I would avoid assuming that recording inside a closet full of clothes automatically creates professional results.

    Heavy absorption of high frequencies without proper low-frequency control can sometimes create an overly dull or uneven sound.

    What Frequencies Should I Cut to Fix Muffled Vocals?

    Low-mid buildup between roughly 200 Hz and 500 Hz is a common cause of vocal mud.

    I normally listen first and then use EQ to sweep carefully through that area. If one frequency clearly makes the vocal sound congested, a subtle cut may clean it up.

    A high-pass filter can also remove unnecessary low-frequency rumble. Depending on the voice, filtering somewhere around 80 to 100 Hz may provide a reasonable starting point, but I would adjust by ear rather than treating those numbers as fixed rules.

    If the filter moves too high, the vocal can become thin.

    After cleaning up unwanted lows and low mids, a gentle boost in the presence range or upper frequencies can improve intelligibility. The key is moderation because too much high-frequency boosting can introduce harshness, hiss, and excessive sibilance.

    Can Noise Suppression Make Recorded Vocals Sound Dull?

    Can Noise Suppression Make Recorded Vocals Sound Dull

    This is an increasingly important problem in modern home recording.

    Automatic noise suppression, echo cancellation, voice isolation, automatic gain control, and other audio enhancements can sometimes mistake parts of the voice for unwanted background sound.

    As a result, high-frequency harmonics and subtle vocal detail may disappear.

    This can happen in streaming software, communication apps, operating-system audio settings, conferencing programs, or recording applications.

    If my microphone sounds natural during direct monitoring but the saved recording sounds strangely dull, I check for any automatic processing first.

    Turning off unnecessary noise reduction, echo cancellation, automatic gain control, or enhancement features can help determine whether the software is altering the recording.

    Why Does My Vocal Sound Clear Alone but Muffled in the Mix?

    Sometimes the recording itself is not the problem.

    If a vocal sounds clear when soloed but becomes muddy once the instrumental starts, frequency masking is probably contributing.

    Guitars, keyboards, synths, drums, and other instruments can occupy the same frequency areas that give a vocal definition.

    Instead of continuously boosting the voice, I often create space by slightly reducing competing frequencies in other instruments.

    Level balance matters as well. A vocal that is simply too quiet may appear dull even when its EQ is technically fine.

    Checking how the vocal translates across different playback systems is also important, especially when understanding why does my mix sound different in the car and whether the issue comes from frequency balance, monitoring, or the mix itself.

    For producers working in a home setup, can I mix music with regular headphones is also an important consideration because headphones can help with detailed vocal and instrument balance when the listening environment is not ideal.

    Can Compression and Reverb Make Vocals Sound Muffled?

    Yes. Both can reduce clarity when used too aggressively.

    Heavy compression can raise quiet room reflections, breaths, resonances, and background noise. This may make an already imperfect recording sound even more congested.

    I usually apply compression gradually and compare the processed vocal with the unprocessed version.

    Reverb can create similar problems. Long decay times, dark reverb tones, and high wet levels can push vocals farther behind the rest of the mix. Controlling the room itself is also important before relying heavily on reverb, which is why how to reduce echo in a bedroom studio can help with managing unwanted reflections and creating a cleaner recording environment.

    Filtering unnecessary lows from the reverb and controlling its level can preserve depth without sacrificing vocal intelligibility.

    How Do I Diagnose Muffled Vocals Before Using EQ?

    When someone asks me Why do my recorded vocals sound muffled, I recommend starting with the completely raw recording.

    Disable EQ, compression, reverb, noise reduction, pitch processing, and other plugins.

    If the raw vocal already sounds muffled, investigate the microphone position, room acoustics, recording distance, mic orientation, pop filter, and recording settings.

    If the raw recording sounds clear but becomes dull after processing, turn plugins back on one at a time.

    If it sounds clear solo but muddy in the complete song, focus on frequency masking and mix balance.

    This simple approach prevents unnecessary processing and usually reveals the actual cause much faster.

    Should I Re-Record a Muffled Vocal or Fix It in the Mix?

    Should I Re-Record a Muffled Vocal or Fix It in the Mix

    A slightly dark recording can usually be improved.

    Careful EQ, moderate compression, and better balance may restore enough clarity for the vocal to sit naturally in the song.

    However, severely muffled vocals caused by incorrect microphone positioning, heavy room reflections, or software processing are much harder to repair cleanly.

    Whenever I can reproduce the performance, I would rather re-record a badly compromised vocal than use extreme EQ to rescue it.

    Starting with a cleaner recording almost always makes the final mix easier.

    Frequently Asked Questions 

    1. Why do my vocals sound muffled even with an expensive microphone?

    An expensive microphone cannot compensate for poor positioning, room reflections, proximity effect, incorrect alignment, or unwanted software processing.

    2. What frequency makes vocals sound muddy?

    Excessive energy between approximately 200 Hz and 500 Hz commonly contributes to muddy or boxy vocals, although the exact problem frequency varies from recording to recording.

    3. How far should I stand from my microphone when recording vocals?

    Around 6 to 12 inches can be a useful starting range, but microphone type, voice, room acoustics, and performance style should determine the final distance.

    4. Can a pop filter make vocals sound muffled?

    A normal pop filter should have minimal impact when positioned properly. Thick foam, excessive layers, or material placed too close to the capsule may reduce some high-frequency detail.

    5. Why does my vocal sound muffled after adding plugins?

    Aggressive EQ, compression, noise reduction, echo cancellation, automatic gain control, or dark reverb can reduce clarity even when the original recording sounds good.

    6. Can I fix muddy vocals without re-recording?

    Often, yes. Mild problems may respond well to low-mid EQ cuts, high-pass filtering, better instrument separation, and reduced reverb. Severe recording problems may still require another take.

    Final Thoughts

    Whenever I hear a dull vocal, I try to fix the cause rather than immediately making the recording brighter. Microphone distance, proximity effect, room reflections, off-axis recording, low-mid buildup, software noise suppression, compression, reverb, and frequency masking can all create similar symptoms.

    Understanding why my recorded vocals sound muffled makes it much easier to choose the correct solution. I would start with the raw recording, correct microphone and room problems at the source, and then use subtle EQ and processing only where needed.

    That approach usually gives a cleaner, more natural vocal than trying to solve every problem with aggressive EQ.

  • How to Make Drums Sound Less Robotic and More Alive

    How to Make Drums Sound Less Robotic and More Alive

    A beat can be perfectly quantized, perfectly balanced, and still feel lifeless. I notice this most when every snare lands with the same force, every hi-hat repeats with identical timing, and the entire groove feels locked to a grid instead of played by a person.

    For me, making drums sound less robotic comes down to introducing the right kind of variation. Small changes in timing, velocity, articulation, groove, and ambience can make MIDI drums feel much more natural without sacrificing the tightness that modern production needs.

    Why Do MIDI Drums Sound Robotic?

    Computers reproduce MIDI information with perfect consistency. That precision is useful, but it can also make drums sound artificial.

    A real drummer does not strike every note with identical force. Tiny differences appear in timing, stick position, dynamics, and articulation. Acoustic drums also interact with the room.

    When programmed drums remove all of those variations, listeners often hear the result as mechanical. The same problem can become more obvious when I make overly rigid processing choices, such as trying to EQ while compressing without first deciding what part of the drum sound actually needs correction or control.

    The solution is to introduce controlled differences without destroying the groove.

    How Do I Humanize Drum Timing?

    Perfect quantization is one of the most common causes of robotic drum programming.

    I usually start by deciding which drums should act as rhythmic anchors. In many productions, I keep the kick relatively tight while allowing the snare, hi-hats, and percussion to move slightly.

    Moving a snare a few milliseconds behind the beat can create a relaxed pocket. Shifting it slightly forward can make the rhythm feel more urgent.

    I may also loosen hi-hats and secondary percussion rather than forcing every note directly onto the grid.

    Most major DAWs also offer groove, swing, or humanization controls. Ableton Live, for example, includes Groove Pool tools that let producers apply timing and velocity characteristics to MIDI patterns.

    The important point is moderation. Huge timing changes sound sloppy rather than human.

    How Should I Change Drum Velocity?

    How Should I Change Drum Velocity?

    Velocity creates movement because a real drummer naturally plays some notes harder than others.

    If every MIDI hit uses a velocity of 100, the beat can quickly sound artificial.

    I prefer creating an intentional dynamic hierarchy. Main snare hits remain strong, while ghost notes sit much lower. Hi-hats can alternate between stronger and softer hits, and accents can emphasize important parts of the groove.

    Rapid drum rolls also benefit from velocity variation. When a drummer plays several fast hits, every strike will not necessarily have identical strength because the hand or foot has less time to recover between strokes.

    I avoid completely random velocity changes. Human playing follows patterns, so my velocity choices should follow the musical phrase too.

    How Do I Make Hi-Hats Sound More Natural?

    Repeated hi-hats often reveal robotic programming faster than almost any other drum element.

    I vary both velocity and timing instead of repeating identical hits. I may emphasize certain subdivisions while lowering others to create a recognizable accent pattern.

    Articulation also matters.

    Alternating between closed, slightly open, open, and pedal hi-hats can create movement that one repeated sample cannot provide.

    I also avoid shifting every note randomly. A convincing groove comes from repeatable rhythmic behavior, not uncontrolled variation.

    Should I Use Ghost Notes, Flams, and Drum Articulations?

    Yes, when they fit the arrangement.

    Ghost notes add subtle rhythmic information between stronger snare hits. I keep them quiet so they support the groove instead of competing with the main backbeat.

    Flams and grace notes can also introduce realistic performance detail.

    Drum articulations make an even bigger difference. A real snare sounds different depending on whether the drummer strikes the center, rim, or edge. Cymbals and hi-hats also change dramatically depending on how they are played.

    Multi-sampled virtual drum instruments can recreate these differences using separate articulations and velocity layers.

    Why Do Repeated Drum Samples Sound Artificial?

    Why Do Repeated Drum Samples Sound Artificial?

    Triggering the exact same sample repeatedly creates what producers often call the machine-gun effect.

    Real acoustic drums never produce a perfectly identical waveform on every strike.

    When available, I use round-robin samples, velocity layers, and alternate recordings. Round-robin systems automatically rotate between similar versions of a drum hit.

    Velocity layers go one step further because hard and soft hits use different recordings rather than simply changing the volume of one sample.

    This is especially useful for snares, toms, and rapid hi-hat patterns.

    How Do I Program Drums Like a Real Drummer?

    One of my simplest tests is asking whether an actual drummer could physically play the pattern.

    A drummer has two hands and two feet.

    If a MIDI pattern has a drummer striking a ride cymbal, closed hi-hat, crash, snare, and multiple toms simultaneously, the performance may sound unrealistic even when the individual samples sound excellent.

    I also think about how the drummer’s energy would change throughout the song.

    A verse may use simpler patterns and softer dynamics. A chorus can introduce stronger cymbals, more aggressive kicks, or busier fills.

    This approach makes the drum arrangement respond naturally to the music instead of repeating one static loop.

    How Can I Stop Drum Loops From Sounding Repetitive?

    A four-bar loop may sound convincing by itself but become noticeably artificial when copied across an entire verse.

    I make small changes every few bars.

    Sometimes I remove a kick. Other times I add a ghost note, change a hi-hat opening, adjust an accent, or modify the final beat before a new section.

    I also avoid copying the same fill before every chorus.

    Phrase-level variation makes programmed drums feel as though a musician is responding to the arrangement in real time.

    Should I Add Swing or Use Partial Quantization?

    Swing can help, but it is different from humanization.

    Swing creates a consistent rhythmic displacement between subdivisions. Humanization involves smaller variations in timing, velocity, and articulation.

    I sometimes combine both.

    Partial quantization is another useful option. Instead of moving every note completely onto the grid, I can reduce quantization strength so the performance becomes tighter while keeping some of its original timing.

    This often works better than forcing every note into perfect alignment.

    How Do Room Reverb and Panning Make Drums More Realistic?

    How Do Room Reverb and Panning Make Drums More Realistic?

    Programming is only one part of making drums sound less robotic. Mixing can reinforce the illusion of a real kit.

    Individual drum samples often sound disconnected because they were recorded in different spaces or designed independently.

    I like sending a small amount of several drum elements to one short room reverb. A shared stereo room can make the kit feel as though the drums exist in the same acoustic environment.

    Panning helps too.

    I generally keep the kick and snare close to the center while placing hi-hats slightly to one side and spreading toms and cymbals across the stereo field.

    I avoid extreme panning unless the production style specifically calls for it.

    Can Saturation Make Programmed Drums Sound More Natural?

    Subtle saturation can help overly clean digital drums feel more cohesive.

    I sometimes route the drums to a bus and add gentle tape-style saturation or analog-inspired drive.

    The goal is not obvious distortion. I want enough harmonic character to soften sterile transients and make separate samples feel more connected.

    Parallel saturation can work particularly well because I can blend the processed signal underneath the original drums without losing punch.

    Common Drum Humanization Mistakes

    The biggest mistake I avoid is treating randomization as realism.

    Random timing, random velocity, and random note placement can actually make a performance less convincing.

    Real drummers create repeatable tendencies. They accent particular beats, play slightly ahead or behind the pocket, and change intensity according to the musical section.

    I also avoid humanizing every element equally. Some parts of the beat should remain stable.

    Finally, I do not use every technique at once. A few subtle changes usually create a more natural result than aggressively changing every note.

    Frequently Asked Questions (FAQs)

    1. Why do my MIDI drums sound so robotic?

    MIDI drums often sound robotic because they use identical velocity, perfect timing, repeated samples, and unchanged loops. Adding controlled variation in dynamics, timing, samples, and arrangement usually creates a more natural feel.

    2. How much should I move drums off the grid?

    Small changes are usually enough. Moving selected notes by only a few milliseconds can change the pocket without making the drums sound obviously late or early.

    3. Should every drum have different velocity?

    Not necessarily. I use velocity variation where it supports musical accents, ghost notes, rolls, and section dynamics rather than changing every note randomly.

    4. Should I humanize the kick drum?

    That depends on the genre. In many electronic or modern pop productions, I keep the kick relatively tight while humanizing snares, hats, and percussion more aggressively.

    5. Can reverb make MIDI drums sound more realistic?

    Yes. A subtle shared room reverb can make separate drum samples feel as though they were played in the same physical environment.

    Final Thoughts

    When I work on making drums sound less robotic, I start with performance before reaching for complicated mixing tricks.

    I adjust velocity, timing, quantization, ghost notes, articulations, sample variation, and phrase-level changes first. Then I use room ambience, realistic panning, and subtle saturation to help everything feel like one performance.

    The most useful principle is simple: human drums are not random drums. They contain patterns, accents, physical limitations, dynamic changes, and small imperfections. When I program those details intentionally, MIDI drums can feel much more expressive without losing their punch or precision.

  • Why Do My Beats Sound Empty? The Real Reasons Your Mix Feels Incomplete

    Why Do My Beats Sound Empty? The Real Reasons Your Mix Feels Incomplete

    There is a specific kind of frustration that hits when a beat has drums, bass, chords, and a melody but still sounds like it is missing something. I have run into that problem plenty of times, and the answer is rarely to keep stacking more sounds. 

    When I ask why my beats sound empty, I start by checking whether the mix lacks midrange weight, stereo depth, rhythmic movement, background texture, or simply enough space for a vocal to sit properly.

    What makes this problem tricky is that an empty beat can still look “full” inside a DAW. You may have several tracks playing at once, yet the production can feel thin because those sounds overlap in the same frequencies, leave important ranges uncovered, or fail to create enough contrast and movement. Once I identify what kind of emptiness I am actually hearing, the fix becomes much easier.

    Why Does My Beat Sound Empty Even With Multiple Sounds?

    A beat can contain several tracks and still feel hollow because track count does not determine fullness. What matters is how those sounds occupy frequency, rhythm, stereo space, and time.

    For example, I could have an 808, kick, snare, hi-hat, piano, bell, and lead synth. If most of the melodic instruments and synth layers sit in similar upper frequencies while the middle of the spectrum remains weak, the production can still sound thin.

    I therefore listen for missing frequency ranges before adding another instrument.

    Are Missing Mid-Range Frequencies Making My Beat Sound Thin?

    Are Missing Mid-Range Frequencies Making My Beat Sound Thin?

    The midrange is one of the first areas I inspect when a beat lacks body.

    If my production contains a deep sub-bass and bright hi-hats or melodies but very little useful information between them, the track can feel disconnected. Frequencies roughly between 200 Hz and 2 kHz often contain much of the warmth, body, chords, keys, guitars, synths, and melodic information that helps music feel substantial.

    Warm electric piano, supportive synth pads, chords, guitars, or carefully selected samples can strengthen this area.

    I also avoid aggressive high-pass filtering. Cleaning unnecessary low frequencies can improve clarity, but cutting too much from every instrument strips away low-mid weight and creates a thin-sounding mix.

    Is My Sound Selection Too Thin?

    Good sound selection makes mixing much easier.

    If a kick lacks body, a snare has only a sharp transient, and a synth patch sounds narrow and weak, I cannot expect plugins to completely rebuild them.

    I prefer sounds that already complement each other. If layering is necessary, I give each layer a specific purpose. A snappy snare might gain a deeper body layer, while a sub-bass can sometimes benefit from harmonics that help it translate on phones, laptops, earbuds, and small Bluetooth speakers commonly used by US listeners.

    Light saturation or parallel compression can add density, but I use them after choosing strong source sounds.

    Should I Add More Layers to Make My Beats Sound Fuller?

    Beat layering can help, but random layering usually creates frequency masking.

    If a melody sounds thin, I might add a subtle octave, pad, or supporting texture. If a snare needs weight, I can combine a transient-focused layer with a fuller one. If the bass disappears on smaller speakers, saturation may work better than adding another sub.

    The goal is not to fill every frequency with something loud. Each additional layer needs a job.

    Too many sounds can muddy the low mids, compete with the vocal, and reduce the impact of important elements.

    Does My Beat Need More Stereo Width?

    Does My Beat Need More Stereo Width?

    A flat stereo image can make an otherwise strong beat feel small.

    If every instrument sits directly in the center, I use panning techniques to create separation. Hi-hats can sit slightly off-center, percussion can occupy different positions, and background pads, cymbals, effects, and textures can extend farther across the stereo field.

    I usually keep the kick, 808, and important low-frequency information closer to the center.

    Stereo widening can help selected sounds, but I do not widen everything. Excessive processing can create phase problems and cause elements to disappear when the track plays in mono.

    Can Background Textures Make a Beat Feel More Complete?

    Subtle textures can make a major difference without sounding like additional instruments.

    I may add low-level vinyl crackle, filtered noise, room ambience, rain textures, reversed effects, atmospheric recordings, or other quiet background elements. These sounds can fill tiny gaps between the main musical parts and give the production a more continuous atmosphere.

    The important word is subtle.

    If I clearly hear the texture competing with the melody, it is probably too loud. Background layers should support the production rather than become another focal point.

    Is the Empty Space Actually Meant for Vocals?

    This is one of the most important questions to ask.

    Sometimes I wonder why my beats sound empty because I am comparing an instrumental directly with a commercially released song that already contains lead vocals, doubles, harmonies, ad-libs, and vocal effects.

    A beat made for a rapper or singer needs room.

    If I fill every open space with another synth, countermelody, percussion loop, or effect, the production may become overcrowded as soon as vocals are recorded.

    A simple test is to place a suitable acapella or temporary vocal over the beat. If the instrumental suddenly feels balanced, the apparent emptiness may actually be a well-designed vocal pocket.

    Are My Kick and 808 Fighting Each Other?

    Are My Kick and 808 Fighting Each Other?

    A huge 808 does not automatically make a beat sound full.

    When my kick and bass compete for the same low-frequency space, frequency masking can make both elements feel weaker. I decide which sound should dominate the deepest frequencies and shape the other around it.

    I also pay attention to 808 harmonics. A powerful sub may sound impressive through a large system but disappear through small speakers. Gentle saturation can create audible upper harmonics that improve translation without simply increasing volume.

    Do My Drums Need More Groove and Movement?

    Sometimes the problem is rhythmic rather than tonal.

    Perfectly repeated velocities, identical hi-hat patterns, and predictable drums can make a beat feel lifeless even when the frequency balance is technically good.

    I use velocity variation, swing, ghost notes, percussion, fills, and call-and-response patterns to create movement. Even subtle changes between sections can stop an eight-bar loop from feeling like an unfinished idea.

    Is My Beat Too Dry?

    A completely dry mix can feel disconnected because every element appears to exist at the same distance from the listener.

    Reverb and delay help create depth. Short ambience can give drums a sense of space, while longer delays or reverbs can support selected melodic elements.

    However, I avoid using huge reverbs simply to hide emptiness. Too much reverb pushes sounds backward, removes definition, and can create another kind of hollow mix.

    Can Mixing or Mastering Fix an Empty Beat?

    Mixing can improve frequency balance, stereo width, punch, clarity, depth, and perceived density. Saturation, compression, EQ, reverb, and delay are valuable tools, but they cannot replace a weak arrangement.

    Mastering has even less ability to solve structural problems.

    If my chords lack body, the drum groove feels static, or important frequency ranges are missing, I return to the production before trying to make the master louder.

    I also compare my track with professional reference tracks at a similar listening level. That makes it easier to identify whether I am actually missing low mids, width, movement, ambience, or simply vocal content.

    Frequently Asked Questions (FAQs)

    1. How Do I Make My Beats Sound Fuller Without Making Them Muddy?

    I add only what the beat actually needs. Better sound selection, balanced mids, purposeful layering, stereo width, subtle textures, and controlled ambience usually work better than stacking more instruments.

    2. Why Does My Beat Sound Thin on Small Speakers?

    Your bass may rely heavily on sub frequencies that small speakers cannot reproduce. Adding controlled harmonics through saturation can help the bass remain audible without significantly increasing its level.

    3. Should I Layer Every Sound in My Beat?

    No. I layer only when another sound performs a useful role. Excessive layering can cause frequency masking, mud, phase issues, and competition with vocals.

    4. Why Do Professional Beats Sound Wider?

    Professional productions often use careful panning, stereo recordings, effects, delays, supporting layers, and controlled width while keeping important low-frequency elements stable near the center.

    5. Can an Instrumental Sound Empty Because It Needs Vocals?

    Absolutely. Beats intended for singers or rappers often contain deliberate space so the vocal can become the focal point. Filling every opening can make the finished song overcrowded.

    Final Thoughts

    When I hear myself asking Why do my beats sound empty, I first diagnose the type of emptiness instead of immediately adding another instrument. I check my frequency balance, harmonic balance, midrange, arrangement, sound selection, kick and 808 relationship, drum groove, stereo width, background textures, ambience, and expected vocal space.

    A fuller beat is not necessarily a busier beat. The strongest productions give every element a clear purpose while preserving enough space for contrast and vocals. Once I started thinking in terms of balance rather than track count, my beats became fuller, cleaner, wider, and much easier to finish.

  • How Long Should a Beat Intro Be Before the Drop Hits?

    How Long Should a Beat Intro Be Before the Drop Hits?

    A beat can lose momentum before the artist even starts if the intro drags on too long. I have found that the best openings create interest fast, establish the mood, and then move naturally into the verse or hook without wasting bars. That is where how long a beat intro should be becomes an important production decision rather than just a matter of counting measures.

    For most modern hip-hop, trap, drill, and R&B beats, I usually work within 4 to 8 bars. Depending on the BPM, that often falls somewhere around 5 to 15 seconds. Pop intros can be even shorter, while DJ-focused electronic tracks may need significantly more time for transitions and beatmatching.

    The key is not simply making the intro short. It is making every second feel necessary.

    How Many Bars Should a Beat Intro Be?

    For most beats designed for rappers and singers, I prefer 4 or 8 bars.

    A four-bar intro moves quickly and works well when I want the artist to enter almost immediately. An eight-bar intro gives me more room to establish a melody, sample, chord progression, atmosphere, or producer tag before the full beat arrives.

    I do not treat these numbers as strict rules. Instead, I think about what the intro needs to accomplish. If the musical idea is already obvious after four bars, adding another four identical bars rarely improves the track.

    How Long Should a Hip-Hop or Rap Beat Intro Be?

    For modern hip-hop and rap beats, 4 to 8 bars is usually the most practical range.

    That often equals approximately 8 to 15 seconds, although the exact time changes with tempo. This gives a rapper enough time to catch the rhythm, deliver an ad-lib or spoken line, or prepare for the first verse.

    When I create a more cinematic or sample-heavy beat, I may use a longer intro. However, for a modern streaming-oriented rap song, I usually avoid letting the instrumental run too long without meaningful change.

    How Long Should a Trap or Drill Intro Be?

    How Long Should a Trap or Drill Intro Be?

    Trap and drill beats also work well with 4 to 8 bars.

    I often start with the main melody while holding back the kick, 808, or full hi-hat pattern. When the verse begins, I bring in the heavier low end and drums. That difference in energy makes the drop feel much bigger without requiring dozens of extra elements.

    For drill, I may use atmospheric pads, dark piano notes, vocal textures, or filtered melodies during the opening. The key is to build tension instead of simply repeating the same loop.

    How Long Should a Pop Beat Intro Be?

    Pop usually benefits from an even shorter opening.

    A 2- to 4-bar intro can be enough, especially when the vocalist is the main focus. In many current pop arrangements, the vocals, hook, or central musical idea enters within the first several seconds.

    That approach makes sense for streaming platforms because listeners can decide quickly whether they want to continue with a track. I would rather introduce the strongest idea early than make the audience wait through a long instrumental opening with little development.

    How Long Should an R&B Beat Intro Be?

    For R&B, I often prefer 4 to 8 bars, although an eight-bar opening can work particularly well when the production depends on atmosphere.

    Smooth chords, guitar textures, ambient effects, vocal chops, or slow melodic phrases may need a little more space before the singer enters.

    At the same time, modern R&B does not require a long intro. If the vocal melody carries most of the emotion, starting the singer after two or four bars can make the track feel more immediate.

    Why Can EDM and Club Intros Be Much Longer?

    Electronic and club-oriented music follows different arrangement rules.

    A DJ-focused track may use a 16- to 32-bar intro that lasts 30 to 60 seconds or more. DJs often need those longer sections for beatmatching, EQ adjustments, and smooth transitions between songs.

    That does not mean every electronic song needs a long opening. If I am producing primarily for Spotify, Apple Music, YouTube, or casual listening rather than DJ sets, I can usually shorten the arrangement and reach the main musical section much faster.

    How Long Should a Sync Licensing Intro Be?

    How Long Should a Sync Licensing Intro Be?

    Music created for TV, film, advertising, and other sync licensing uses often needs to establish its mood almost immediately.

    An intro may be only one or two bars, sometimes around three to five seconds. Editors often need a track that communicates its emotional direction quickly.

    A short drum fill, sound effect, chord hit, or melodic phrase can be enough before the main theme begins.

    Should I Measure Beat Intros in Bars or Seconds?

    I prefer bars when I am producing because bars follow the musical arrangement more naturally.

    Seconds can still help me understand how long a listener actually waits before something important happens, but BPM changes everything.

    An eight-bar intro at a slow tempo can feel considerably longer than eight bars at a fast tempo. That is why I use bars for arranging verses, hooks, bridges, drops, and transitions while also checking the total time in seconds.

    Does BPM Change the Ideal Beat Intro Length?

    Yes. Tempo directly affects how long a fixed number of bars lasts.

    If I am working on a slower beat, eight bars may start to feel lengthy. In that case, I may shorten the intro to four bars or introduce a new element halfway through.

    At faster tempos, eight bars can pass much more quickly.

    Rather than choosing a number before listening, I play the arrangement from the beginning and ask whether the listener has enough information to understand the vibe without getting bored.

    What Should Happen During a Beat Intro?

    A strong intro should reveal part of the musical identity without giving away the complete arrangement.

    I often start with a melody, sample, chord progression, guitar line, or stripped-back rhythm. Then I save the 808, bass, heavier drums, or additional layers for the verse or hook.

    Filtering can also help. I might low-pass the melody at first and gradually open the filter as the main section approaches. Reverb, automation, risers, reverse cymbals, vocal effects, and short pauses can also add movement.

    The producer tag fits naturally here as well. Placing it before the full drums enter can make it easier to hear without disrupting the artist.

    When Is a Beat Intro Too Long?

    For a typical non-club track, I become cautious once the intro moves beyond roughly 15 seconds.

    That does not automatically make it too long. A longer opening can work if it introduces something special or develops continuously. The problem starts when the listener hears the same loop repeatedly while waiting for the song to begin.

    When an intro feels slow, I often cut it in half and listen again. If the track suddenly feels more exciting, the shorter arrangement was probably the better choice.

    How Do I Transition From the Intro Into the Verse?

    How Do I Transition From the Intro Into the Verse?

    A strong transition does not always require adding more sounds. Sometimes subtraction creates more impact.

    I may briefly remove the melody, mute the drums for half a beat, create a short silence, or use a reverse cymbal immediately before the verse. Drum fills, risers, filtered effects, and vocal chops can also work. Even when starting music production with laptop as the main setup, these simple arrangement techniques can make a beat sound far more polished without requiring expensive gear.

    The goal is contrast. If I hold back the 808 and kick during the intro, simply bringing them in at the start of the verse can make the beat feel dramatically bigger.

    Frequently Asked Questions (FAQs)

    1. Is 8 bars too long for a beat intro?

    No. Eight bars is a common intro length for hip-hop, trap, drill, and R&B, especially when the arrangement changes within those eight bars.

    2. Can a beat intro be only 2 bars?

    Yes. Two-bar intros work well for pop, rap, and streaming-focused songs where the vocalist or main hook needs to enter quickly.

    3. Is a 16-bar intro too long for hip-hop?

    It can feel long if the instrumental does not develop. However, cinematic, atmospheric, or sample-driven beats can support 16 bars when new elements keep the listener engaged.

    4. Should drums play during the intro?

    They can, but I often hold back the kick, 808, or full drum pattern. This creates a stronger contrast when the first verse or hook begins.

    5. How long should a beat intro be for streaming?

    For most streaming-focused music, I prefer keeping the opening concise and getting to the vocals or main musical idea quickly. Four bars often works well, although genre and BPM still matter.

    Final Thoughts

    When someone asks me how long a beat intro should be, I usually recommend starting with 4 to 8 bars for hip-hop, trap, drill, and R&B, 2 to 4 bars for many pop tracks, and 16 to 32 bars for DJ-focused electronic music.

    I also pay attention to BPM, streaming behavior, vocal timing, and how much the arrangement changes. A short intro can feel powerful when it gets straight to the point, while a longer intro can work when every section adds tension or atmosphere.

    My simplest rule is this: never keep an intro long just because the timeline looks empty. Every bar should create anticipation, establish the mood, or prepare the listener for what comes next.