Blog

  • From Bedroom Beginner to Producer: How to Learn Music Production From Scratch at Home

    From Bedroom Beginner to Producer: How to Learn Music Production From Scratch at Home

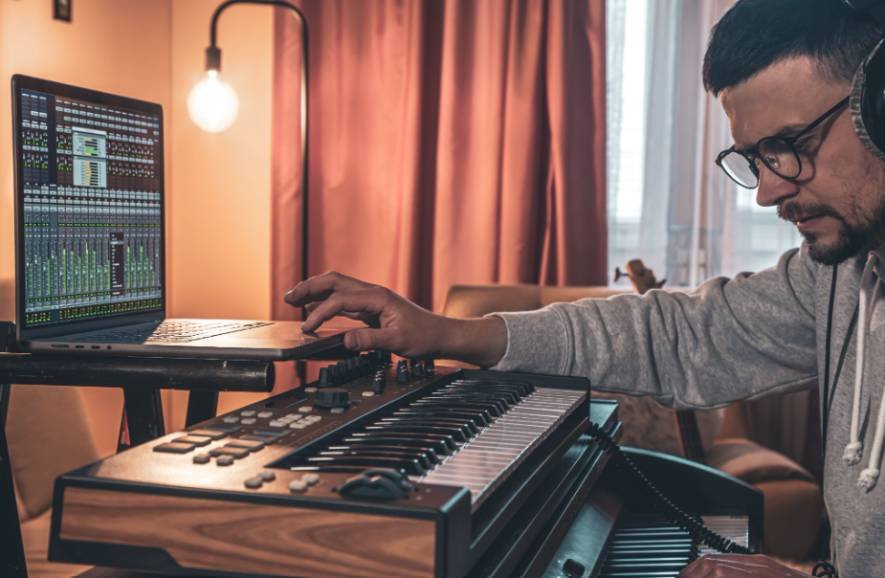
    The first time I opened a DAW, the screen looked more like a control panel than a place to make music. Tracks, plugins, MIDI, waveforms, effects, and dozens of unfamiliar buttons made the whole process feel more technical than creative. But music production becomes much easier once I stop trying to understand everything at once and start learning one practical skill at a time.

    For anyone figuring out how to learn music production from scratch at home, the best starting point is not buying expensive studio gear or downloading hundreds of plugins. It is building a simple setup, choosing one DAW, learning how rhythm and song structure work, and completing small projects consistently.

    A laptop, headphones, basic software, and regular practice can take a beginner surprisingly far. The goal is to turn that simple setup into a working creative space where each finished track teaches the next skill.

    What Do I Need to Start Producing Music at Home?

    The minimum setup is surprisingly simple. I need a capable computer or laptop, a digital audio workstation, and dependable headphones.

    If you are starting with minimal equipment, learning how to start music production with just a laptop can help you understand what you actually need before investing in additional studio gear.

    For modern music production, a computer with around 8GB to 16GB of RAM can provide a practical starting point, although demanding virtual instruments and large projects may benefit from more processing power and memory.

    The DAW becomes the center of the home studio. It is where I record audio, program drums, create MIDI parts, arrange songs, add effects, mix tracks, and export finished music.

    GarageBand offers an accessible starting point for Mac users, while Reaper provides a flexible recording and production environment. FL Studio is popular for beat making and electronic production, while Ableton Live is widely used for electronic music, songwriting, sampling, and live performance.

    The most important decision is not finding the supposedly perfect DAW. It is choosing one and staying with it long enough to understand the workflow.

    Good studio headphones are also valuable, especially when I cannot use speakers loudly in an apartment or untreated room. Closed-back headphones can also help when recording vocals because they reduce sound leaking into the microphone.

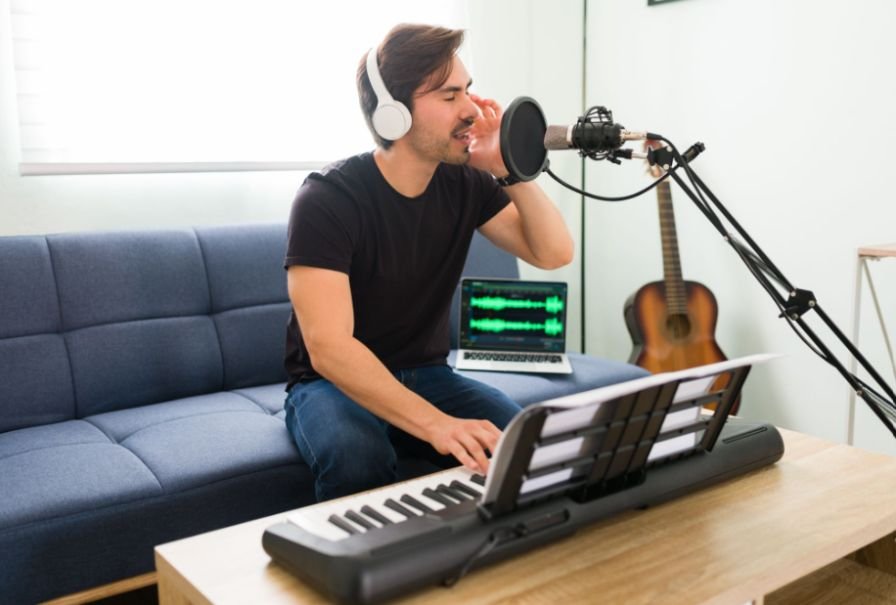
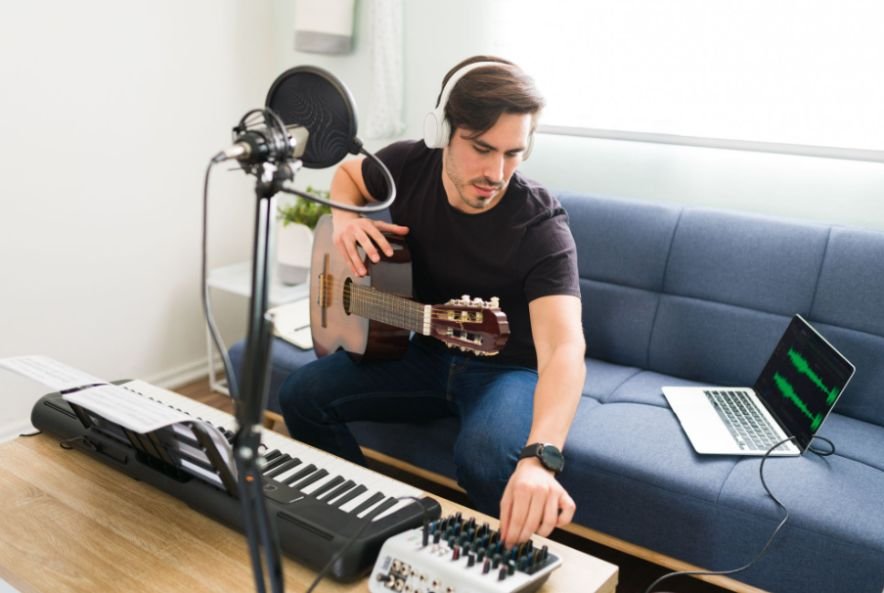
    A MIDI keyboard can make playing chords, bass lines, and melodies easier, but it is optional. If I want to record vocals, guitar, or other instruments, I can later add an audio interface and microphone.

    What Is the Best Order to Learn Music Production?
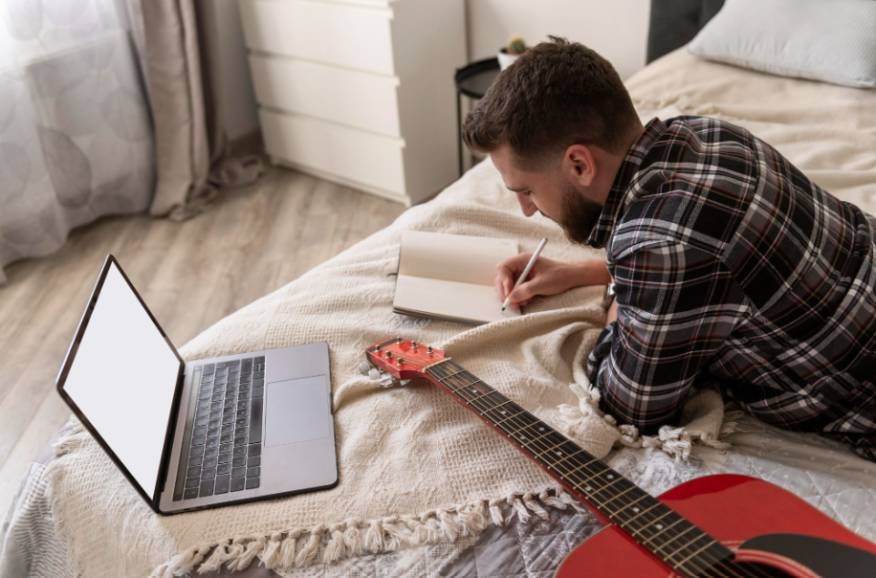
    What Is the Best Order to Learn Music Production

    I would learn production in a clear sequence rather than jumping between random tutorials.

    First, I would learn my DAW. Next, I would understand rhythm, basic music theory, MIDI, audio, and samples. After that, I would practice recreating existing songs, arranging complete tracks, and using basic mixing tools. Finally, I would develop my ears, improve sound selection, explore sound design, and learn more advanced mixing and mastering.

    As you explore different artists and styles, understanding what indie means in music can also give you useful context for how independent artists approach production and release their work.

    Following this order prevents me from spending weeks learning advanced compression techniques before I can even arrange a complete song.

    How Should I Learn My DAW as a Complete Beginner?

    My first goal should be navigating the DAW (A digital audio workstation) without constantly searching for basic controls.

    I would learn how to create tracks, use the timeline, load virtual instruments, import audio samples, record MIDI, edit notes in the piano roll, adjust track volume, add stock plugins, automate parameters, and export an audio file.

    Stock plugins are more than enough at this stage. Buying large plugin collections before understanding EQ, compression, reverb, and delay often creates more confusion rather than better music.

    I would also learn keyboard shortcuts gradually. Faster navigation gives me more time to stay creative instead of fighting the software.

    How Much Music Theory Should a Beginner Producer Learn?

    I do not need to become a trained pianist or study advanced harmony before making music.

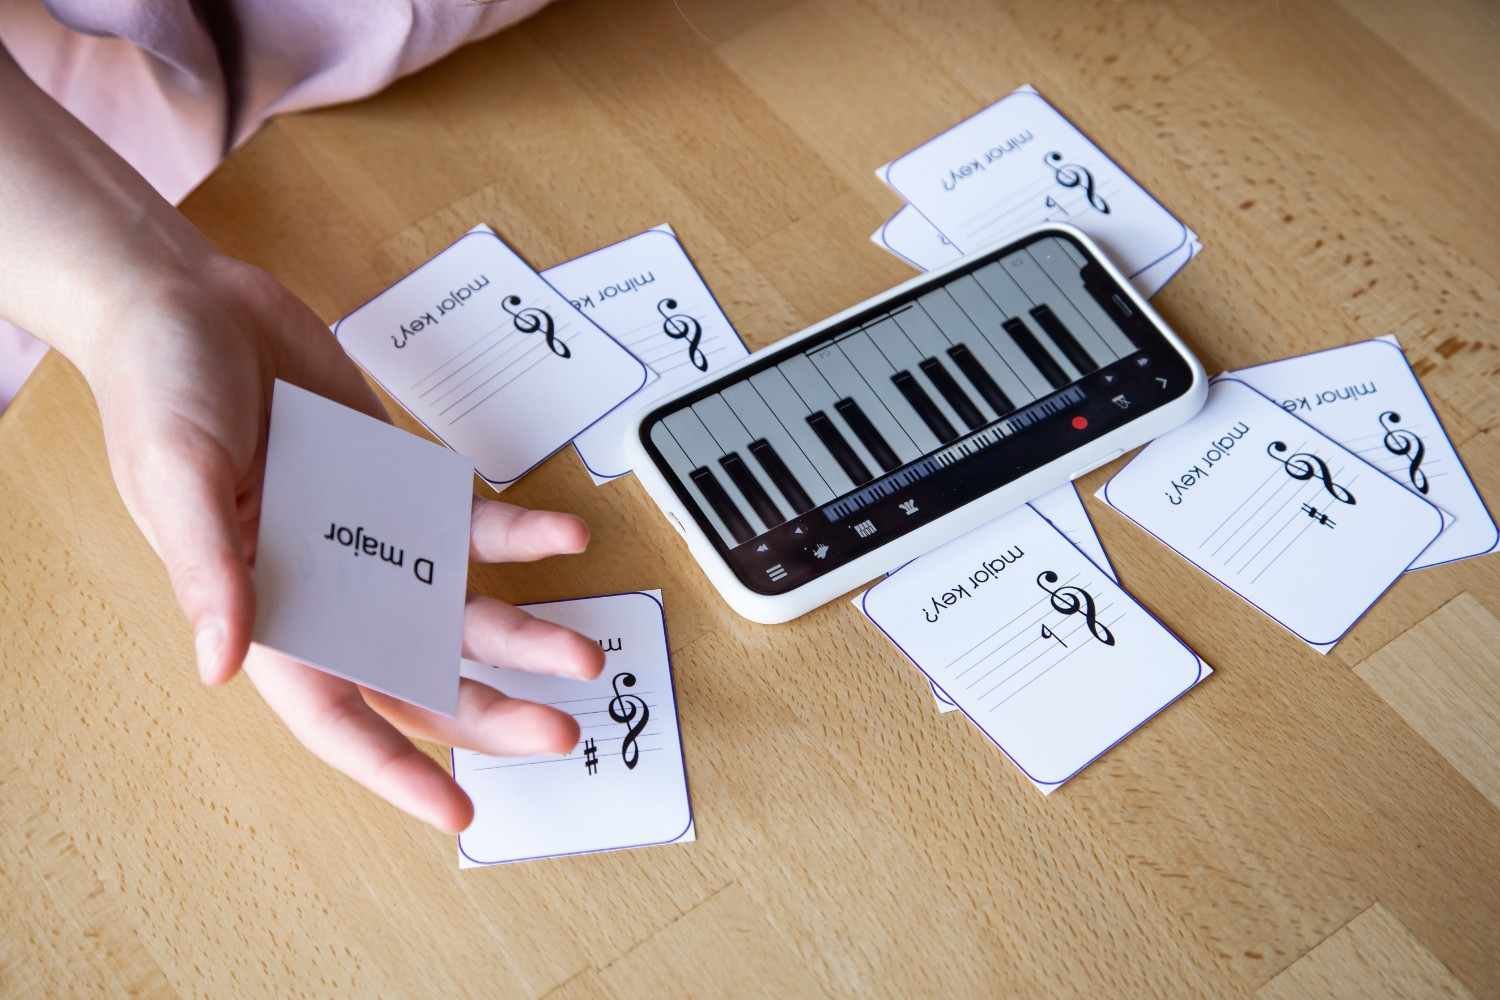
    Basic music theory is enough to remove much of the guesswork. I would start with tempo, rhythm, musical keys, major and minor scales, chords, chord progressions, melodies, and basic song structure.

    Once I understand which notes belong to a key, writing melodies becomes easier. Once I understand simple chords, creating harmonic progressions becomes less random.

    The fastest way to make theory useful is to apply it immediately inside the DAW rather than studying it only from a textbook.

    Should I Reverse Engineer Songs to Learn Music Production Faster?

    Yes. Recreating parts of existing songs is one of the most practical learning exercises available.

    I can import a song I like into my DAW as a reference track and listen carefully to its tempo, drum pattern, bass line, chords, transitions, and arrangement.

    If the song is being developed for an independent release, understanding curated user playlists vs editorial pitching can also help you think about how the finished track may be promoted after production.

    Then I can attempt to recreate those elements with basic virtual instruments and samples.

    The purpose is not to copy or release somebody else’s music. I am studying how professional songs are constructed.

    Reverse engineering also teaches me how intros develop, when choruses arrive, how instruments enter and leave, and how energy changes throughout a track. These lessons can be harder to understand through theory alone.

    How Do I Build a Complete Song Instead of an Eight-Bar Loop?

    How Do I Build a Complete Song Instead of an Eight-Bar Loop

    Many beginners become good at creating loops but struggle to finish songs.

    Learning how to make music without any instruments can also help beginners build complete songs using MIDI, samples, loops, virtual instruments, and other digital production tools.

    I would begin with rhythm by building the drums and bass. Then I would introduce harmonic elements such as chords, pads, or keys. After establishing that foundation, I could add melodies, leads, vocals, samples, and additional textures.

    Next, I would turn the loop into an arrangement.

    Depending on the genre, the structure might include an intro, verse, pre-chorus, chorus, bridge, breakdown, buildup, drop, or outro. Not every track needs every section.

    The goal is movement. Different parts of the song should create changes in energy, density, and emotion.

    Finishing imperfect music is far more educational than repeatedly polishing the same eight bars.

    When Should I Start Learning Mixing?

    I would start learning basic mixing after I can create a reasonably complete arrangement.

    The first mixing tool I would use is volume. Many problems can be solved simply by making one element quieter or louder.

    Next comes panning, which helps position sounds across the stereo field. From there, I can begin learning EQ to manage frequencies, compression to control dynamics, reverb to create space, delay to add repeats and depth, and automation to make parameters change throughout the song.

    I would avoid assuming that professional mixing requires dozens of plugins. Good arrangement, sound selection, recording, and volume balance often matter more.

    How Do Reference Tracks Improve My Mixing and Ear Training?

    Reference tracks help me understand what professional production sounds like within the genre I am creating.

    I can compare my track with professionally released music and listen for differences in bass level, kick impact, vocal placement, brightness, stereo width, dynamics, and overall energy.

    This develops critical listening skills.

    Over time, ear training helps me recognize muddy low frequencies, harsh highs, weak drums, buried vocals, excessive reverb, and other production problems much faster.

    How Can I Learn Without Watching Tutorials All Day?

    Tutorials become useful when they solve a real problem.

    Instead of watching hours of unrelated music production videos, I would open my DAW and start creating. When I encounter something I cannot solve, I can search specifically for that problem.

    For example, if my kick and bass sound muddy together, I can research frequency balance, EQ, sidechain compression, and arrangement techniques that address that issue.

    This problem-based learning approach immediately connects information with practical experience.

    What Should My First 30 Days of Music Production Look Like?
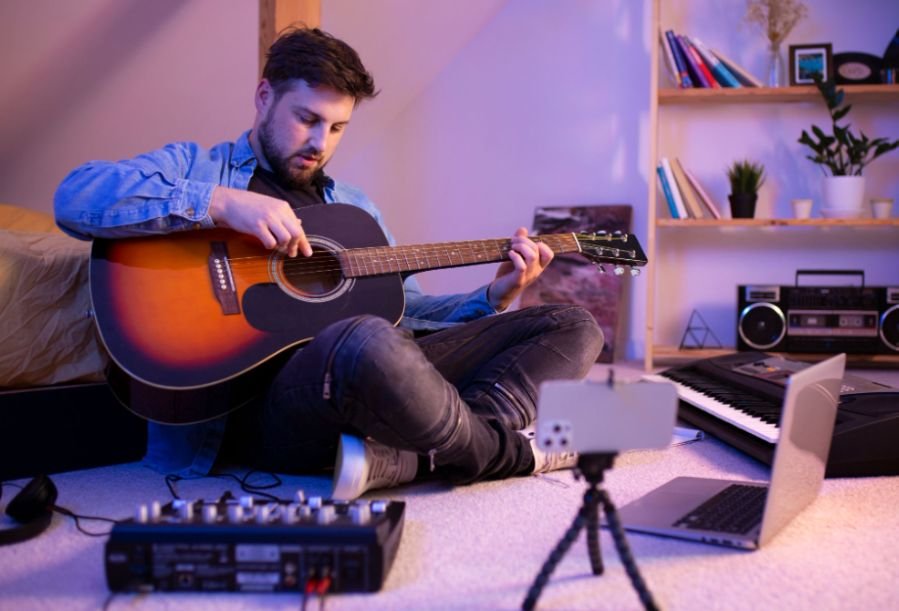
    What Should My First 30 Days of Music Production Look Like

    During the first week, I would focus almost entirely on learning the DAW. I would create tracks, load instruments, program basic drums, experiment with MIDI, use samples, and export small projects.

    During week two, I would practice beats, bass lines, chord progressions, melodies, and basic music theory. I would also begin recreating simple parts of songs I enjoy.

    Week three would focus on turning short ideas into complete arrangements while introducing basic EQ, compression, panning, reverb, and volume balancing.

    During week four, I would finish and export at least one complete track.

    It does not need to sound professional. Completing the project teaches me arrangement, decision-making, mixing, workflow, and problem-solving in a way unfinished loops cannot.

    What Beginner Music Production Mistakes Should I Avoid?

    One common mistake is constantly switching DAWs because another producer uses different software. Another is buying expensive plugins before understanding stock tools.

    I would also avoid comparing my first few tracks with commercially mastered releases created by experienced producers, engineers, and musicians.

    Finally, I would not expect mastering to repair weak production. Mastering is the final preparation of an already strong mix. It cannot completely fix poor sound selection, weak arrangement, badly recorded vocals, or major balance problems.

    Frequently Asked Questions 

    1. Can I Produce Music Without Playing an Instrument?

    Yes. MIDI programming, piano rolls, samples, loops, virtual instruments, and step sequencers allow me to produce music without traditional instrumental skills.

    2. Do I Need an Audio Interface to Start Producing Music?

    Not necessarily. I mainly need an audio interface when I want to connect microphones, guitars, studio monitors, or other external audio equipment.

    3. Can I Make Professional Music Using Only Headphones?

    Headphones can take a beginner surprisingly far. I should learn how my headphones sound and regularly compare my mixes with professional reference tracks. Studio monitors and acoustic treatment can become useful upgrades later.

    4. How Many Hours Should a Beginner Practice Music Production?

    Consistency matters more than occasional marathon sessions. Even 30 to 60 focused minutes several times per week can produce noticeable improvement when I spend most of that time actively creating.

    5. What Is the Fastest Way to Understand How to Learn Music Production From Scratch at Home?

    The fastest approach is to choose one DAW, learn its essential tools, practice rhythm and basic theory, understand MIDI and audio, recreate simple songs, arrange complete tracks, learn basic mixing, and finish projects consistently.

    Turning Beginner Practice Into Real Production Skills

    When I think about learning music production from scratch at home, I would not measure progress by the number of tutorials I have watched, plugins I own, or pieces of studio equipment on my desk.

    I would measure progress by finished music.

    Every completed track reveals something new about arrangement, rhythm, sound selection, mixing, recording, or songwriting. My next track allows me to correct those weaknesses.

    A computer, DAW, headphones, consistent practice, and the willingness to finish imperfect projects are enough to begin. The studio can improve later. The most important step is opening the DAW and making music regularly.
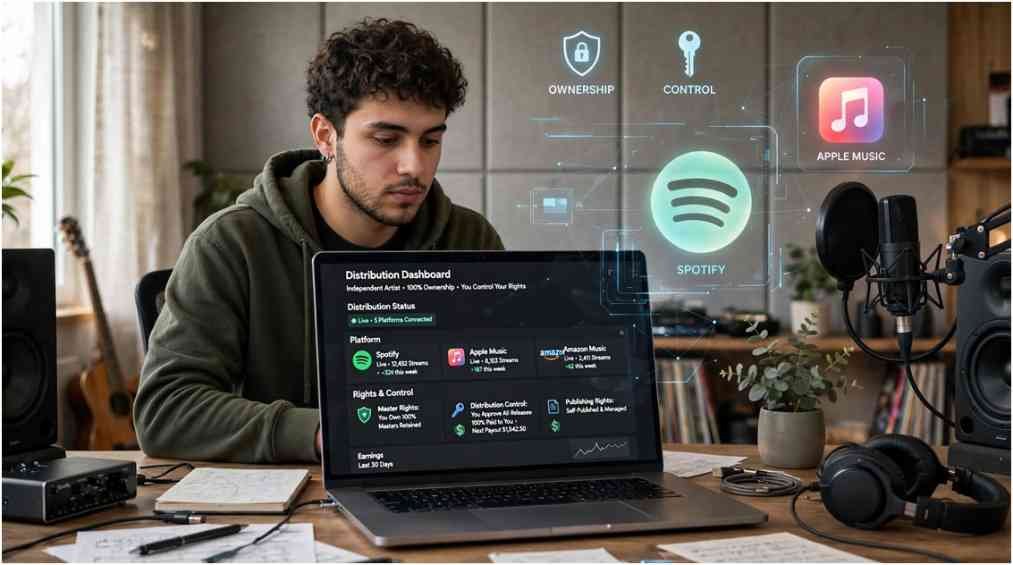
  • What Rights Do Independent Artists Own Under Distribution Deals?

    What Rights Do Independent Artists Own Under Distribution Deals?

    I learned the difference between owning music and controlling it the hard way. Early in my music career, I delivered a single through an aggregator, assuming “100% ownership” protected me everywhere. Two weeks later, my own YouTube channel received an automated copyright strike on my background instrumental.

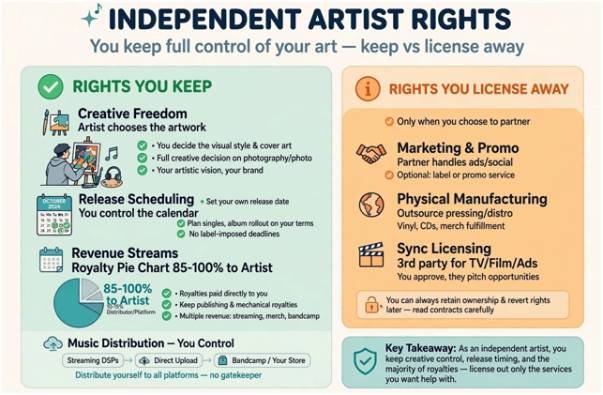
    Understanding what rights do independent artists own under distribution deals separates artists who build long-term catalogs from those who run into unexpected legal blocks. Under standard distribution agreements, you retain 100% ownership of your intellectual property. However, distributors require an exclusive limited license to exploit your tracks on streaming stores.

    The Core Legal Separation: Masters vs. Compositions

    The Core Legal Separation: Masters vs. Compositions

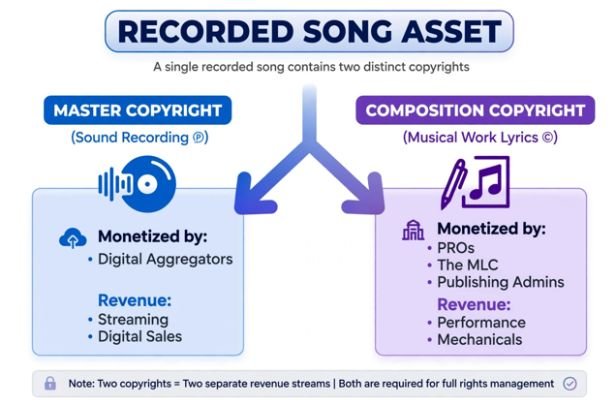
    Every recorded track consists of two separate copyrights recognized by law. When you sign a distribution deal, the platform only operates on the sound recording, not the musical composition. 

    If you plan to scale your catalog or start an independent record label, you must know which copyrights you retain, which rights you license out, and where the boundaries sit.

                                ┌─────────────────────────────────┐

                                 │       Recorded Song Asset       │

                                 └────────────────┬────────────────┘

                                                  │

                          ┌───────────────────────┴───────────────────────┐

                          ▼                                               ▼

             ┌─────────────────────────┐                     ┌─────────────────────────┐

             │    Master Copyright     │                     │  Composition Copyright  │

             │   (Sound Recording ℗)   │                     │  (Musical Work/Lyrics ©)│

             └────────────┬────────────┘                     └────────────┬────────────┘

                          │                                               │

             Monetized by: Digital Aggregators               Monetized by: PROs, The MLC, Pub Admins

             Revenue: Streaming, digital sales               Revenue: Performance, mechanicals

    Sound Recording Rights (The Master Copyright)

    Under federal copyright law, as detailed by the U.S. Copyright Office, sound recordings (marked by the $\mathbb{P}$ symbol) embody the fixed audio performance.

    When you release through DIY distributors, you remain the sole copyright owner of these audio recordings. You hold the exclusive right to duplicate, sell, and license that specific recording. The distributor receives a non-exclusive or release-exclusive right to distribute that audio file to digital service providers (DSPs) like Spotify and Apple Music.

    Underlying Composition Rights (The Publishing Share)

    The composition copyright (marked by the $\mathbb{C}$ symbol) protects the underlying melody, harmony, and lyrics. Standard distributors have zero claim to your songwriting.

    Distributors do not register your songs with global mechanical collection societies or pitch your catalog for sync opportunities. To collect your mechanical royalties from streaming in the United States, you must register through The Mechanical Licensing Collective (The MLC).

    International mechanicals and public performance royalties require separate registration with your domestic Performing Rights Organization (ASCAP, BMI, SESAC) or a dedicated publishing administrator.

    Operational Rights You Keep (And What You License Away)

    Operational Rights You Keep (And What You License Away)

    Retaining legal title to a work does not mean your distributor has no power over its digital footprint. You grant distributors specific administrative rights to do their jobs.

    Creative Freedom and Release Scheduling

    You retain complete creative autonomy. You choose your artwork, decide track orders, pick release dates, and pull singles off the market. Unlike major-label recording contracts, distributors cannot reject a mix because it lacks radio potential or mandate revisions to your visual assets.

    Revenue Streams and Royalty Distribution

    Distributors do not take your base rights, but their pricing models dictate your net independent artist revenue. Some platforms charge an upfront annual fee and pass through 100% of sales, while others charge zero upfront fees in exchange for a 9% to 15% backend commission.

    Non-interactive digital performance royalties from platforms like SiriusXM or Pandora do not route through your distributor; those collect directly through SoundExchange.

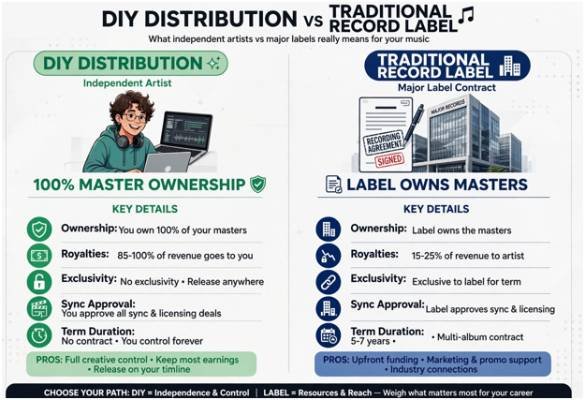
    Rights Comparison: DIY Distribution vs. Traditional Record Label Deals

    Rights Comparison: DIY Distribution vs. Traditional Record Label Deals

    The fundamental difference between self-releasing and signing with an established record label comes down to whether you assign your property or license a service.

    Feature DIY Distribution Deal Traditional Record Label Contract
    Master Ownership ($\mathbb{P}$) 100% retained by the artist Transferred or assigned to the label (“Work for Hire”)
    Composition Rights ($\mathbb{C}$) 100% retained by the songwriter Often pressured into co-publishing agreements
    Streaming Royalties 85% to 100% paid directly to artist 15% to 25% paid after full expense recoupment
    Exclusivity Limited to uploaded tracks Strict personal exclusivity across all output
    Sync Approval Artist retains direct approval Label controls sync and licensing terms
    Term Duration At-will or short renewal terms Multi-album or fixed multi-year commitments

    Hidden Traps in Modern Distribution Agreements

    Hidden Traps in Modern Distribution Agreements

    Even when a distributor advertises complete ownership, you must read the terms of service closely. Certain default clauses limit how you exploit your songs elsewhere.

    YouTube Content ID and Social Monetization Sweeps

    Many distributors bundle YouTube Content ID, TikTok, and Meta monetization as optional checkboxes or automatic defaults. If you grant them exclusive YouTube fingerprinting rights, their automated system flags any third party who uses your track—including your own social channels. If you plan to clear beats for other creators or lease backing tracks, never grant your distributor exclusive Content ID rights.

    Takedown Clauses and Catalog Orphan Risks

    Some subscription-based distributors unpublish your entire catalog from streaming services if your annual membership lapses. Unless you pay an additional legacy fee per track, you risk losing your playlist placements, stream counts, and algorithmic momentum. Commission-based models generally leave your music active indefinitely, as they deduct their fee directly from incoming payouts.

    Frequently Asked Questions About Distribution Rights

    1. Do digital music distributors own my master recordings?

    No, distributors act as third-party aggregators and claim zero ownership over your master recordings.

    2. Can I switch distributors without losing my stream counts?

    Yes, as long as you reuse the original ISRC codes, track lengths, and exact metadata on the new platform.

    3. Does my distributor collect my songwriting royalties?

    No, distributors only collect sound recording revenue unless you separately purchase an optional publishing administration add-on.

    4. Can I release music with another company while using a distributor?

    Yes, standard distribution agreements are release-specific, meaning you can distribute other singles through different platforms.

    Stop Signing Away Your Leverage

    Owning your master recordings is the single greatest competitive advantage an independent musician holds. When you retain your copyrights, your catalog functions as an income-generating asset that you control indefinitely.

    Before you click accept on that digital distribution terms of service, verify that the agreement contains no automatic exclusivity beyond the tracks you upload. Retain your publishing rights, maintain control over your digital fingerprinting, and audit your distributor agreements yearly to protect your sound.

  • Why Do My Vocals Sound Thin After Recording? The Real Reasons

    Why Do My Vocals Sound Thin After Recording? The Real Reasons

    A vocal can sound powerful while I am performing it and still feel surprisingly weak the moment I listen back. That contrast is usually what makes me ask, why do my vocals sound thin after recording? The answer is rarely just “bad EQ.” Thinness can start with microphone distance, room reflections, the way the voice was captured, or the way instruments compete with it later in the mix.

    What makes this problem confusing is that a vocal can lose body at several different stages. It may be recorded without enough low-mid warmth, weakened by comb filtering in an untreated room, thinned out by aggressive high-pass filtering, or buried by guitars, synths, and keys occupying the same frequency range. 

    I find the fastest way to fix it is to identify exactly where the vocal starts sounding small, then correct that stage instead of stacking more processing on top.

    What Makes a Recorded Vocal Sound Thin?

    A thin vocal usually lacks the low-mid warmth and density that make a voice feel full and present. It may sound overly bright, nasal, distant, brittle, or disconnected from the rest of the track.

    However, a dry raw vocal should not necessarily sound like a finished commercial recording. Professional releases build vocal size through strong tracking, arrangement space, compression, saturation, automation, EQ, delay, and reverb.

    Your first goal should therefore be identifying whether the raw vocal is genuinely weak or simply unfinished.

    Is Your Microphone Too Far From Your Voice?

    Microphone distance can dramatically change your recorded tone.

    Many directional microphones create a proximity effect, which increases low-frequency response as you move closer to the capsule. Moving too far away can reduce this natural warmth and capture more room reflections.

    For many large-diaphragm condenser microphones, around 6 to 10 inches with a pop filter can provide a useful starting position. Some voices and microphones may work better slightly closer or farther away.

    Rather than following one fixed measurement, I recommend recording several short takes at different distances and comparing them at the same playback volume.

    Can an Untreated Room Make Vocals Sound Thin?

    Can an Untreated Room Make Vocals Sound Thin?

    Yes. Reflections from hard walls, ceilings, windows, desks, and floors can return to the microphone milliseconds after your direct voice.

    For a more complete approach to controlling those reflections, how to reduce echo in a bedroom studio covers practical ways to improve room acoustics with absorption, positioning, and other treatment methods.

    When those signals interact, they can create comb filtering. Certain frequencies reinforce each other while others partially cancel, leaving the vocal sounding hollow, phasey, or weak.

    This is why a better microphone does not automatically solve a thin vocal recording.

    For US home producers working in untreated rooms, adding broadband acoustic panels, thick absorption, or other appropriate treatment around reflection areas can help.

    Understanding why do my recorded vocals sound muffled can also help producers identify whether room reflections are contributing to a dull, unclear, or less defined vocal recording.

    Recording closer to the microphone can also reduce how much room sound reaches the mic compared with your direct voice.

    Is Frequency Masking Making Your Vocal Disappear?

    Sometimes the vocal sounds perfectly acceptable when soloed but suddenly loses its body when the instrumental starts.

    That usually points to frequency masking.

    Guitars, synths, keyboards, samples, and other instruments may occupy important vocal frequencies. The broad 400 Hz to 1.5 kHz area can become particularly crowded in dense arrangements, although the exact conflict varies from song to song.

    I would avoid automatically boosting the vocal by several decibels.

    Instead, listen to the competing instrument and create small EQ reductions where it masks the voice. Dynamic EQ or frequency-conscious sidechaining can be even more effective because the competing frequency range moves out of the way primarily when the singer is active.

    Are You High-Passing Too Much Vocal Body?

    High-pass filters are useful for removing HVAC rumble, floor vibration, handling noise, and unwanted sub-bass information. However, aggressive filtering can remove part of the vocal itself.

    Many voices carry useful warmth somewhere around 100 to 250 Hz.

    If you push the high-pass filter too far upward simply because a tutorial recommends a particular number, you may remove exactly what gives the singer weight.

    When using thin vocal EQ, I prefer moving the cutoff while listening to the whole song rather than looking at the frequency number alone.

    Are Your EQ Boosts Making the Vocal Brighter but Smaller?

    Another common mistake is repeatedly boosting presence and air.

    Boosting frequencies around 2 to 5 kHz can improve articulation and help the voice cut through a mix. High-frequency boosts above roughly 10 kHz can create additional air. However, a careful analysis of load frequency across the vocal and instrumental can also help reveal whether too much energy is building up in these higher ranges while the vocal lacks sufficient low-mid support.

    But if the vocal already lacks low-mid body, those boosts can exaggerate the imbalance.

    Before adding more highs, I check whether I have removed too much around 150 to 300 Hz. A subtle low-shelf adjustment or carefully chosen bell boost may restore weight, but the exact frequency should depend on the singer and recording.

    Can Too Much Compression Make Vocals Sound Thin?

    Can Too Much Compression Make Vocals Sound Thin

    Compression can make vocals denser, more consistent, and easier to hear, but aggressive settings can make them feel smaller.

    Very fast attack settings may reduce the natural impact of words and phrases. Heavy gain reduction can also make a performance feel choked.

    If a vocal sounded healthy before compression, I bypass the compressor and compare.

    I often get better results from gentler compression than forcing one processor to control every peak. The goal is to stabilize the voice while preserving its natural character.

    Can Saturation Add Warmth to Thin Vocals?

    Subtle saturation can help a vocal feel fuller by introducing additional harmonic content.

    Tape-style or tube-style saturation can create perceived density without simply turning up the low frequencies. This can be especially useful for clean condenser microphone recordings that feel overly clinical.

    I still treat saturation as an enhancement rather than a repair tool. If the recording suffers from severe room reflections, bad mic placement, clipping, or strong phase problems, saturation will not solve the underlying issue.

    Why Do Double-Tracked Vocals Sometimes Sound Hollow?

    Vocal layering can create impressive width and size, but similar recordings can interact in unpredictable ways.

    If two tracks line up closely, phase relationships can cause some frequencies to partially cancel. The combined vocal may actually sound thinner than one track alone.

    Mute the doubles and listen to the lead. If the vocal suddenly regains its weight, check the timing and phase relationship between the layers.

    Small timing differences often sound natural, but problematic cancellation may require editing or a different approach to the doubles.

    How Can I Tell Whether the Recording or Mix Is the Problem?

    This is the test I recommend before changing anything else.

    Bypass every plugin and listen to the raw vocal.

    If the unprocessed recording already sounds thin, focus on mic distance, microphone choice, gain staging, room acoustics, performance, and recording position.

    If the raw vocal sounds full but loses weight after processing, reactivate the plugins one at a time. You may quickly discover that a high-pass filter, EQ cut, compressor, noise reduction processor, or effect is causing the problem.

    If the vocal only becomes weak when the instrumental plays, investigate frequency masking instead.

    How Do I Make Thin Vocals Sound Fuller?

    How Do I Make Thin Vocals Sound Fuller

    I start with the recording rather than immediately boosting bass.

    A good vocal sound comes from capturing enough natural body at the source, minimizing destructive room reflections, and leaving enough space for the voice in the arrangement.

    That arrangement principle also matters when deciding how long should a beat intro be, because the opening section can establish the track’s space and energy before the vocal enters.

    After that, I use corrective EQ carefully, maintain useful low-mid energy, apply controlled compression, and add subtle saturation when appropriate. I also shape competing instruments instead of continuously making the vocal louder.

    This approach usually creates more natural vocal warmth than stacking corrective plugins.

    Frequently Asked Questions 

    1. Why does my recorded voice sound thinner than my voice in real life?

    You hear your own voice partly through vibrations conducted through your head as well as through the air. A microphone mainly captures airborne sound, so your recorded voice may initially seem lighter than what you hear while speaking or singing.

    2. What frequency adds body to vocals?

    Vocal body often exists somewhere around 100 to 300 Hz, but the ideal frequency varies with the singer, microphone, and recording. Avoid blindly boosting one frequency on every vocal.

    3. Why does my vocal sound good alone but thin in the mix?

    Frequency masking is usually responsible. Guitars, keyboards, synths, and other instruments may compete with the vocal’s important midrange frequencies. EQ or dynamic processing on the competing instruments can create more room.

    4. Can room reflections really make my vocals sound hollow?

    Yes. Early reflections can interact with the direct signal and create comb filtering, causing some frequencies to become stronger while others partially cancel.

    5. Can compression make my vocals fuller?

    Moderate compression can increase perceived density and consistency. Too much compression, however, may make the vocal feel flat, choked, or smaller.

    6. Why do my vocals sound thin after recording even before I start mixing?

    If why do my vocals sound thin after recording is the problem you hear in the completely raw take, I would check microphone distance, gain level, room reflections, microphone choice, and performance before applying EQ or compression.

    Final Thoughts

    When I hear a thin vocal, I no longer assume that EQ is automatically the answer. I first listen to the raw take, check microphone placement and room acoustics, and then determine whether processing or arrangement masking is changing the sound.

    Getting enough vocal body at the recording stage makes everything afterward easier. From there, careful EQ, restrained compression, subtle saturation, and intelligent arrangement choices can help a vocal sound warm, clear, and confident without making it artificially bass-heavy.

  • How to Discover Bands Before They Get Famous Before Everyone Else Does

    How to Discover Bands Before They Get Famous Before Everyone Else Does

    The easiest time to discover a promising band is often when almost nobody is searching for them. Before an artist reaches festival posters, editorial playlists, or viral clips, there is usually a quieter stage: Tuesday-night club shows, college-radio spins, self-released singles, opening slots, local record-store recommendations, and enthusiastic fans telling ten friends.

    Learning how to discover bands before they get famous is therefore less about predicting the future and more about getting closer to where new music first circulates. The best discoveries tend to happen one layer below mainstream recommendation systems, where musicians are still building local audiences and human curators are doing much of the filtering.

    Why Great New Bands Are Often Easier to Find Offline

    Streaming services make enormous catalogs accessible, but accessibility is not the same as discovery.

    Algorithms generally become more useful after they have collected signals such as plays, saves, follows, playlist additions, and listener similarities. A genuinely new local band may not have enough activity to generate those signals yet.

    That is why live scenes still matter.

    The National Endowment for the Arts reported that 48% of U.S. adults attended at least one in-person arts event during the July 2021–July 2022 reporting period. Interestingly, its research also found that social media and peer-to-peer communication were among the most common ways people learned about arts events they attended.

    For music discovery, that combination matters: go where musicians perform, then follow the people who are already talking about those performances.

    Explore the National Endowment for the Arts research on U.S. arts participation for broader context on how Americans find and experience live arts.

    Start at the Bottom of the Concert Poster

    Fans naturally look at the headliner first. Early-discovery listeners should often do the opposite.

    If a touring indie band has three supporting acts, research the first name on the bill. Local promoters frequently give opening slots to emerging regional artists whose audiences are still small.

    Understanding emerging artist meaning can help listeners put that early career stage into context, since an artist may already have a substantial body of work, live experience, and professional activity while still developing wider recognition.

    Arrive when doors open rather than halfway through the evening.

    Then repeat the process. If an unfamiliar opener impresses you, check which other bands they perform with, which local label released their single, where they rehearse or record, and which venues keep booking them.

    One promising band can lead to an entire scene.

    Watch Small Venues, Not Only Big Festivals

    Watch Small Venues, Not Only Big Festivals

    A 200-capacity room usually gives you more useful discovery signals than a massive festival lineup announced months after artists have already gained momentum.

    Monitor independent clubs, all-ages spaces, university venues, DIY promoters, community arts centers, record-store performances, neighborhood festivals, and even coffee-shop calendars depending on the genre.

    Smithsonian reporting on Washington, D.C.’s DIY music culture highlights how independent promoters, performers, venue operators, designers, and audiences collectively sustain underground scenes. It also notes the continuing importance of word of mouth.

    The Smithsonian’s examination of D.C.’s underground music network is a useful example of how scenes develop outside mainstream music channels.

    Treat College Radio DJs Like Human Discovery Engines

    Treat College Radio DJs Like Human Discovery Engines

    College and freeform radio remain surprisingly effective because DJs can make choices that are not entirely dictated by popularity.

    UC Berkeley’s KALX describes its programming as freeform radio featuring underground music, with DJs encouraged to explore different genres rather than remain inside narrow formats.

    That makes stations like these valuable discovery tools.

    Do not simply listen passively. Open the station’s playlist history. When something catches your attention, write down the artist, label, city, and release. Then investigate the other musicians appearing immediately before and after them. Explore KALX’s freeform-radio philosophy at UC Berkeley.

    The same principle works across the country. UT Austin reports that KUTX regularly features local and touring performers and describes the station as a launch pad for up-and-coming Austin acts.

    Use the Internet Differently

    You do not need to abandon streaming platforms. You need to stop using only their homepages.

    Bandcamp is especially useful when you browse by location, genre tags, labels, supporters, and newly released records rather than waiting for personalized recommendations.

    Understanding the difference between curated user playlists vs editorial pitching for indie music can also help you evaluate how independent artists gain visibility online, since listener-driven recommendations and editorial selections can introduce emerging music to audiences through different discovery paths.

    SoundCloud can reveal demos, early versions, remixes, and self-released material. Rate Your Music can help you identify obscure releases through community-generated genre charts. Hype Machine provides another angle by surfacing music receiving attention from independent blogs.

    Reddit communities and genre-specific Discord servers can also work, but avoid simply asking, “What bands should I listen to?”

    Ask narrower questions: Which local bands are drawing crowds in Minneapolis right now? Which shoegaze bands are playing DIY rooms in Philadelphia? Which unsigned punk groups have released their first EP this year?

    Specific questions produce earlier discoveries.

    Use This Five-Signal Band Discovery Test

    A band does not need all five signals to be worth following. The objective is to recognize momentum before mass attention arrives.

    Signal What to Look For
    Live activity Repeated bookings at respected small venues
    Scene support Other musicians, promoters, DJs, and local fans recommending them
    Release momentum Consistent singles, demos, EPs, or self-released music
    Human curation College radio, independent blogs, record stores, or niche playlists
    Audience behavior Small but visibly engaged crowds who know lyrics and return to shows

    Pay particular attention when several signals appear simultaneously.

    A band with only 2,000 monthly listeners may be more interesting than one with 100,000 passive listeners if local shows are selling out, respected DJs keep playing them, and established bands repeatedly choose them as support.

    Browse Freeform Radio Archives

    Browse Freeform Radio Archives

    One overlooked trick is searching radio archives rather than listening only to live broadcasts.

    Independent station WFMU, for example, maintains extensive playlists and archives across experimental, underground, international, rock, electronic, and other specialist programming. Recent playlists include self-released and newly issued music alongside older recordings.

    Browse the WFMU freeform radio archives and playlists and treat each specialist show as a curator you can follow. This method is particularly useful for genres poorly represented by mainstream playlists.

    Ask Record Stores the Right Question

    Independent record-store employees often see music scenes from several directions simultaneously.

    They know which local seven-inches arrive every week, which records musicians themselves are buying, which small labels suddenly have demand, and which bands are promoting release shows nearby.

    Instead of asking for “new music,” say what you already like and ask for something local or recently released.

    The narrower your question, the more useful the recommendation.

    Build a Discovery Chain, Not a Playlist

    Once you find one exciting unknown band, do not immediately return to your recommendation feed. Investigate outward.

    Check the band’s opening acts, record label, producer, photographer, poster designer, venues, related artists, radio appearances, tagged collaborators, and musicians’ side projects.

    This is how to discover bands before they get famous consistently: follow relationships rather than popularity rankings. Music scenes are networks. A promising artist rarely exists alone.

    This network-based approach also makes how to find local bands near you more practical, because following opening acts, venues, collaborators, and related artists can uncover local musicians who may not yet appear prominently in mainstream recommendations.

    What Does Not Work Every Time

    Early discovery is inherently messy.

    A brilliant local band may break up after six months. Another may intentionally remain small. Some musicians may have strong local reputations without wanting mainstream careers. High streaming growth can also result from one viral song rather than durable audience development.

    Do not treat discovery as an investment contest where you need to predict the next superstar.

    The reward is hearing interesting music while it is still close to the community that created it.

    Frequently Asked Questions

    1. Where can I find bands before they become popular?

    Start with small venues, college radio, Bandcamp, independent record stores, regional promoters, opening acts, niche music blogs, and genre-specific online communities.

    2. Is Bandcamp good for discovering unknown bands?

    Yes. Browsing by location, tag, label, new releases, and supporter collections can expose artists before they accumulate substantial streaming numbers elsewhere.

    3. How can I find new local bands?

    Follow independent venues, college stations, local promoters, record shops, community festivals, and musicians already active in your city’s scene.

    4. How often should I search for new music?

    A short weekly discovery session is usually more effective than occasional marathon browsing. Track new releases, local concert calendars, radio playlists, and opening acts regularly.

    The Most Valuable Music Usually Has a Trail

    Finding tomorrow’s favorite band rarely requires secret industry access. It requires noticing the places most casual listeners skip.

    Listen to the first opener. Check yesterday’s college-radio playlist. Browse the label behind a self-released EP. Talk to the person working behind the counter at a neighborhood record store. Follow the tiny promoter announcing a four-band bill in a 150-person room.

    If you want to master how to discover bands before they get famous, stop searching only where popularity is already visible. Follow the smaller signals that appear before popularity exists.

  • Can You Produce Music Without an Audio Interface? Start With What You Have

    Can You Produce Music Without an Audio Interface? Start With What You Have

    You open your DAW, load a drum kit, add a virtual synth, plug in your headphones, and start building a track. At that point, you may wonder whether an audio interface is actually necessary—or whether it is just another piece of gear people assume every producer should own.

    If you are asking if you can produce music without an audio interface, the answer is yes. You can create beats, arrange songs, work with MIDI, use VSTs, layer samples and loops, mix with headphones, and export finished music using your computer’s built-in audio system.

    For beginners in the US building a home or bedroom studio, this means you can start making music without buying extra hardware immediately. The real question is not whether you can produce without an interface, but how far your current setup can take you before recording, monitoring, and connectivity limitations start to matter.

    Do You Need an Audio Interface for Music Production?

    You do not need an interface if you produce mainly “inside the box.” This means your music stays inside your computer and digital audio workstation rather than coming from microphones, guitars, or external synthesizers.

    You can program drums, write melodies, use VST instruments, manipulate samples, arrange songs, apply effects, mix tracks, and export completed music without separate audio hardware. DAWs such as FL Studio, Ableton Live, Logic Pro, and GarageBand can work with your computer’s existing sound system.

    For electronic music, hip-hop, trap, pop demos, lo-fi, and other sample-based production, that setup can be enough to start making complete tracks.

    What Can You Produce Without an Audio Interface?

    Can You Make Beats and Electronic Music Without One?

    Yes. Beat making and electronic music rely heavily on MIDI, samples, virtual synthesizers, drum machines, loops, and effects plugins. None of these automatically requires an audio interface.

    A USB MIDI keyboard can normally connect straight to your computer. MIDI carries performance information rather than recorded audio, so your DAW uses that information to trigger virtual instruments. You can even create melodies directly in your DAW’s piano roll without owning a MIDI controller.

    Can You Mix Music Using Only Headphones?

    Can You Mix Music Using Only Headphones

    Yes. You can connect wired headphones directly to your computer’s headphone output and monitor your DAW.

    USB headphones can also work, but I would avoid relying heavily on Bluetooth headphones for production. Wireless connections can introduce noticeable audio latency, which can make recording or playing virtual instruments uncomfortable.

    A dependable pair of wired studio headphones gives beginners a relatively affordable way to monitor and mix before investing in studio monitors.

    Can You Record Vocals Without an Audio Interface?

    You can record vocals without a traditional interface if you use a USB microphone.

    A USB microphone converts the signal internally and sends digital audio directly to your computer. This setup can work well for demos, songwriting, vocals, voiceovers, and other basic recording tasks.

    Your laptop’s built-in microphone can technically record too, although background noise, room acoustics, and microphone quality may limit the result.

    An XLR studio microphone changes the situation. Most XLR microphones need a microphone preamp and analog-to-digital conversion, while many condenser microphones also require 48-volt phantom power. An audio interface conveniently provides these features.

    Can You Record Guitar Without an Audio Interface?

    Direct guitar recording is one area where an interface becomes considerably more useful.

    Electric guitars normally use a quarter-inch instrument connection, while most computers do not provide the proper high-impedance input needed for direct guitar recording.

    You can sometimes work around this limitation with a USB-equipped amplifier, USB guitar adapter, or another compatible digital recording device. However, if guitar or bass becomes a regular part of your music production workflow, an interface with an instrument input generally provides a cleaner and more flexible setup.

    How Can You Reduce Audio Latency Without an Interface?

    How Can You Reduce Audio Latency Without an Interface

    Latency is the delay between performing an action and hearing the result. You may notice it when playing a MIDI keyboard, recording vocals, or monitoring audio through your DAW.

    On a Windows PC, an ASIO-based audio driver can help reduce latency compared with some standard Windows audio configurations. FL Studio includes FL Studio ASIO, while ASIO4ALL can work with many built-in audio devices.

    Mac users generally work through Apple’s Core Audio system, which is integrated into macOS and designed for high-performance, low-latency audio.

    Your audio buffer size also matters. A smaller buffer can make your virtual instruments feel more responsive, but going too low can increase CPU usage and produce clicks, pops, or audio dropouts. I prefer lowering the buffer gradually until I find a setting that feels responsive without making the system unstable.

    What Are the Disadvantages of Producing Without an Audio Interface?

    The biggest limitations usually appear as your home studio grows.

    Built-in computer audio provides fewer options for XLR microphones, electric guitars, external synthesizers, multiple simultaneous inputs, and professional studio monitor connections.

    Dedicated interfaces can provide microphone preamps, instrument inputs, balanced outputs, headphone amplification, low-latency drivers, and better analog-to-digital and digital-to-analog conversion.

    However, an interface does not magically improve everything inside your DAW. If your song consists completely of MIDI, VSTs, samples, loops, and plugins, simply connecting an interface will not automatically make the exported track professional.

    Its biggest advantages come from improved recording, monitoring, connectivity, and workflow.

    As your production skills evolve, learning how to discover new indie artists can broaden your exposure to diverse sounds, styles, and production techniques that you can draw upon for creative inspiration.

    As you continue refining your production skills, understanding where to find new independent music can broaden your exposure to diverse artists, distinctive sounds, and innovative production approaches worth exploring.

    Can You Use Studio Monitors Without an Audio Interface?

    Sometimes, but using an interface generally makes the setup easier.

    Many powered studio monitors use balanced TRS or XLR connections. Balanced connections can help reduce unwanted noise while giving you a convenient way to control monitor levels.

    If you currently produce entirely through headphones, you may not need to worry about this. Once your US home studio expands to include monitors, microphones, guitars, or external instruments, an interface becomes much more valuable.

    When Should You Buy an Audio Interface?

    When Should You Buy an Audio Interface

    I would buy an interface when my existing setup starts preventing me from making the music I want.

    If you want to use an XLR microphone, plug an electric guitar directly into your DAW, connect studio monitors properly, record hardware synthesizers, or monitor live recordings with lower latency, an interface starts making practical sense.

    If you currently produce with MIDI, software instruments, samples, loops, and headphones, focus first on developing your skills in arrangement, sound selection, EQ, compression, automation, and mixing.

    Gear should solve an actual production problem rather than simply make your desk look more like a professional studio.

    For producers working independently, supporting independent musicians can also mean discovering their releases, purchasing their music, attending their shows, and engaging with their work.

    Frequently Asked Questions 

    1. Can I Make Professional Music Without an Audio Interface?

    Yes. A software-based producer can compose, arrange, mix, and export high-quality tracks using a computer, DAW, virtual instruments, samples, plugins, and headphones. External recording and professional monitoring are usually what make an interface more important.

    2. Do I Need an Audio Interface for a MIDI Keyboard?

    Usually not. Most modern USB MIDI keyboards connect directly to a computer and send MIDI information to the DAW without passing through an audio interface.

    3. Can I Use FL Studio Without an Audio Interface?

    Yes. FL Studio can use your computer’s built-in audio hardware. Windows users can also use compatible ASIO drivers to improve latency and responsiveness.

    4. Does an Audio Interface Improve Sound Quality?

    It can improve recording and monitoring through better converters, microphone preamps, headphone outputs, and connections. However, it does not automatically improve virtual instruments or a digital mix simply because the interface is connected.

    5. Do Beginners Need an Audio Interface for a Home Studio?

    No. A capable computer, DAW, and wired headphones can provide everything many beginners need to start learning music production. You can add an interface later when your recording and monitoring requirements grow.

    Final Takeaway

    When I look at what a new producer actually needs, I would rather see someone start creating music than delay learning because they think expensive hardware is mandatory. The answer to whether you can produce music without an audio interface is yes, especially when you work inside the box using MIDI, VSTs, samples, loops, plugins, and headphones.

    An interface becomes valuable when you start recording microphones and guitars, adding hardware instruments, connecting studio monitors, or needing reliable low-latency monitoring. Until that point, the computer you already own may give you everything you need to start creating and finishing music.

  • The Future of Songwriting in an AI-Saturated Music Industry: What Comes Next

    The Future of Songwriting in an AI-Saturated Music Industry: What Comes Next

    I have started noticing how quickly AI-generated music has moved from a novelty to something that can sound surprisingly complete. As a listener, I can hear why instant melodies, polished vocals, and finished arrangements are appealing, but I also find myself paying closer attention to who made a song and what gives it a real reason to exist.

    I have also realized that the interesting question is no longer whether songwriters will use AI. It is what songwriting becomes when almost anyone can generate a technically finished track in minutes. That shift could make some music cheaper and more plentiful while making human perspective and identity more valuable elsewhere.

    Songwriting Is Already Changing

    Generative AI is moving into songwriting at several stages, including brainstorming, lyric development, arrangement, instrumental experimentation, vocal production, and demo creation. Tools can help creators test ideas quickly, explore sounds outside their abilities, or move past a blank page.

    In 2026, music organizations introduced voluntary labels separating “AI-Generated” recordings from “AI-Assisted” recordings. IFPI also introduced chart eligibility principles requiring qualifying AI-assisted recordings to be substantially human-made and created with authorized, lawful AI services.

    The Songwriter’s Role Is Moving Upstream

    The Songwriter's Role Is Moving Upstream

    When technology can generate chords, melodies, and arrangements quickly, valuable work may shift toward deciding what deserves to become a song.

    That puts more weight on direction. A songwriter still has to recognize a strong idea, shape a narrative, edit weak material, and decide when a polished option feels emotionally empty. AI can produce possibilities, but possibilities are not the same thing as artistic judgment.

    AI can also make experimentation cheaper. A songwriter may test different vocal perspectives, arrangements, or instrumental textures without paying for a complete studio session each time.

    More Music Could Make Distinctive Voices Matter More

    When AI makes ordinary songwriting abundant, listeners have more choices and less reason to spend time with music that feels interchangeable. That puts weight on specificity: a distinctive story, unusual perspective, memorable voice, or lyric connected to an actual life rather than familiar phrases.

    This is where why emotionally specific lyrics connect with modern listeners becomes relevant. Emotional specificity gives a song texture. A vague breakup song can describe sadness, while a specific lyric can capture the strange detail of sitting in a parked car outside someone’s apartment and knowing the relationship has already ended. AI can generate either scenario, but the songwriter’s perspective determines whether the detail feels purposeful.

    Copyright Will Shape What Comes Next

    In the United States, the U.S. Copyright Office says generative AI outputs can receive copyright protection when a human author determines sufficient expressive elements. Simply providing prompts is not enough, although human-authored material can be combined with AI-generated material in a larger copyrightable work.

    Training is another pressure point. Music organizations have raised concerns about copyrighted recordings being used without authorization to develop generative systems. Meanwhile, licensing models are emerging as companies try to create lawful ways for AI development and music rights to coexist.

    For songwriters, documenting which tools were used and what material was human-created may become a normal part of practice.

    AI Can Become Part of the Songwriting Toolkit

    AI Can Become Part of the Songwriting Toolkit

    AI can support stages of creative work. It can generate starting points, test arrangements, explore chord possibilities, or provide direction when a songwriter is stuck.

    Using technology to expand possibilities differs from accepting an entire generated song without substantial development. Industry language around AI-assisted and AI-generated recordings reflects that difference.

    Exploring modern songwriting techniques for alternative and indie artists can involve traditional lyric writing, unusual structures, home recording, collaboration, and selective AI experimentation.

    The Value of Being Human

    Human imperfection can contribute to a relationship between an artist and listener. A breath left in a vocal, an uneven guitar attack, unusual phrasing, or a lyric revealing an uncomfortable truth can make a recording feel connected to a person. They can communicate intention and presence.

    An IFPI study of more than 43,000 music fans across 26 countries found that 79% considered human creativity essential to music creation.

    Why Human Creativity May Matter Differently

    Songwriters still shape work through experience, taste, interpretation, collaboration, and artistic choices. That could mean more tracks, more experimentation, and greater pressure on creators to make their work recognizable.

    That pressure may push songwriting toward stronger identity. When polished sound becomes easier to produce, the story behind a song, the perspective within its lyrics, and the choices that make its performance personal can carry more weight. AI changes the tools available to songwriters, but it does not automatically decide what deserves to be said.

    FAQs: The Future of Songwriting in an AI-Saturated Music Industry: What Comes Next

    1. Will AI replace human songwriters?

    AI can automate parts of songwriting, but human direction, interpretation, and artistic identity still shape many forms of music.

    2. Can songwriters use AI and still own their work?

    Potentially. Copyright protection depends on sufficient human authorship. The facts and degree of human contribution matter.

    3. Is AI-generated music becoming more common?

    Yes. Generative tools are making complete recordings easier to produce, while the industry develops labeling and eligibility standards for AI-created and AI-assisted music.

    4. What will help songwriters stand out?

    Distinctive storytelling, emotional specificity, recognizable identity, strong performances, and thoughtful creative decisions can differentiate songs in a crowded market.

    The Habits Worth Keeping

    The most useful response to AI may be neither rejection nor blind adoption. Songwriters can learn the technology, understand its limitations, protect their rights, and decide where it genuinely improves their process. At the same time, observation, memory, cultural experience, collaboration, and personal risk remain worth developing deliberately. In a market filled with technically complete songs, the creative question becomes more selective: what does this particular writer notice that nobody else would have written quite the same way?

    The tools will keep changing, but a meaningful song still needs a reason to be heard.

  • How to Start an Independent Record Label at Home: The Complete Blueprint

    How to Start an Independent Record Label at Home: The Complete Blueprint

    I launched my first record imprint from a laptop on an IKEA desk with less than $1,000 in seed money. Learning how to start an independent record label at home does not require venture capital or industry connections anymore. It requires disciplined accounting, ruthless contract clarity, and an automated royalty pipeline.

    Modern digital gatekeepers have crumbled. Independent labels now capture market share because they move quickly, test niche audiences, and treat artists as collaborative partners rather than debt liabilities.

    Setting Up the Legal and Financial Machine

    Setting Up the Legal and Financial Machine

    A bedroom label remains an expensive hobby until you form a legal barrier between your personal checking account and your master recordings.

    Business Entity and Tax Isolation

    File articles of organization for a Limited Liability Company (LLC) through your Secretary of State or reference registration workflows at the SBA.gov. An LLC shields your personal home, car, and savings from infringement liabilities or contract disputes.

    Once your LLC receives its Employer Identification Number (EIN) from the IRS, open a dedicated business checking account. Route every dollar of streaming income, tape sale revenue, and software expense through this single hub. Mixing personal groceries with mastering invoices destroys your liability shield and complicates annual tax returns.

    Royalties Collection Architecture

    Royalties Collection Architecture

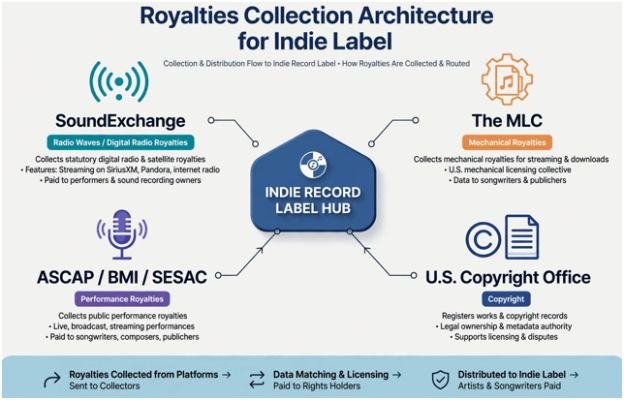
    Distribution aggregators deliver your music to streaming platforms, but they leave significant master-side royalties uncollected. You must register your entity across direct industry collection agencies to claim every micro-penny owed.

    Organization Registration Type Revenue Stream Collected
    SoundExchange Master Rights Owner Non-interactive digital performance royalties (Pandora, SiriusXM, webcasts)
    The MLC Mechanical Administrator Digital audio mechanical royalties from interactive streaming services
    ASCAP / BMI / SESAC Publishing Entity Public performance royalties for underlying compositions
    US Copyright Office Form SR (Sound Recording) Statutory legal copyright protection for master recordings

    Affiliate your label with SoundExchange as both a sound recording copyright owner and a designated payee. Have your songwriters register their works directly through TheMLC.com to capture statutory mechanicals.

    Distribution Infrastructure and Account Tiers

    Do not sign up for a single-artist distributor plan. Home-based labels need administrative dashboards capable of managing multiple artist profiles, distinct ISRC allocations, and automated split payments.

    Selecting Multi-Artist Pipelines

    Pick distributors that support enterprise label routing. DistroKid’s “Ultimate” plan, TuneCore for Labels, and CD Baby Pro offer multi-artist tiers with automated payment splitting. Automated split features save hours of tedious manual accounting each month by paying your artists their percentages directly at the distributor level.

    Distribution Partner Best Feature for Home Labels Starting Multi-Artist Cost Cut on Royalties
    DistroKid (Ultimate) Automated split-pay to artist accounts ~$89.99/year 0%
    TuneCore (Breakthrough/Pro) Robust global reporting and mechanical support ~$49.99/year 0% on streaming
    CD Baby Legacy physical distribution sync + sync licensing Fee per release ($9.99+) 9% digital sales cut

    Structuring Bulletproof 50/50 Indie Contracts

    Structuring Bulletproof 50/50 Indie Contracts

    Early DIY labels often rely on handshakes. Handshakes lead to severed friendships and frozen catalog rights. You need written, signed agreements before spending money on third-party mixing or mastering. 

    Weighing independent music contract pros and cons early clarifies whether an exclusive license or a pure catalog acquisition suits your risk profile.

    Defining Net Profits and Allowable Deductions

    The industry gold standard for modern boutique imprints is the 50/50 Net Profit Agreement. Under this framework, the artist retains their underlying copyright, granting your label an exclusive exploitation license for a fixed duration (typically 3 to 5 years).

    Net profit is gross receipts minus approved, itemized direct out-of-pocket costs:

    $$\text{Net Profit} = \text{Gross Receipts} – \text{Approved Direct Costs}$$

    Do not deduct general label overhead, home Wi-Fi bills, or equipment upgrades from an artist’s royalty statements.

    Cost Category Recoupable from Net Receipts? Non-Recoupable Label Expense?
    Mastering & Audio Restoration Yes No
    Direct Digital Ad Spend (Meta/TikTok) Yes (Capped in contract) No
    Vinyl / Tape Manufacturing Yes No
    Cover Art Graphic Design Yes No
    Label Hardware / DAW Plugins No Yes (Label overhead)
    Standard Business Legal Filings No Yes (Label overhead)

    Establish a clear reversion clause. If the project fully recoups its initial investment within the contract term, ownership and distribution access return to the artist at the end of the license window.

    The 8-Week Release Operations Plan

    Dropping music the day after receiving a final master guarantees obscurity. Algorithmic streaming ecosystems require lead time to index metadata and populate pitch queues. Once your roster grows and you join the ranks of independent music labels accepting demo submissions, running a standardized operational schedule keeps multiple artists organized.

    Week -8: Receive uncompressed 24-bit/48kHz masters, hi-res square cover art, and metadata splits.

    Week -6: Deliver files to distributor; verify ISRC and UPC code generation.

    Week -4: Pitch track through Spotify for Artists and Amazon Music for Artists dashboards.

    Week -3: Secure localized press coverage, niche blog features, and playlist curator outreach.

    Week -2: Deliver short-form video creative assets (vertical visualizers, teasers, reels).

    Week -1: Launch pre-save campaigns and send direct-to-fan email newsletters.

    Week  0: Release Day: Trigger social ad spend, update DSP profile banners, ship physical pre-orders.

    Week +2: Audit initial streaming figures, pay direct recoupment deductions, assess playlist traction.

    Register the final sound recording with the Copyright.gov database using Form SR to lock in statutory damage protections against unauthorized sampling or sync infringement.

    Stop Overthinking the Artwork: Go Press Play

    Perfectionism kills more record labels than bad contracts. You do not need a four-room facility in Nashville or an analog tape machine to matter. You need three standout releases, spotless legal hygiene, transparent accounting statements, and total dedication to your artists’ creative visions. Set up your LLC, lock in your distribution pipeline, and launch your first catalog number this month.

    Frequently Asked Questions

    1. How much does it cost to start an independent record label from home?

    Most home operators launch legally for $500 to $1,500, covering state LLC formation fees, a multi-artist distribution subscription, and initial mastering costs.

    2. Do I need a lawyer to draft indie label recording contracts?

    While using vetted contract templates works for early releases, having an entertainment attorney review your master agreement prevents costly future disputes.

    3. Can I run a record label from home without owning the master recordings?

    Yes, modern indie labels routinely operate on exclusive licensing deals where artists retain ownership while the label handles commercial exploitation for an agreed timeframe.

    4. How do bedroom labels make money from streaming?

    Labels collect net streaming payouts directly from their digital distributor and retain an agreed split (typically 50%) after recouping direct release expenses.

  • How to Make Melodies Without Music Theory Using Simple Ear Tricks

    How to Make Melodies Without Music Theory Using Simple Ear Tricks

    Some of my best melody ideas do not start with a scale chart, chord formula, or piano lesson. They start with something much simpler: a rhythm I can tap, a phrase I can hum, or a few notes that immediately feel right together.

    That is why learning how to make melodies without music theory is often less complicated than beginners expect. I do not need to understand every interval or memorize every key before I can create something catchy. Instead, I can limit my note choices, use my DAW’s scale tools, follow a simple bassline, hum ideas before programming them, and shape short patterns through repetition and variation.

    For beginner producers in the US working in FL Studio, Ableton Live, Logic Pro, GarageBand, or similar software, this approach makes melody writing feel practical instead of intimidating. The goal is not to guess randomly. It is to give my ears a simple framework so I can make faster, more confident musical decisions.

    Can I Really Make Melodies Without Knowing Music Theory?

    Yes. Music theory can eventually help me understand why certain notes work together, but I do not need to master scales, intervals, notation, and harmony before writing my first catchy melody.

    My first goal is much simpler: create a short musical idea that sounds good, repeats clearly, and is easy to remember.

    I usually start with only three to five notes. Fewer choices force me to pay attention to rhythm, note length, silence, and repetition instead of randomly filling the piano roll.

    How Can I Use the White-Key Trick to Write Melodies?

    One of the easiest beginner shortcuts involves the white keys.

    C major and A natural minor use only the white notes on a standard piano. That means I can experiment with those notes while staying within one note collection. EDM Tips also demonstrates a transposition technique that lets producers use white keys while effectively playing in another key.

    I still use my ears because staying inside a scale does not guarantee that every note will sound perfect over every chord.

    If my DAW supports scale highlighting or scale mode, I often use that instead. It visually limits or highlights the notes belonging to my selected scale, making piano roll melodies far easier to construct.

    Should I Start My Melody With a Bassline?

    Should I Start My Melody With a Bassline?

    Starting with bass notes gives me a foundation.

    I place three or four low notes across my loop and listen to their movement. Instead of immediately worrying about a complicated chord progression, I treat those bass notes as anchors for everything I add afterward.

    Production Music Live recommends a similar approach: establish bass notes first, then use them as a framework for finding notes that fit the track.

    Once that foundation sounds right, I can start experimenting higher in the piano roll.

    How Can I Build Easy Chords Without Knowing Chord Theory?

    If I want harmony underneath the melody, I can start with basic three-note shapes.

    Using notes available within my selected scale, I begin with a low note and stack additional notes above it while leaving scale-note spaces between them. This gives me a simple starting shape that I can adjust by ear.

    I can also move individual chord notes an octave higher or lower. This technique, commonly called an inversion or wider voicing, changes the chord’s character without requiring an entirely new set of notes.

    Once the chord works, I avoid making everything perfectly mechanical. Very small timing differences can make programmed parts feel less rigid. Production Music Live similarly recommends subtle timing adjustments to humanize MIDI performances.

    How Do I Use Humming to Find a Catchy Melody?

    Humming is one of the fastest ways I know to escape piano-roll overthinking.

    I loop my drums, bassline, or chords and record myself humming whatever comes naturally. I do not worry about lyrics or singing perfectly. I only want the rhythm and general rise and fall of the idea. This also helps me better understand the structure of musical preferences, because the phrases I naturally repeat often reveal the rhythms, note movements, and melodic shapes I find most appealing.

    EDM Tips demonstrates this approach by recording improvised vocal melody ideas and then converting or reproducing them as MIDI.

    After recording, I find the first note on a piano or synth and work through the phrase gradually. Even if my transcription is not perfect, it gives me a much more musical starting point than randomly clicking notes.

    Should I Create the Rhythm Before Choosing Melody Notes?

    When I cannot think of a melody, I sometimes ignore pitch completely.

    I place one repeated note across the piano roll and create a rhythm first. Once the groove sounds interesting, I move selected notes higher or lower while preserving most of the timing.

    This turns rhythm into a melodic pattern.

    It also helps prevent the common beginner mistake of using too many different pitches. A catchy melody often gets its identity from rhythm and repetition rather than complexity.

    How Do I Use Repetition Without Making a Melody Boring?

    How Do I Use Repetition Without Making a Melody Boring?

    I like using a simple four-bar rule.

    Bars one and three establish the recognizable idea. Bars two and four introduce small changes.

    I might change the final note, alter the rhythm, add a higher passing note, shorten one note, extend another, or introduce a brief pause.

    Production Music Live emphasizes repeating recognizable notes and then filling the spaces around them, which follows the same underlying principle: listeners need something familiar before variations become meaningful.

    This is one of the most useful techniques when learning how to make melodies without music theory because I do not need to invent four completely different musical phrases.

    Why Does My Melody Sound Random?

    When my melody sounds random, I usually have too many unrelated decisions happening at once.

    Maybe every note changes pitch. Maybe the rhythm never repeats. Perhaps I jump between octaves constantly or fill every space.

    I fix this by finding the strongest two- or three-note idea and repeating it somewhere else.

    Then I remove unnecessary MIDI notes.

    Silence is especially important. Empty spaces give listeners time to process one phrase before the next begins. A melody does not need constant movement to feel complete.

    How Do I Give a Melody More Movement?

    I think visually about melodic contour.

    If my notes slowly move upward, the phrase can feel as though it is building. A downward movement can create a sense of release. Repeating notes can create stability, while an occasional larger jump attracts attention.

    I normally combine small steps with occasional wider movement rather than jumping unpredictably between distant notes.

    The piano roll makes this easy to understand even if I cannot name a single musical interval.

    How Can I Make a Counter Melody Without Music Theory?

    I first look for gaps in the main melody.

    If the lead plays continuously, adding another busy melody usually creates clutter. Instead, I let the counter melody answer the main phrase during its quieter moments.

    I also place it in a different register or choose a contrasting instrument so both melodies remain distinct.

    A counter melody may only need a few notes. Its job is to support the hook, not compete with it.

    What Is the Easiest Melody Exercise for Beginners?

    What Is the Easiest Melody Exercise for Beginners?

    When I practice how to make melodies without music theory, I create a four-bar loop and limit myself to roughly five notes.

    I begin with one repeated note and create the rhythm. Then I change selected pitches, duplicate the strongest phrase, modify the second or fourth bar, and remove notes that do not improve the idea. I also pay attention to beat intro length, because the amount of time before the full melody enters can affect how naturally the idea develops and how much impact the main section has.

    Finally, I test different note lengths, octaves, rests, and sounds.

    This exercise teaches me to develop one strong musical idea instead of continuously adding new ones.

    FAQs About Writing Melodies as a Beginner

    1. Do I Need to Know Scales to Make Melodies?

    No. I can start with scale highlighting, the white-key method, and my ears. Learning scales later can make the process faster, but I do not need to master them before producing music.

    2. Should I Make Chords or Melody First?

    Both workflows work. I may start with chords or a bassline when I want a harmonic foundation, but humming the melody first often produces more spontaneous ideas.

    3. How Many Notes Should a Beginner Melody Have?

    I usually start with three to five different notes. Once the phrase works, I can introduce additional pitches when they serve a clear purpose.

    4. Why Do My Melodies Sound Boring?

    The issue may be rhythm, repetition, note length, or phrasing rather than the notes themselves. I first change the timing and introduce rests before adding more pitches.

    5. Can I Make Melodies Using Only a Mouse?

    Yes. I can create complete MIDI melodies directly in a piano roll. A MIDI keyboard can make experimentation faster, but it is not required.

    Final Thoughts

    I stopped struggling with melodies once I stopped treating every production session like a music theory exam.

    A simple bassline gives me direction. Scale highlighting limits wrong turns. Humming captures ideas before I overthink them. Rhythm gives the melody personality, while repetition and variation make it memorable.

    Music theory is still useful, and I can learn more of it over time. But I do not have to postpone creating music until I understand every technical term. My ears, DAW (A digital audio workstation), and a few reliable constraints are enough to start writing stronger melodies today.

  • How to Turn an 8 Bar Loop Into a Full Song That Feels Finished

    How to Turn an 8 Bar Loop Into a Full Song That Feels Finished

    Eight bars can capture the best part of a track, but they can also become a trap. The groove feels right, the melody is catchy, the drums hit the way I want, and every element seems to fit. Then the loop repeats, and the song stops moving.

    When I work on turning an 8-bar loop into a full song, I don’t start by forcing myself to write a completely new section. I use the loop as the strongest version of the idea and reshape it across the timeline. By changing which elements play, controlling energy, adding variation, and creating cleaner transitions, I can turn one short musical section into an arrangement that actually feels complete.

    How Do I Map an 8-Bar Loop Into a Full Song Structure?

    I start by placing markers across my DAW timeline before changing individual instruments. A reference track in a similar genre can help me identify where the intro ends, how long the verse runs, when the chorus or drop arrives, and where a breakdown or bridge might fit.

    For many pop, hip-hop, electronic, and beat-driven songs familiar to US listeners, an intro may run around 8 to 16 bars, while verses and choruses often stretch between 16 and 32 bars.

    I never treat those numbers as strict rules. Tempo, genre, vocals, and the overall feel of the track matter more. The purpose of markers is to create a visible roadmap so I am no longer staring at eight bars with no direction.

    Why Should I Paste the Full 8-Bar Loop Across the Timeline?

    Once I have my structure, I copy every element of the loop across the entire arrangement.

    That can include drums, bass, chords, leads, percussion, textures, and effects.

    At first, the song may look overly busy. That is intentional.

    Instead of asking myself what I need to add, I can now ask what I should remove. This simple change in thinking makes arrangement much easier because I already have material covering the full timeline.

    It also helps maintain a consistent musical identity rather than forcing me to write completely unrelated sections.

    How Does Subtractive Arrangement Turn a Loop Into a Song?

    How Does Subtractive Arrangement Turn a Loop Into a Song?

    Subtractive arrangement means creating contrast by deleting or muting elements from the full version of the loop.

    For the intro, I may remove the kick and heavy bass while keeping chords, ambience, or light percussion.

    During the verse, I can introduce the groove but remove the main lead to create space for vocals.

    When the chorus or drop arrives, I can restore the bass, full drum pattern, lead, and supporting elements so the section immediately feels larger.

    This creates a natural energy curve without requiring a completely new composition. The same approach also works alongside techniques for making drums sound less robotic, since subtle changes in drum layers, velocity, and pattern density can help each section feel more natural and distinct.

    When learning to turn an 8-bar loop into a full song, subtractive arrangement is especially useful because it allows the strongest version of the loop to become the high-energy section while simpler versions create contrast around it.

    How Often Should I Change an 8-Bar Loop?

    I usually introduce small changes every four to eight bars while saving larger changes for new sections.

    A second verse might use a different hi-hat pattern. I may remove one melody layer halfway through the verse, change the final bass note before the chorus, or move a synth part up an octave in the second drop.

    These changes keep the listener interested without destroying the main musical idea.

    Variation can come from rhythm, melody, instrumentation, dynamics, and processing. I also use automation frequently because it creates movement without requiring more sounds.

    Filter automation, volume changes, delay throws, reverb adjustments, and stereo-width changes can make the same loop feel noticeably different.

    How Can I Build More Intensity Without Adding More Instruments?

    I think about intensity in terms of density and frequency range.

    A section containing only chords and percussion naturally feels smaller than one containing drums, bass, lead, vocals, and effects.

    This means I do not always need new instruments to make a chorus or drop feel bigger.

    Sometimes removing bass from the breakdown and bringing it back later creates more impact than adding another synth.

    Saving certain sounds for important sections also gives those elements more meaning when they finally appear.

    How Do I Create Smooth Transitions Between Sections?

    How Do I Create Smooth Transitions Between Sections?

    Transitions prevent an arrangement from sounding like separate loops pasted next to each other.

    I often use reverse cymbals, risers, white-noise sweeps, drum fills, impacts, reverb tails, or short moments of silence before major section changes.

    Filter automation works well too. For example, I might gradually low-pass several instruments before a drop and then restore their full frequency range when the beat returns.

    I avoid using dramatic effects before every section. If every eight bars contains a huge riser and impact, the listener quickly stops noticing them.

    Small transitions work well for subtle changes, while stronger transition effects should usually support important moments.

    How Can a Reference Track Help Me Finish the Arrangement?

    Reference tracks are one of the most useful tools when I am unsure about song structure.

    I choose a professionally released song with a similar genre, tempo, or energy and study its arrangement.

    I pay attention to when the drums enter, when the bass disappears, how long the verse lasts, when transitions happen, and how the second chorus or drop differs from the first.

    I am not copying the melody or production. I am studying the arrangement workflow.

    Using a reference track also helps me understand whether my intro feels too long or whether I am waiting too long before reaching the main hook.

    What Mistakes Keep an 8-Bar Loop From Becoming a Full Track?

    What Mistakes Keep an 8-Bar Loop From Becoming a Full Track?

    One common mistake is adding another instrument every time the arrangement feels repetitive. More layers can make the mix crowded without fixing the real problem.

    Another mistake is allowing every instrument to play throughout the entire song. If everything stays at maximum intensity, the chorus has nowhere to grow.

    I also avoid changing every section too dramatically. An arrangement still needs repetition so the listener can recognize the hook, groove, and musical identity.

    Finally, I try not to spend too much time mixing before the song structure is finished. Perfecting EQ and compression on an instrument I later remove wastes time and interrupts the creative workflow.

    Frequently Asked Questions About 8-Bar Loop Arrangement

    1. How many bars should a finished song have?

    There is no universal number. Tempo, genre, vocals, and section lengths all affect the final arrangement. I focus more on pacing and energy than forcing the song into a specific bar count.

    2. Can I use the same chord progression throughout the song?

    Yes. The same progression can work across multiple sections when drums, melodies, dynamics, instrumentation, and vocals create enough contrast.

    3. Should I add a new melody for every section?

    Usually not. I prefer changing rhythm, octave, instrumentation, or processing first. A new counter melody can be effective later when I want a final chorus or drop to feel different.

    4. Should I arrange the drums or melody first?

    I prefer outlining the overall song structure first. Once the sections are clear, I decide which drum and melodic elements belong in each part.

    5. How do I know when my arrangement is finished?

    I listen from beginning to end without editing. If each section has a purpose, the transitions feel natural, and the energy continues moving, I consider the arrangement ready for detailed mixing.

    Final Thoughts

    Learning how to turn an 8-bar loop into a full song gets much easier when I treat my original loop as the fullest version of the idea rather than something I need to replace.

    I map the timeline first, duplicate the full stack, remove elements to create contrast, introduce small variations, automate movement, and use transitions to connect the major sections. These changes help me control the elements of music more intentionally, including rhythm, melody, harmony, dynamics, and texture.

    The loop gives me the musical identity. Arrangement gives that idea a beginning, progression, climax, and ending.

  • How Concert Photography Shapes Music Memories

    How Concert Photography Shapes Music Memories

    I can forget the order of songs at a concert and still remember one photograph perfectly: a singer reaching toward the crowd, my friend laughing beside me, or the color of the lights just before the encore. When I see that image again, other details return with it. That is how concert photography shapes music memories. A photograph records one moment, but the meaning we attach to it can keep changing long after the show ends.

    A Photograph Gives the Night a Place to Begin

    Live music moves quickly. The lights change, a song ends, and the crowd reacts before anyone has time to take it all in. A photograph lets us return to one part of that experience and use it as a starting point for remembering the rest.

    The image does not need to show the biggest moment of the performance. A picture of the empty stage before the band arrived might remind someone of the anticipation in the room.

    A shot of friends waiting outside the venue might bring back the journey there and the conversation afterward. What happens during live soundcheck can also become part of those memories, especially when fans arrive early enough to notice the musicians preparing the stage and testing the sound. The details around the music often make the night feel personal.

    Why Small Details Matter

    A ticket held against the stage, rain shining on an outdoor crowd, or a drummer’s expression can distinguish one show from another. Without those details, memories of several concerts may begin to blend together. A specific image gives the mind something to return to.

    Photographs Preserve the Feeling Between Performer and Crowd

    Photographs Preserve the Feeling Between Performer and Crowd

    Concert images are most affecting when they show a relationship. A singer looks toward the front row. Fans sing a chorus back. Two band members turn toward each other at the end of a song. These moments suggest what it felt like to share a room with the performers and everyone listening.

    That is why crowd photographs deserve as much attention as stage portraits. How DIY music venues support underground artists is also reflected in these images, especially when photographs capture smaller performances where artists and audiences share a more direct connection. A clear image of an artist tells us who performed.

    A clear image of an artist tells us who performed. A photograph that includes the audience can also show how the performance was received. Faces, gestures, and movement help tell the story of the night.

    A professional photographer may capture that exchange from a useful angle with careful timing. A fan’s photo may be blurry or partly blocked, yet still hold a strong memory because it shows the view from where that fan stood. Both images can matter for different reasons.

    The Photographer Helps Decide What We Remember

    Every photograph involves a choice. The photographer decides where to stand, when to press the shutter, and which images to keep. Those decisions shape the story people see later.

    A tight portrait can make a performance feel intimate. A wide shot can show the scale of the venue and the crowd. An image taken during a quiet song may reveal an artist’s concentration, while a photograph from the encore may capture movement and celebration. Neither frame tells the whole story on its own.

    Editing also matters. Selecting only dramatic stage shots can leave out the friendships, waiting, and shared reactions that made the concert memorable to fans. A varied collection gives a fuller sense of the evening: the venue before the show, the performance, the audience, and what happened as people left.

    Can Taking Photos Change the Experience?

    Can Taking Photos Change the Experience

    I think this is the question every concertgoer should consider. Photography can make us notice visual details we might otherwise miss. It can also pull our attention toward framing a shot when we would rather be listening.

    Research on photography and memory points in both directions. One study found that people remembered less about museum objects they were instructed to photograph than objects they simply observed. Other research found that taking photos improved memory for visual aspects of an experience while drawing attention away from auditory details. Those studies took place outside concerts, so they do not offer a rule for every show. They do suggest that what we pay attention to matters.

    There is a practical balance. Take a few photographs that mean something to you, then lower the camera and listen. The image can help you revisit the night; being present gives you more of the night to revisit.

    Sharing Photos Creates a Collective Story

    A concert photograph can carry memories beyond the person who took it. Friends may notice themselves in the background or remember a song when they see the stage lighting. Someone who attended the same show from another part of the venue may recognize a moment they had almost forgotten.

    Images can also preserve a record of smaller performances and local music scenes.

    Why small music venues matter to local culture becomes especially clear when photographs document the spaces where local artists perform, audiences gather, and communities build connections around music.

    A photograph of a crowded room may later show what a venue looked like, how an audience gathered, and which artists played there. As people share and discuss those images, they add names, stories, and context that a picture alone cannot provide.

    Frequently Asked Questions

    1. How concert photography shapes music memories for fans?

    It gives fans visual cues that can bring back people, places, and feelings associated with a show. The strongest cues are often personal details, such as who was there or what happened around a favorite song.

    2. Are professional concert photos more meaningful than fan photos?

    They serve different purposes. Professional images can show moments a fan could not see clearly. Fan photos often preserve the personal view from a particular seat or place in the crowd.

    3. Should I photograph the whole concert?

    You can, but consider whether filming or taking photos is changing how you experience the music. A few chosen images, paired with time spent watching and listening, may tell you more about the night later.

    What Stays With Me After the Show

    When I look back at a concert photo, I do not expect it to reproduce the sound or capture every minute. I value it because it helps me recall what surrounded that moment: who came with me, how the room responded, and why a song mattered then. To me, how concert photography shapes music memories depends on both the image and the experience I gave myself time to have.